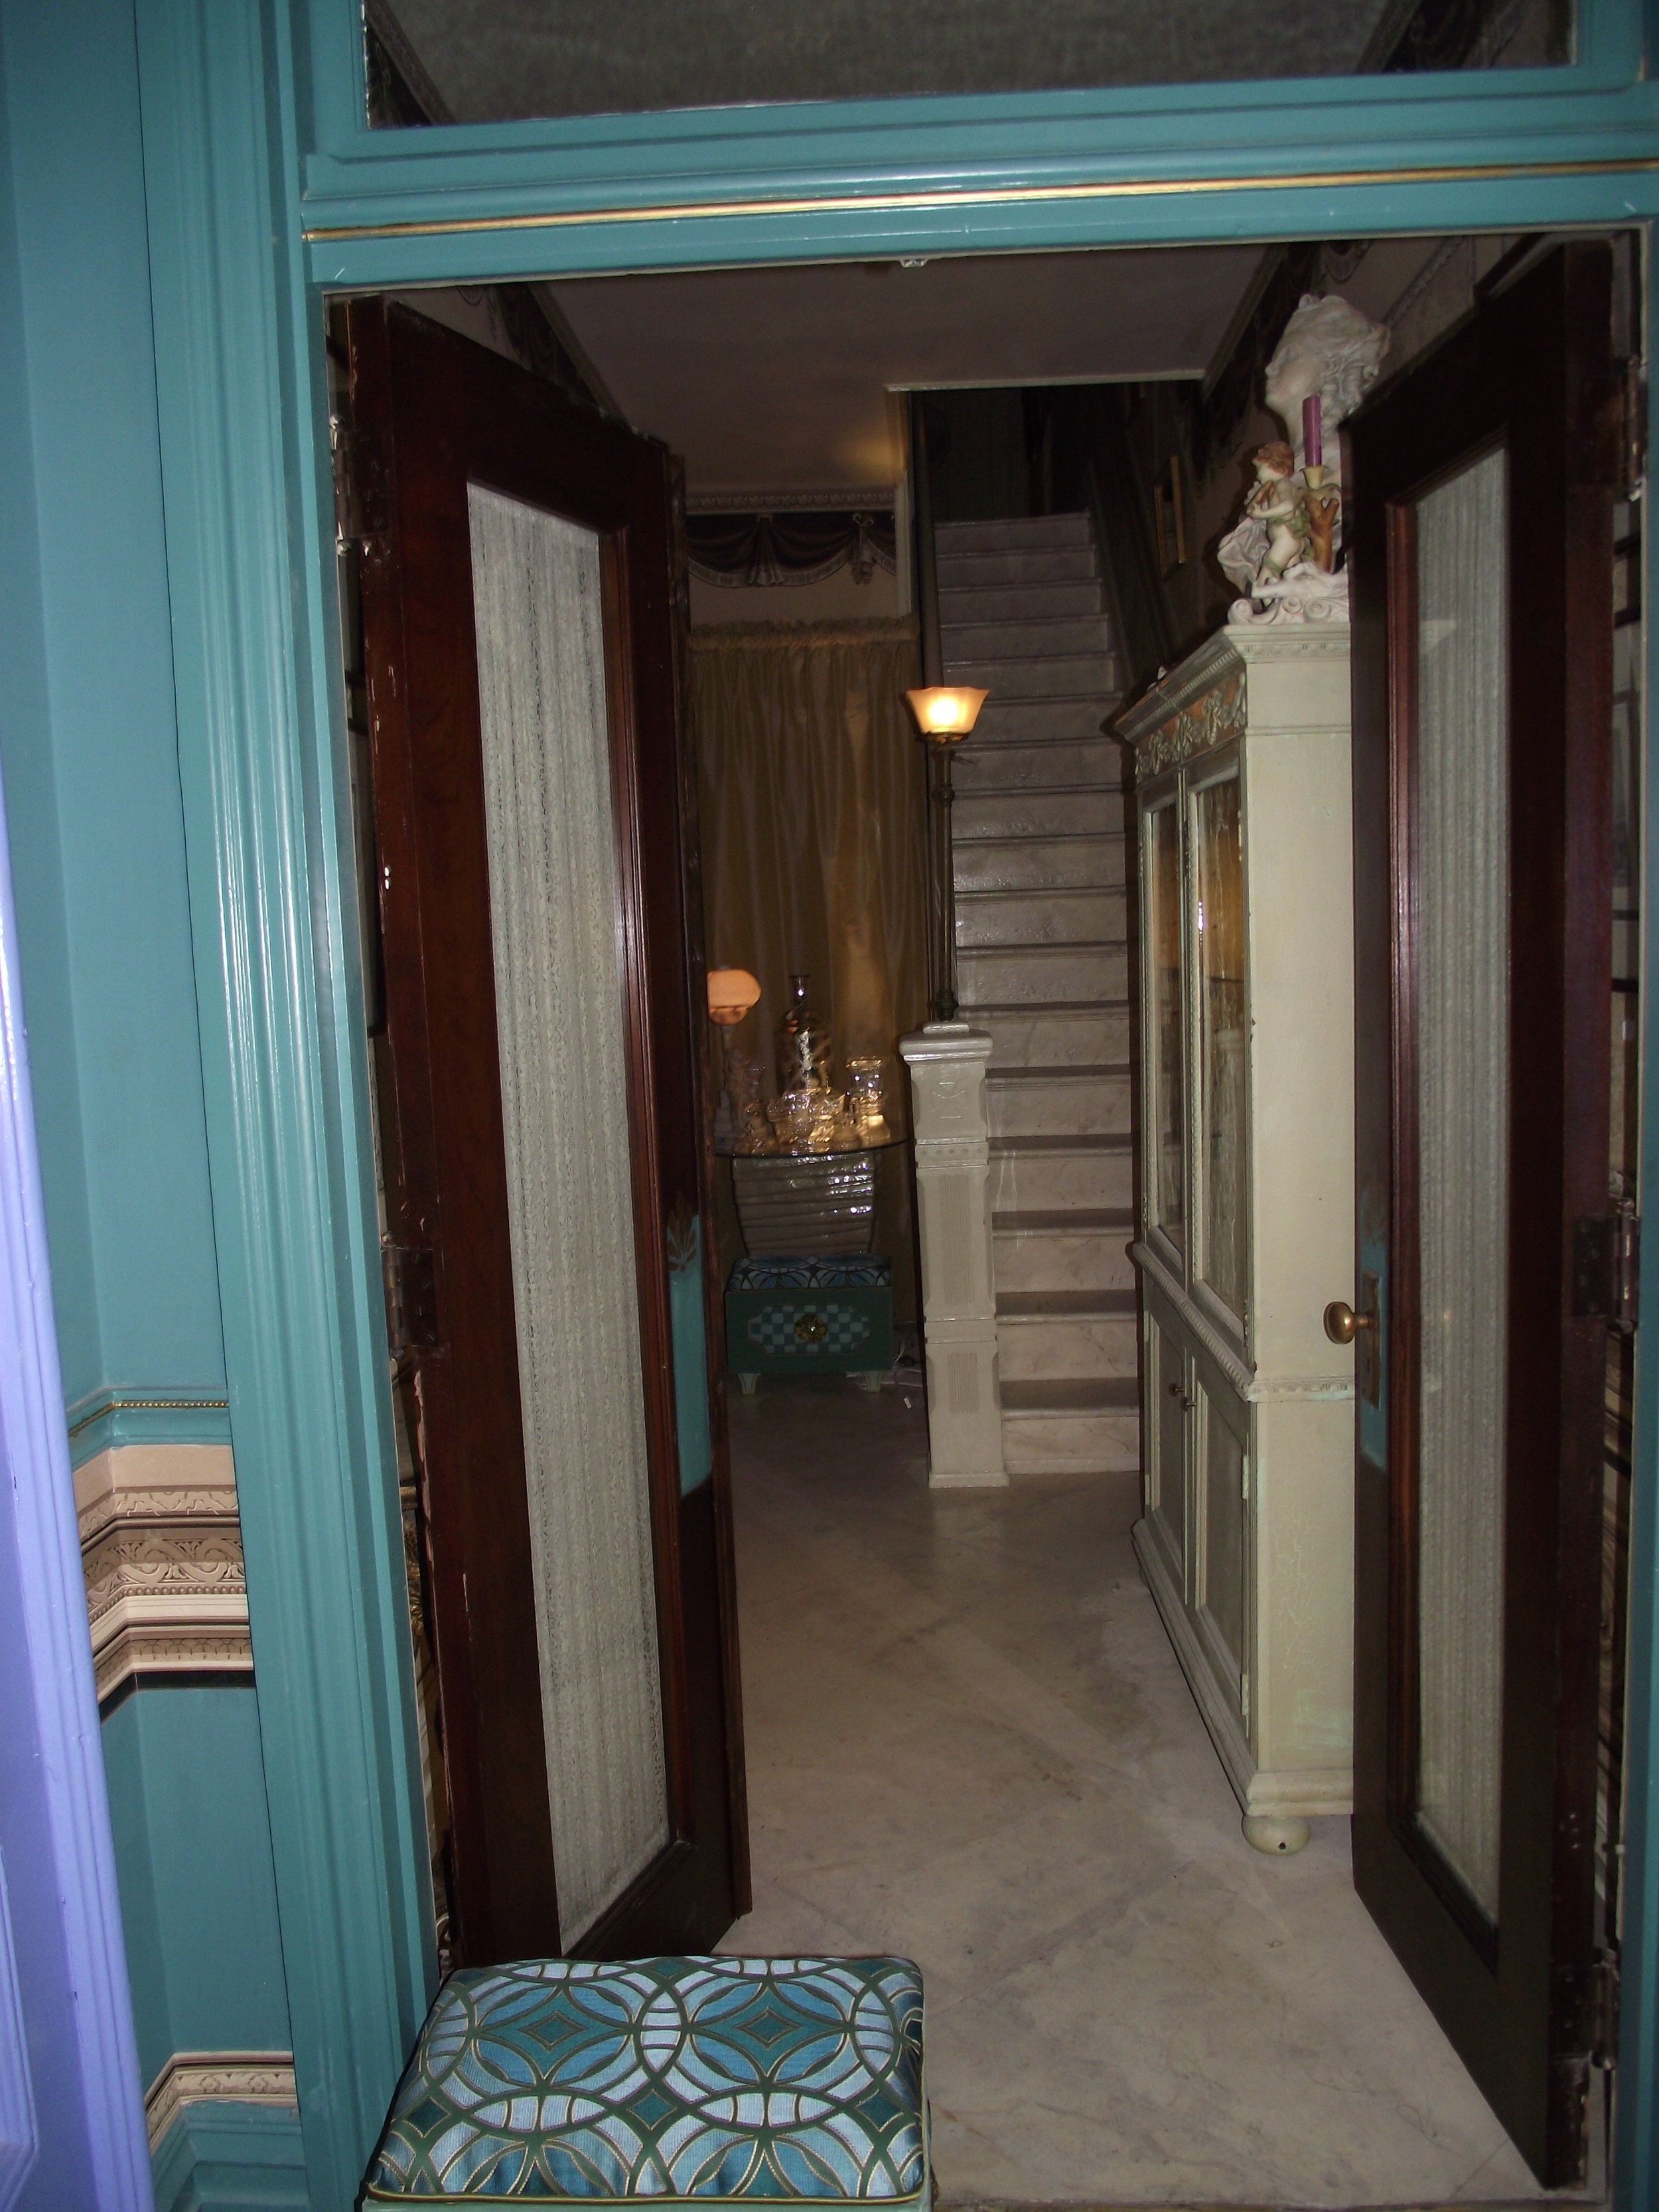
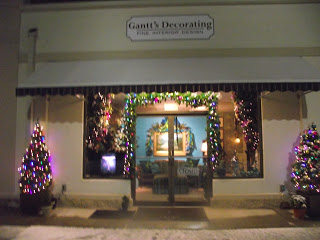
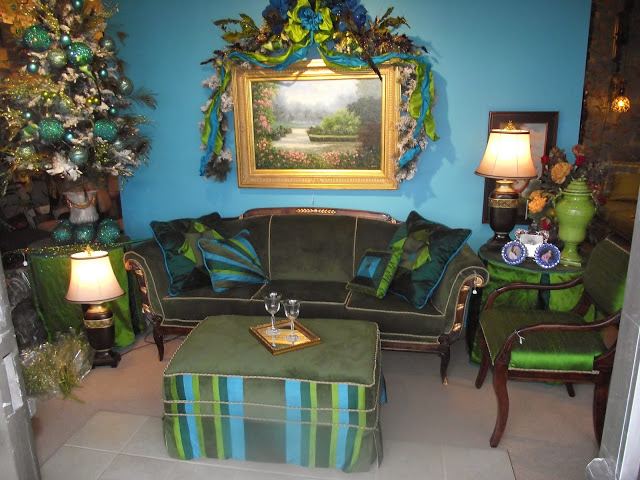
I am working hard tobe ready for a Holiday Ope House the first Saturday in December, Months ago I showed the finished foyer. Today I can sow the finished 1st and 2nd floor halls and stairwells completed. The living room is nearing completion.


Business has been Good but, no Open House This Year
While progress has been made my new location is not far enough along to be able to have my Open House this year. I will definitely be ready for 2017.

Before

While I still need some finishing touches like hand rails on the steps the bulk of the front is done.


The original foyer floor tile has been reset and grouted.

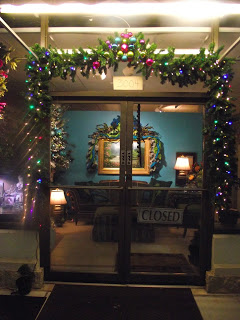
The foyer is finished. The antique gas light is surrounded by pleated plaid silk.

The foyer walls feature field and styles upholstered in plaid silk.
Unfortunately the tour stops here. Next year I hope to have the stairs,halls,living and dining rooms ready to welcome you for a Holiday Open House that ill feature all Christmas decorations at 70% off. Please remember I am still working by appointment and can help you or your friends with custom draperies and interior design just s I always have.
Happy Holidays
Bill Gantt
PILL BOX/ORGANIZER, A new original design from GANTT DESIGN STUDIO

PILL BOX/ORGANIZER, a nex original design from GANTT DESIGN STUDIO
Read moreBack and ready for business!!!
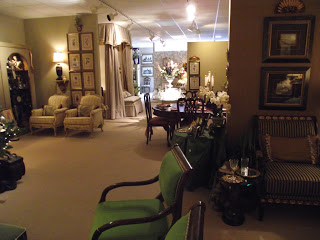
While the rest of the house is far from ready I have my sample rooms a and SEWING ROOM set up and am working on jobs now!!!

Installed my first valance made since the move today. Customer was delighted.
Gantt's is Moving On
After 27 years of providing full service design based in a retail studio I am downsizing. I will be setting up in a 3 story house that I have owned for years as a rental property.


Good By Lemoyne <br>
<br>
<br>
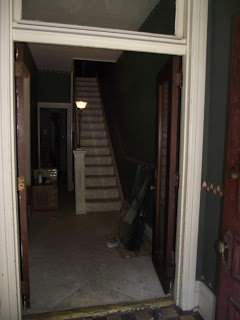
At 7:00 PM last night the old space was finally empty, cleaned and locked up.<br>

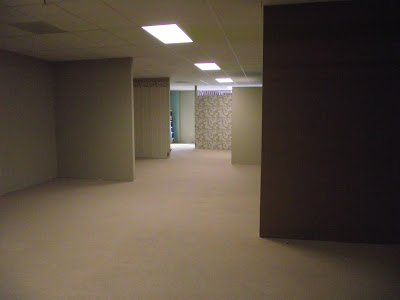
Hello to the new Sylvan Terrace home base for Gantt's Decorating
As you can see it it needs a bit of work.<br>


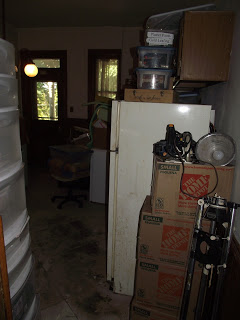

Maybe a little paint and wallpaper>br>
And maybe I'll live long enough to complete it. lol
I will begin today to carve out my workroom so that I can start making drapes, valances and comforters.
Eventually I will have a small show space in the living room but from now on my business will be by appointment only.
Check out my shop on 1st dibs which will be my primary retail .
Any item you see there will be reduced by 35 to 50% for my clients.
I look forward to continuing to serve my existing clients as well as developing new relationships in the future.
You can still reach me by calling ...561-8166<br>
Bill Gantt
How to Upholster Walls with Fabric
This Master Bedroom was designed around a fabric my client found. It was a large floral woven pattern floral fabric. It would not have been my first choice but as always it was my job to build a beautiful room around it. The fabric had great colors so I began looking for fabrics , papers and trim to compliment it.
On a visit with my clients we were looking at both fabric and wallpaper samples. None of the wallpaper samples were exciting. <br>

My client noticed a fabric and commented it was a shame the fabric couldn't be put on the walls.The fabric was a beautiful woven stripe. I said that fabric can be installed like wallpaper and that we would use it for that purpose. I also lived to regret my next comment. Having been a professionally trained paperhanger many years back I had hung fabric on walls and said, "If we cannot find someone to hang it I will do it myself."
I quoted the job. Quote accepted I placed orders and contcted two paperhangers. They were both given fabric samples to test. One said it should be paperbacked. The other said he couldn't do it. I tried a sample on the wall at the shop and thought I could hang it. Long story short. I couldn't./
So now I have walls and I have fabric. I suggested to my client that I can attach it to the walls as if they are upholstered.
They agreed.
This was not the first I had upholsterd a wall. I also did a music room with upholstery to soften the sounds.<br>
Step 1
Measure all walls and do a set of elevation drawings showing all windows, doors ect.
On the drawings show ceiling height
space from corner to window or door,width of the window and the space above and below the window. Show the total width of the wall.
It is good to draw the outline of the room as if looking down at it, showing the shape of the room.
Label every flat space or wall in the room and mark it with a letter or number.
Be sure you have an accurate elevation drawing for each and label it to correspond with the space it represents on the outline drawing.
Step 2
Using your ACCURATE drawings determine how much fabric you need. Most fabrics are 54" wide. Determine where you want the seams of the fabric to fall and mark them on your outline drawing.
I like to plan to not have a seam on a focal area of a wall. For example above the bed I centered a 54" width over the headboard and worked out toward the ends of the walls.
If the fabric is plain or a stripe you can plan to put a seam at the edge of each window. This allows you to save fabric by sewing a short piece above the window and another short piece below the window.<br>
These two examples show the Room Outline drawing and the A Wall or bed wall elevation drawing. I neglected to put measurements on it. It should include as I said before :
Ceiling to floor
Top of window to ceiling
Bottom of window to floor
Space between windows
Space outside edge of window to corner on both sides.
The Green lines on the elevstion show where wood strips need to be attached to the walls.<br>
Step 3
Total the measurements of the room where wooden strips need to be attached. You can use furring strips or lath strips. Both seemed to get a little expensive for me so I bought 2x10" wood and cut it down to strips 1/2" x 1 1/2" wide. I used a miter box, on site to cut them to the lengths I needed.
Step 4
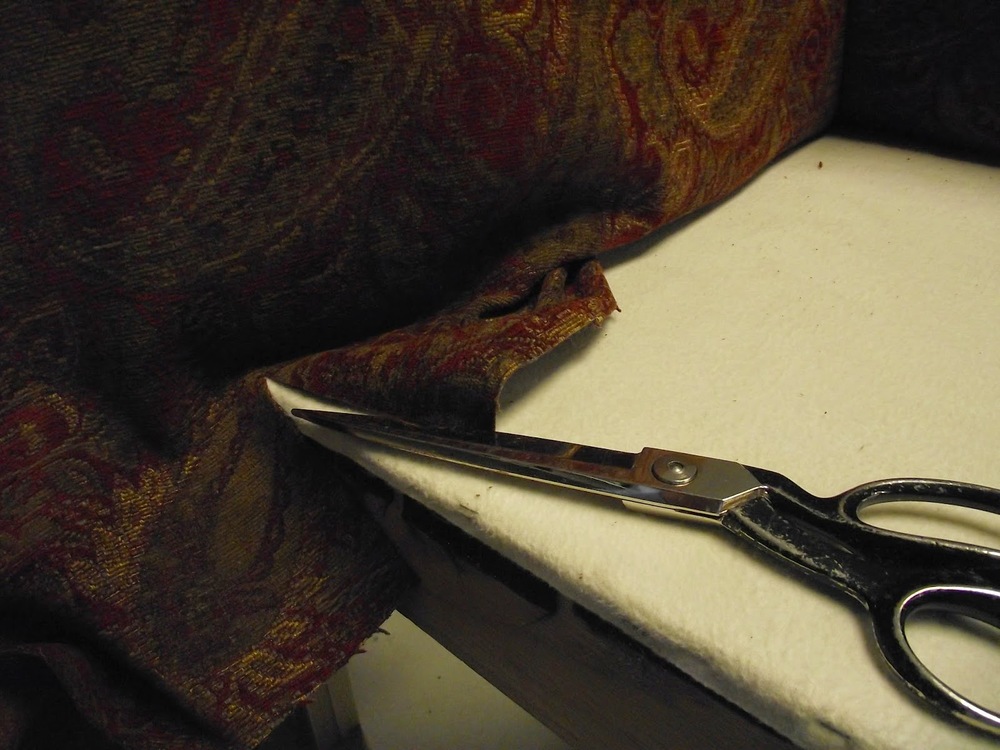
Using the measurements from your drawings cut the fabric to the length you need plus 4". This will give you 2" of trim top and bottom.
Using your elevation drawings and measurements cut the fabric for the first wall.
I started with the most important wall. The one with two windows and where the bed will go. Because I didn't want a seam down the middle of the wall I started in the middle and cut one full length( floor to ceiling +4". Then following my elevation plan cut a strip of fabric full length again. From that strip I cut a strip wide enough to reach from the left side of the full width to the edge of the window+ 1" (1/2" seam allowance for each side)
I then cut another strip the same width for the other side of the full panel. Each strip was sewn with a small stitch to each side fo the 54"width.
Next cut a piece the width of the window plus 1" (1/2" seam allowance on each side) and 4" longer than the distance from the ceiling to the top of the window.
Always mark the top of each piece as you cut it. make sure to keep the top edges of the fabric aligned as you sew. You must use a very small stitch so seams not only hold but so that when you trim the fabric at seams, the seams don't unravel.
Repeat this process for the area below the window. Attach the pieces on the left side of the piece and do the same on the right side of the piece.
Cut your last strip the width of the space from the left edge of the window to the corner plus about 4". You need to allow extra to help in attaching the fabric in the corner. Stitch that strip to the left edge of the top and bottom piece. Besure to align the top edge of the "top" strip and sew from the top toward the middle. Align the bottom edges of the bottom strip sand thelong strip and again sew toward the middle.
Repeat the process to go around the right hand window.
Fold this wall of fabric and mark the back clearly in several places with the letter corresponding with the wall in your elevation drawing.
Stitch together or cut as necessary the fabric for each elevation and clearly mark the back in several places with the corresponding letter.<br>
 Step 5. If you are truly upholstering the walls use 1" polyester fiber furniture batting. It comes in a roll about 70" wide. The furniture batting is much more stable and dense than quilting batting and less likely to pull loose from the wall. The last thing you want when the job is done is to have the batt pull loose from the wall under your fabric.
While you can glue it to the wall if you decide to go back to painted or papered walls it will make a disaster of your wall surfaces.
I prefer to staple it. Besure your staple is deep enough to not pull out easily. Start at the top and staple the batting to but against the fabric staple strip. Do not staple it to the strip this will cause an un sightlylumpy effect when the fabric is stapled. Supporting the weight with your free hand, staple it about 6" appart accross the top. Then coming down spot staple it in the midsections. Use enough staples so that it is evenly attached to the wall. When you are confident it is smooth and firmly attached trim the bottom to but against the bottom nailing strip. The batting will be thicker than the staple strips which will give your walls a soft padded look when the fabric is stretched over the batting.<br>

Step 6
Make Miles of double welt.
You can make your double welt out of the same fabric as the walls or out of a contrasting fabric.
Cut the fabric on the bias in 3" wide strips to cover 1/4" furniture type cording.
Cover the first cord as you would normally, with 1/2" of selvage beyond the seam.
Lay the next cord to the right of the covered cord on top of the 1/2" selvedge.
Holding both cords together roll them over encasing the second cord with the wider selvedge and exposing the stitch from encasing the first cord.
Change the zipper foot to the regular straight stitch foot and carefully stitch on top of the first stitch to encase the second cord. Remember as you stitch to keep the fabric snug around the second cord. The double welt is done because a normal 1/4" cord would not be thick enough to cover the edges. While using a larger cord might cover it would also protrude further from the wall and be more likely to get caught on something and pulled loose.
<br>
When all the double welt is sewn you must trim the selvedge leaving no more than 1/4"beyond the middle seam. Be careful not to get so close to the seam as to cause it to come loose. To save time I pinned the cord to my table, instead of cutting the selvedge I used my shears to "shave" it off in 3' sections.<BR>

Referring to your drawings and reference numbers find the fabric planned for the first wall.
Starting at the top of the corner staple the fabric to the wooden strip. Allow about 2" of the fabric to lap around the corner.
Be careful to keep your staples as tight to the corner as possible and to maintain the 2" selvedge consistently. Staple the fabric every 3 or 4 inches top to bottom.<br>
Return to the top of the fabric and turn 1/2" selvedge under as you staple as close to the ceiling as possible. Be sure the fabric is pulled taunt as you staple.
Staple until you reach the first seam. Measure from that seam to the corner. Now go to the bottom strip. Measure the same distance and mark the wooden strip. Pull the fabric taunt across the bottom and down from the top and tack the seam at the measured mark.
Now go back to the corner and staple the bottom of the fabric every 3 or 4" keeping the fabric taunt top to bottom as you go. Staple as close to the top of the baseboard as possible without missing your wooden strip. Let the selvedge hang over the baseboard until all fabric is installed.
You may well find that although the fabric is attached the same distance from the corner top and bottom that the seam is not straight and belly's back in the middle.
When you get to the next vertical strip on the wall you will stretch the fabric to correct the seam so that it runs straight top to bottom.<br>
 >br>
>br>
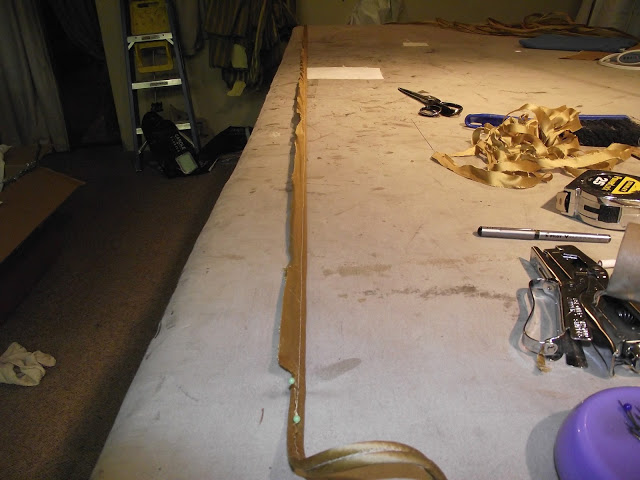
Above you can see the fabric has been stapled in the corner, across the ceiling top and the top of the door. It is being stretched taunt and stapled around the the edge of the mantle. As you approach sharp angles it is necessary to pull the fabric into corners and cut relief cuts on an angle to allow the fabric to be attached tight and smoothly.
Do not trim any selvages until all fabric in the room is attached and looks good. It is possible to carefully pull out staples and make adjustments as you go.<br>
 CORNERS
When you get to the first corner pull the fabric taunt and staple into the wood keeping the same amount of selvedge (around 4" all the way ceiling to floor.
Cut the selvedge down to about 2"
To start the next wall align the next fabric pattern with the strip just attached.
Starting at the top and working down surface staple the fabric about every 3" until reaching the bottom. Leave the selvedge until later.
Follow the same procedure stretching and stapling the fabric to strips.
When all the fabric is stapled in place use a single edge razor blade to trim off excess selvedge.
In corners to cut the edge down to 1/4" be especially careful not to cut through and damage the good fabric.
At baseboards and around windows, doors, mantels etc trim to the edge of the wood work.
FINISH WITH DOUBLE WELT.
With stapler, straight pins and "tacky" glue at hand start the double welt in a top corner. Staple on the seam and 1/4" down from the ceiling. This will hold the welt in place while you glue the rest. Glue about 24" of the back of the double welt with tacky glue. Be careful not to get the glue on the fabric surface. Put the glued cord in place and pin at the end of the glued portion. Glue another 24" and continue until at the bottom.
When you reach the bottom put a staple on the seam of the double welt to hold in place. Bend welt around corner and staple again. Continue gluing procedure as before. Welt each wall separately. When you reach the starting point glue the welt and fit it into the 1/4" space left on the double welt when you started. The starting point welt should but tightly against the welt you are gluing. When you are satisfied with the joining use a new razor blade to cut the finish welt. and pin in place.
OUTLETS AND LIGHT SWITCHES
All covers should be removed before starting. After fabric is stretched and stapled be very careful to find the switches and outlets. Carefully use a fresh sharp blade to cut a small opening near the middle of the outlet or switch. You can use needle nose pliers to pull the fabric out from the receptacle. Trim the fabric to allow the surface to be exposed. Cut smaller rather than large. When you release the fabric from the pliers it will pull back some. You may cover the outlet with the fabric or paint it the background color and screw it in place.
When gluing the double welt be sure to cover staples. Any staples that are too far into the wall surface to cover should be re-stapled first closer to the edge and then removed.
SIT BACK AND ADMIRE YOUR LUXURIOUS FINISHED ROOM.


<BR>
I hope you have found this to be helpful. I am happy to answer any questions you may have.
Bill Gantt
On a visit with my clients we were looking at both fabric and wallpaper samples. None of the wallpaper samples were exciting. <br>
My client noticed a fabric and commented it was a shame the fabric couldn't be put on the walls.The fabric was a beautiful woven stripe. I said that fabric can be installed like wallpaper and that we would use it for that purpose. I also lived to regret my next comment. Having been a professionally trained paperhanger many years back I had hung fabric on walls and said, "If we cannot find someone to hang it I will do it myself."
I quoted the job. Quote accepted I placed orders and contcted two paperhangers. They were both given fabric samples to test. One said it should be paperbacked. The other said he couldn't do it. I tried a sample on the wall at the shop and thought I could hang it. Long story short. I couldn't./
So now I have walls and I have fabric. I suggested to my client that I can attach it to the walls as if they are upholstered.
They agreed.
This was not the first I had upholsterd a wall. I also did a music room with upholstery to soften the sounds.<br>
 |
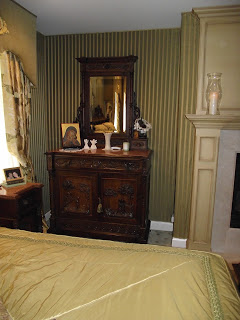
| Before Picture of Room<br> |
Measure all walls and do a set of elevation drawings showing all windows, doors ect.
On the drawings show ceiling height
space from corner to window or door,width of the window and the space above and below the window. Show the total width of the wall.
It is good to draw the outline of the room as if looking down at it, showing the shape of the room.
Label every flat space or wall in the room and mark it with a letter or number.
Be sure you have an accurate elevation drawing for each and label it to correspond with the space it represents on the outline drawing.
Step 2
Using your ACCURATE drawings determine how much fabric you need. Most fabrics are 54" wide. Determine where you want the seams of the fabric to fall and mark them on your outline drawing.
I like to plan to not have a seam on a focal area of a wall. For example above the bed I centered a 54" width over the headboard and worked out toward the ends of the walls.
If the fabric is plain or a stripe you can plan to put a seam at the edge of each window. This allows you to save fabric by sewing a short piece above the window and another short piece below the window.<br>
 |
| Outline Drawing of the Shape of the room with door window and wall measurements shown. Also reference letters to elevation drawings for each wall<br> |
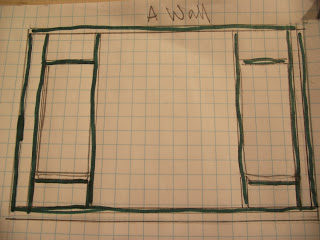 |
| Elevation of Bed Wall. Green showing where strips are attached <br> |
Ceiling to floor
Top of window to ceiling
Bottom of window to floor
Space between windows
Space outside edge of window to corner on both sides.
The Green lines on the elevstion show where wood strips need to be attached to the walls.<br>
Step 3
Total the measurements of the room where wooden strips need to be attached. You can use furring strips or lath strips. Both seemed to get a little expensive for me so I bought 2x10" wood and cut it down to strips 1/2" x 1 1/2" wide. I used a miter box, on site to cut them to the lengths I needed.
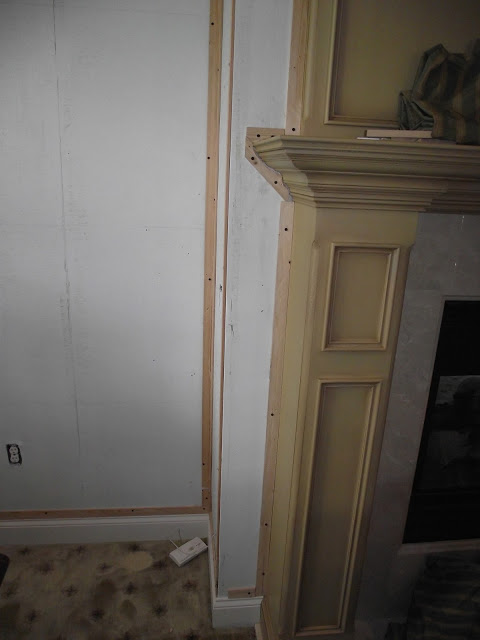 |
| Wood strips attached with drywall screws |
Using the measurements from your drawings cut the fabric to the length you need plus 4". This will give you 2" of trim top and bottom.
Using your elevation drawings and measurements cut the fabric for the first wall.
I started with the most important wall. The one with two windows and where the bed will go. Because I didn't want a seam down the middle of the wall I started in the middle and cut one full length( floor to ceiling +4". Then following my elevation plan cut a strip of fabric full length again. From that strip I cut a strip wide enough to reach from the left side of the full width to the edge of the window+ 1" (1/2" seam allowance for each side)
I then cut another strip the same width for the other side of the full panel. Each strip was sewn with a small stitch to each side fo the 54"width.
Next cut a piece the width of the window plus 1" (1/2" seam allowance on each side) and 4" longer than the distance from the ceiling to the top of the window.
Always mark the top of each piece as you cut it. make sure to keep the top edges of the fabric aligned as you sew. You must use a very small stitch so seams not only hold but so that when you trim the fabric at seams, the seams don't unravel.
Repeat this process for the area below the window. Attach the pieces on the left side of the piece and do the same on the right side of the piece.
Cut your last strip the width of the space from the left edge of the window to the corner plus about 4". You need to allow extra to help in attaching the fabric in the corner. Stitch that strip to the left edge of the top and bottom piece. Besure to align the top edge of the "top" strip and sew from the top toward the middle. Align the bottom edges of the bottom strip sand thelong strip and again sew toward the middle.
Repeat the process to go around the right hand window.
Fold this wall of fabric and mark the back clearly in several places with the letter corresponding with the wall in your elevation drawing.
Stitch together or cut as necessary the fabric for each elevation and clearly mark the back in several places with the corresponding letter.<br>
While you can glue it to the wall if you decide to go back to painted or papered walls it will make a disaster of your wall surfaces.
I prefer to staple it. Besure your staple is deep enough to not pull out easily. Start at the top and staple the batting to but against the fabric staple strip. Do not staple it to the strip this will cause an un sightlylumpy effect when the fabric is stapled. Supporting the weight with your free hand, staple it about 6" appart accross the top. Then coming down spot staple it in the midsections. Use enough staples so that it is evenly attached to the wall. When you are confident it is smooth and firmly attached trim the bottom to but against the bottom nailing strip. The batting will be thicker than the staple strips which will give your walls a soft padded look when the fabric is stretched over the batting.<br>
Step 6
Make Miles of double welt.
You can make your double welt out of the same fabric as the walls or out of a contrasting fabric.
Cut the fabric on the bias in 3" wide strips to cover 1/4" furniture type cording.
Cover the first cord as you would normally, with 1/2" of selvage beyond the seam.
Lay the next cord to the right of the covered cord on top of the 1/2" selvedge.
Holding both cords together roll them over encasing the second cord with the wider selvedge and exposing the stitch from encasing the first cord.
Change the zipper foot to the regular straight stitch foot and carefully stitch on top of the first stitch to encase the second cord. Remember as you stitch to keep the fabric snug around the second cord. The double welt is done because a normal 1/4" cord would not be thick enough to cover the edges. While using a larger cord might cover it would also protrude further from the wall and be more likely to get caught on something and pulled loose.
<br>
When all the double welt is sewn you must trim the selvedge leaving no more than 1/4"beyond the middle seam. Be careful not to get so close to the seam as to cause it to come loose. To save time I pinned the cord to my table, instead of cutting the selvedge I used my shears to "shave" it off in 3' sections.<BR>
Referring to your drawings and reference numbers find the fabric planned for the first wall.
Starting at the top of the corner staple the fabric to the wooden strip. Allow about 2" of the fabric to lap around the corner.
Be careful to keep your staples as tight to the corner as possible and to maintain the 2" selvedge consistently. Staple the fabric every 3 or 4 inches top to bottom.<br>
Return to the top of the fabric and turn 1/2" selvedge under as you staple as close to the ceiling as possible. Be sure the fabric is pulled taunt as you staple.
Staple until you reach the first seam. Measure from that seam to the corner. Now go to the bottom strip. Measure the same distance and mark the wooden strip. Pull the fabric taunt across the bottom and down from the top and tack the seam at the measured mark.
Now go back to the corner and staple the bottom of the fabric every 3 or 4" keeping the fabric taunt top to bottom as you go. Staple as close to the top of the baseboard as possible without missing your wooden strip. Let the selvedge hang over the baseboard until all fabric is installed.
You may well find that although the fabric is attached the same distance from the corner top and bottom that the seam is not straight and belly's back in the middle.
When you get to the next vertical strip on the wall you will stretch the fabric to correct the seam so that it runs straight top to bottom.<br>
Above you can see the fabric has been stapled in the corner, across the ceiling top and the top of the door. It is being stretched taunt and stapled around the the edge of the mantle. As you approach sharp angles it is necessary to pull the fabric into corners and cut relief cuts on an angle to allow the fabric to be attached tight and smoothly.
When you get to the first corner pull the fabric taunt and staple into the wood keeping the same amount of selvedge (around 4" all the way ceiling to floor.
Cut the selvedge down to about 2"
To start the next wall align the next fabric pattern with the strip just attached.
Starting at the top and working down surface staple the fabric about every 3" until reaching the bottom. Leave the selvedge until later.
Follow the same procedure stretching and stapling the fabric to strips.
When all the fabric is stapled in place use a single edge razor blade to trim off excess selvedge.
In corners to cut the edge down to 1/4" be especially careful not to cut through and damage the good fabric.
At baseboards and around windows, doors, mantels etc trim to the edge of the wood work.
FINISH WITH DOUBLE WELT.
With stapler, straight pins and "tacky" glue at hand start the double welt in a top corner. Staple on the seam and 1/4" down from the ceiling. This will hold the welt in place while you glue the rest. Glue about 24" of the back of the double welt with tacky glue. Be careful not to get the glue on the fabric surface. Put the glued cord in place and pin at the end of the glued portion. Glue another 24" and continue until at the bottom.
When you reach the bottom put a staple on the seam of the double welt to hold in place. Bend welt around corner and staple again. Continue gluing procedure as before. Welt each wall separately. When you reach the starting point glue the welt and fit it into the 1/4" space left on the double welt when you started. The starting point welt should but tightly against the welt you are gluing. When you are satisfied with the joining use a new razor blade to cut the finish welt. and pin in place.
OUTLETS AND LIGHT SWITCHES
All covers should be removed before starting. After fabric is stretched and stapled be very careful to find the switches and outlets. Carefully use a fresh sharp blade to cut a small opening near the middle of the outlet or switch. You can use needle nose pliers to pull the fabric out from the receptacle. Trim the fabric to allow the surface to be exposed. Cut smaller rather than large. When you release the fabric from the pliers it will pull back some. You may cover the outlet with the fabric or paint it the background color and screw it in place.
When gluing the double welt be sure to cover staples. Any staples that are too far into the wall surface to cover should be re-stapled first closer to the edge and then removed.
SIT BACK AND ADMIRE YOUR LUXURIOUS FINISHED ROOM.
<BR>
I hope you have found this to be helpful. I am happy to answer any questions you may have.
Bill Gantt
How to Build a Pergola Style Upholstered Cornice
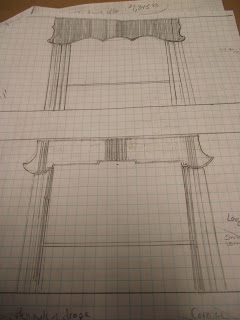
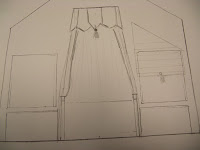
My client had a number of oriental style accents and need new window treatments. I suggested a pergola style cornice, showed her two sketches, she chose the one she liked best and I got started. <br>
She chose the bottom design which featured a stripe fabric in the center and on each end. The end stripes would then line up with the stripe trim on the standing
panels.<br>
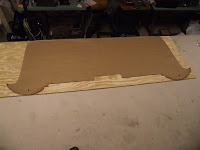
A paper pattern was drawn. Always remember to fold your pattern in half and trim again so both sides are the same. Sing a felt tipped pen the pattern was traced on to 1/2" plyboard.<br>
Since the window was wider than the 8 foot length
plyboard comes in, a piece had to be cut and spliced on one end. It was secured with a 4" piece of plyboard glued and screwed. The splice was used on the inside of the cornice so that it would not show.
A grid pattern was marked and cut out of the plyboard to lessen the weight but maintain stability.<br>
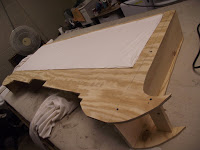
Side pieces were cut and aligned with the straight part of the cornice front, glued and screwed. The board forming the top of the cornice was attached to the face and end boards forming the cornice "box." <br>
Two small end pieces were cut to align with the face board and were attached to the end boards of the cornice box. A piece was attached to brace face board with the shaped end pieces.<br>
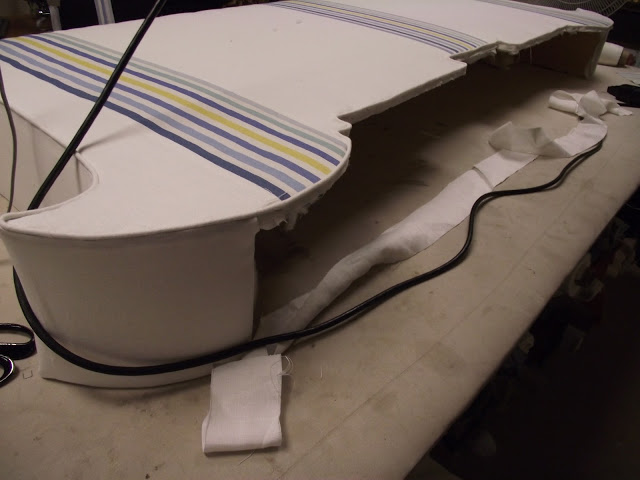
Here you see the final wooden frame of the cornice board.<br>
Black out lining is stapled over the geometric cut outs. This is important to prevent the cut outs from showing through to the face of the cornice.<br>
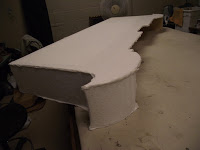
Next the entire board is covered in heavy flannel inner lining.
Note that the flannel is stretched and stapled to the underneath part of the rounded portion on each end.<br>
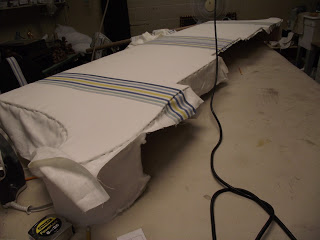
Next fiber batting was spot tacked on the entire cornice board.
The Stripe pattern was cut apart and and stitched in place with the white fabric.
The cover was then stretched and stapled over
The cornice board. *My earlier cornice blogs go into detail as to how to maneuver around corners and shapes.<br>
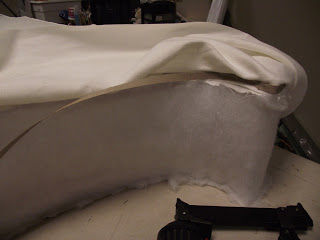
After the face fabric in stapled in place and trimmed, cut a piece of fabric a couple of inches wider than the depth of the cornice.
Lay it face down on the front of the cornice and staple the edge in place .
Then staple cardboard stripping over the edge of the fabric just attached. Be sure to align the top edge of the striping with the hard edge of the face of the cornice board.<br>
After the stripping is in place pull the fabric to the back and staple on the back.
Cut a 3" strip of fabric and repeat the process on the bottom edge of the front of the cornice board.
Line the inside with lining fabric.
Done.
Unfortunately the lighting in the house was so bad where it was installed I couldn't get a picture of the finished, installed window treatment. It looked exactly like the original sketch.
Bill Gantt
How to build a Half Tester Canopy INTERIOR DECORATOR INTERIOR DESIGNER

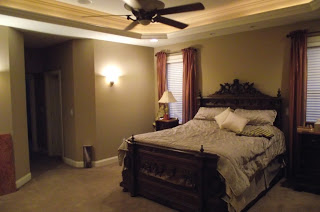
This Master Bedroom had a number of things going for it.
It had dramatic height and an unusual ceiling line.
The finish on the walls and ceiling and the furniture were as they are shown.
My job was to work with the "givens" and make the room beautiful
As it was the room was dark and somewhat gloomy.
I suggested a Canopy to play up the dramatic height.<br>
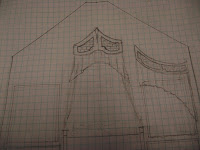
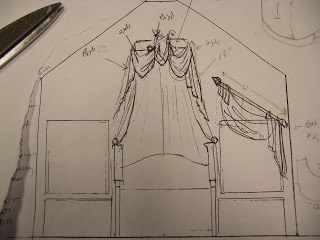
.Three original sketches were created as suggestions. My client chose the Neo Classic design.<br>
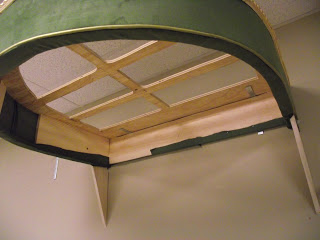
The canopy had to be mounted 11 feet high to give the room much needed drama and a focal point.
A pattern was drawn on paper, traced onto 3/4" plyboard and cut out. To cut down on weight a second pattern was marked on the plyboard and marked about 6" in from the edge.
Keeping in mind that I needed to screw the ceiling piece of the canopy on the top circle piece, a 4" strip running from front to back was planned. The others were to keep it stable.
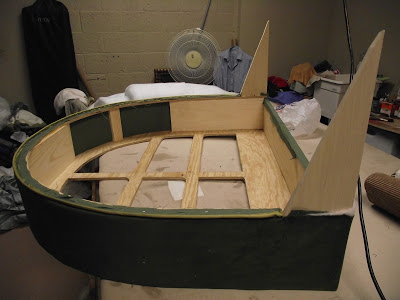
A second circle was cut with the same outer image as the first. This piece was cut down to be 2 1/2 to 3" wide.
1 X 8" wood was used to attach the two pieces together. Notice that the back and straight side pieces were kept as long as possible to add to stability. Also look closely and see the 1/4" space that was cut out of the back board to allow space for the angle irons needed to attach it to the wall. Because you can't be certain of the positioning of the studs I made the opening about 30"along the back. This would allow me to mount the angle irons to the studs, slide the canopy frame over the angle irons and then slide the frame left or right until it was centered on the wall. Even with all the cut outs to reduce weight it is still heavy enough that it should be attached to the studs and not with drywall anchors. The triangle shaped piece was integrated into the frame to help keep it flat on the wall and true.
Keeping in mind that there would be a "crossed arrow" attached to the front center a 1" X 8" piece was glued and screwed to the front center. Two other pieces were attached in the round part.
It is not necessary to fill the entire space of the circle part. Only just enough to make it stable and give you a place to screw in a hook if needed.<br>

Next use a strong fabric, canvas is best: Stretch it taunt as you staple it to bridge the space between the two main frame parts.
Once that is done a layer of furniture batting is added and the final fabric cover is stapled over it all. Be sure to pull the finish fabric around the top and around the bottom and staple it there not on the face of the canopy.<br>
<br>
Here you can get a good look at the frame and see where the 1" X 8" spacer pieces were put.
You can also see the final fabric has been attached along with a rope cord trim.<br>

In this picture a strip of finish fabric about 5" wide has been stapled face down to the frame.
Paper Strippiing has been stapled in place to hold a clean edge. When you strip the rounded part it is necessary to keep the outside edge smooth and let the striping crease as you go around.
With the stripping in place the strip is pulled tight completely around the bottom piece and stapled underneath where the staples will not be seen. This gives you a finished edge on the inside of the frame.<br>
Next a stip of fabric is cut about 10" wide. This fabric is laid face to face with the fabric covering the inside edge of the canopy frame. Stape this fabric on top of the edge you just finished. Staple it onto the the 5/8" thickness of the frame. Come back and staple a cardboard stripping even with the edge of the 5/8" thickness. Now pull the fabric over the stripping and into the frame. Staple the other edge onto the inside top of the frame. Be sure to staple about 1" in from the edge so the staples won't show when you install the "ceiling" panel..
Unfortunately I did not take pictures of how to make the inside "ceiling panel" which is screwed into place after the canopy is mounted on the wall. If you refer to my blog on how to make a unique wooden cornice board, you will see how to make the "ceiling" on a small scale. The way I work the fabric on the cornice insert pieces is how the ceiling panel is made.
For the "ceiling" panel a piece of luan is cut about 1/2" smaller that the dimentions of the inside top of the finished canopy. The fabric is applied as shown in the cornice blog.
When all this is done and the frame is mounted securely on the wall and the :"ceiling" panel iis installed it is time to plan the drapery.
A panel 2 1/2 times the width of the back of the canopy frame will need to be made to reach from the canopy to the floor or at least long enough to be hid behind the headboard. Hem the bottom and hem the top as you would a simple curtain with a 2 1/2" double fold hem. Leave a 1" header when you sew the rod pocket in the top. Since the back will not be seen iot is not necessary to line this piece.
The two tie back panels (one for each side) should be a full width of fabric(54") They should be lined in the same fabric as the back panel. When the two pieces are sewn up the back remember to leave enough open to cover the triangle shaped wall support in the frame.
Gather the tops of the panels to about 18 or 24" . Fold the tops down and sew the velcro 1" down from the top so the header will look the same as the back panel. This velcro will be used to attach the Lining of the panel to the inside of the frame and the outside part of the panel to the outside of the frame. This will ensure the triangle support part is covered.
Cut a piece of oval rod about 2" shorter than the inside measurement ot the back of the canopy frame.
Screw a cup hook in the "ceiling" panel and possibly through the laun into the frame. Gather the back panel fabric evenly on the rod and hook the ends with the cup hooks.
NOW the Neo Classic
To drape the outside of the canopy in the neo classic style I found a good size round finial intended to go on a wooden curtain pole. 4 holes the size of the dowels I used for the shaft of the arrows were drilled in the finial. The holes were drilled in a way to make it appear the arrows went through it.
4 12" lengths of dowel were cut. On two I attached a wooden arrow head made from a soft craft wood. The soft wood allowed me to cut some detail into the heads and feather ends. All four and the ball finial were sealed, painted red and gold leafed.
With the canopy frame attached to my workroom wall I draped and marked the silk to look like it was draped over the arrows. The swag panels were cut selflined and sewn together with velcro at the joining points. Velcro was glued and stapled to the back of the arrows to hold the swags in place,
The larger swag that ended next to the wall was velcroed to the canopy frame as were the jabots on each side.

In order to further play up the shape of the wall and to make the windows look larger and more in proportion to the wall. Larger poles and arrow heads were hung to follow the ceiling line. The swag and jabots were designed to hang on that angle and camouflage the lower corners of the windows.
Done
I hope this was helpful. If you have any questions I'll be happy to answer them.
Bill
Christmas Decorating with Beads
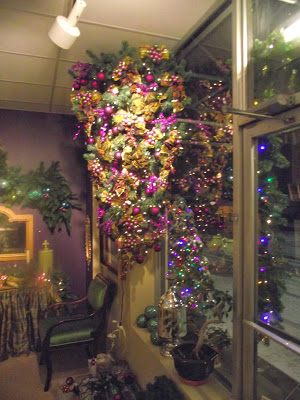
 |
| A different take on beads on this upside down tree |
 |
| Three strands of different sizes of beads hung together make a nice impact. |
Over the last 25 years I have experimented with different ways to use beads. I refuse to do Christmas without them. Beads are so versatile and when used in abundance provide a lot of sparkle.
They add a richness that is unparalleled.
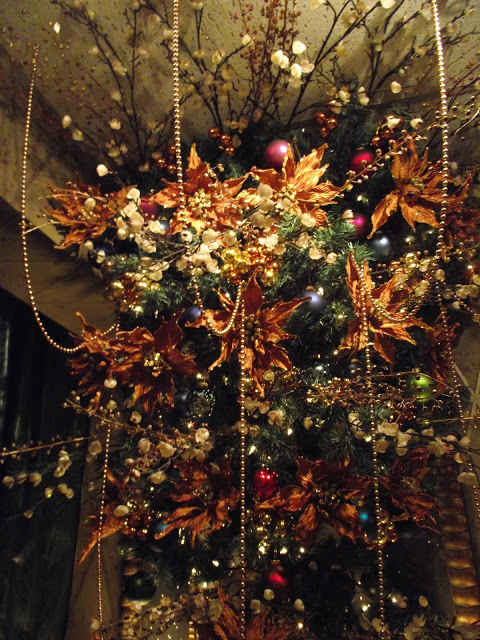
About 5 or 6 years ago I came up with an idea that I think is hard to top. Instead of using one anemic looking little strand, I like to use four or five of different colors and sizes and knot them like pearls every eight inches or so. The following video shows how to do it.

This is what knotting 3 sizes of gold and one copper beads look like on the the tree. Belissimo! I don't know if I spelled it right but I couldn't resist using it.
Other ways to use beads include: If you have skirted tables, pin them along the top edge of the table.
When your accessories are in place, randomly snake them around your table top. Use them in your Christmas center piece. Dribble them around the outside edge of your Dining Room Center piece.
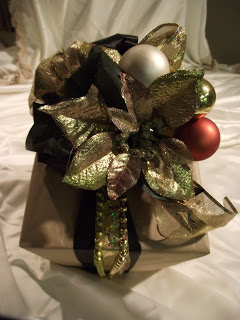
I often loop or swag them on the arms of chandeliers and hold them up with bows. I haven't done this. The idea just now came to me. Hot glue small beads around the edge of place mats! I incorporate them into gift wrap (see Gift wrap in black and gold-ganttsdecorating.com). The possibilities are limited only by your imagination.
 |
| A rare situation when just a few strands do the job |
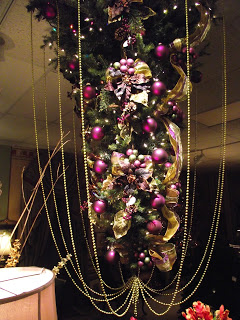 |
| Beads give a Bird Cage effect on this Upside down tree |

Another idea I came up with is a take off of the
knotting idea. Let m show it to you.
 |
| Beads cut successively shorter |
If you want your "knot and Swag" bead treatment to be perfect, you can hang two strings where the treatment is to go. One sting will go where the top strand will be and the other string will hang where the bottom strand will go. Measure both strings and cut one strand the length of the long one and one the length of the short one. Divide the difference in length between long and short
by the number of strands to be between the two. For example is you plan to use 6 strands total. There will be 4 strands between long and short. If the difference between long and short is 8", you will make the second longest 2" shorter than the longest and so on. Personally I like to work by site -fast and not so neat. I don't like math.
 |
| Wire beads together in the center |
 Next cut 24" lengths (longer if you use really large beads, or you can make the knot first and then cut the beads. Cut half as many beads as in the ones wired together, but one of each size used.
Find the center of these beads and put a strand of pearls knot in them. You will have a 6 to 8" loop in the bottom- a knot - and beads coming out the top.
The knotted piece will now have as many strands showing as the side (swag strands). Florist wire the knot in place. Florist wire the top beads together.

Attach the knotted piece in the center of the "swag" strands.
You don't want the two sides of the swag beads to get mixed
so it is a good idea to temporarily wire the "swag "beads together
a few inches from the end of the shortest one.
 |
| Knotted center is attached while "swag beads are kept separated. |
Greenery is not necessary. You can attach the center to a picture hook. The greenery shown is attached to a picture hook and the center is attached to the same hook.
Once the center is attached, take the temporary wire off one side only.
 |
| Swag effect takes shape |
Wire the ends of the swag beads together one at a time. Start with the shortest. Wire it . Then wire it to the next longest and so on until the ends of one side are connected. Pull that side up where you want it and wire it. Do the same on the other side.
Be sure both sides are hung at the same height.
I f you're like me and don't like to measure now is the time to adjust the lengths of strands to even them up. Do the same procedure, but hold the swag beads where you want them and wire them one by one making each a little longer than the last.
Visually do the same to the other side making them match .
DONE!
If you liked this blog, let me know. Please leave a comment.
For more how to blogs go to ganttsdecorating.com.
Holiday Open House is Dec. 1 & 2 Everything in the shop is 1/2 off!!!!
Christmas Decorating an Aqua and Chartreuse Dining Room

 |
| Dining Room before work started. |
 |
| A 24" wood circle is put on top of a 26" pedestal |
on the left. Because the tree was going into a tight corner, it needed to be put on a pedestal.
 |
| Tree is placed on pedestal |
 |
| Bluish cherry blossom branches added |
Next I added several pale blue cherry blossom branches.
This softened and expanded the lines of the tree.
 |
| Bright matte chartreuse balls added |
Matte chartreuse balls are hung symmetrically on the tree.
For a good looking tree, ornaments should never be hung randomly.
 |
| 4" wired cream ribbon is put back to back with the same ribbon in gold |
Next I put cream and gold 4" wired ribbon back to back, made a bow in the middle of it , attached the bow to the top of the tree and coiled the ribbon down both sides of the tree.
 |
| Blue damask balls, angels and beads finish the tree |
The skirted serving table is next to be done.
The top is cleared and work starts.

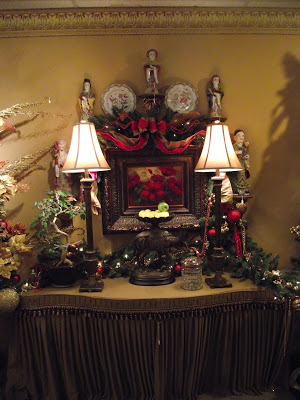
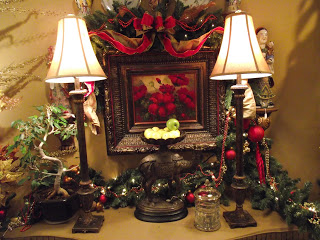
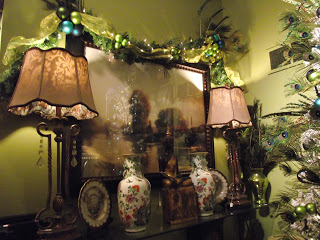
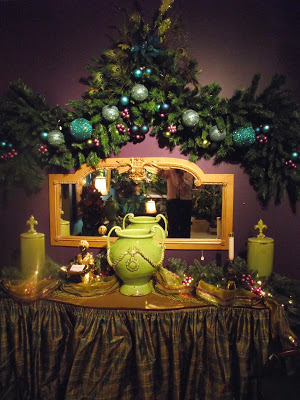
Two nails already in the wall on each side of the art work led me to make the bows and ribbon so that it looks like they are holding the roping up. The lamps were replaced with a pair of "antique mercury glass" electric hurricane lamps. The roping was decorated with chartreuse and blue damask balls. Artificial fruit adds more color.
I hope you enjoyed this one. Please leave a comment . Check out my other 19 blogs and check back. Right now I am posting about two a week. Please tell your friends.
Mark your calendar for my Holiday Open House Dec. 1 & 2
Because I will be moving to a smaller studio Everything in the shop will be 1/2 off---everything!!!
Bill Gantt
Christmas Decorating -No Trees
When you don't have room or don't want the bother of a Christmas tree there are ways to give your home a holiday feel. Here are some ideas.
INTERIOR DECORATOR INTERIOR DESIGNER
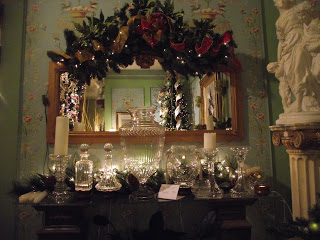
Collect all your crystal and cut glass into one spot.
I set the ones that will be stable on little round lights
(7 Watt bulbs bulbs-too hot could break the crystal)
that are intended for glass paper weights. Or just put some greens behind it with lots of white lights. The sparkle is magical!

As always I hope this was useful. For more ideas go to ganttsdecorating.com. Please tell your friends and keep checking back. Please leave a comment. I want to know what you think.
Bill Gantt
INTERIOR DECORATOR INTERIOR DESIGNER
Collect all your crystal and cut glass into one spot.
I set the ones that will be stable on little round lights
(7 Watt bulbs bulbs-too hot could break the crystal)
that are intended for glass paper weights. Or just put some greens behind it with lots of white lights. The sparkle is magical!
As always I hope this was useful. For more ideas go to ganttsdecorating.com. Please tell your friends and keep checking back. Please leave a comment. I want to know what you think.
Bill Gantt
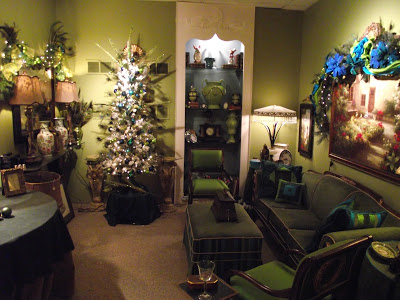
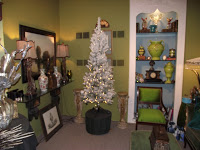
Christmas Trees decorated White on White

This Christmas I decided to feature a white on white theme. Personally I have always preferred trees to be at least lightly flocked. It keeps them from getting too dark. Now people seem to be warming to the idea.
Let me show you how I do white on white.
INTERIOR DECORATOR INTERIOR DESIGNER
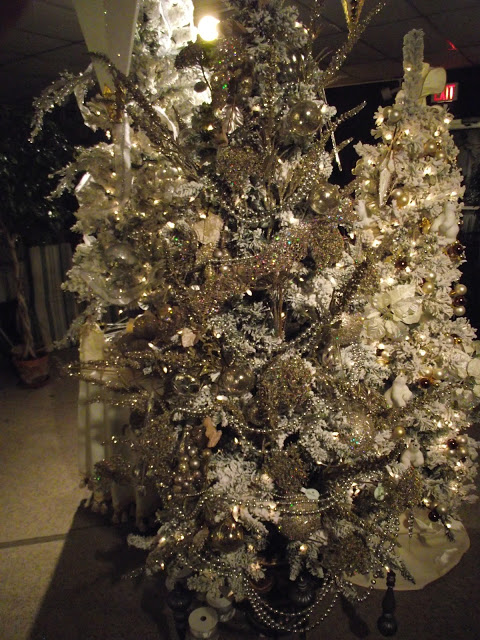
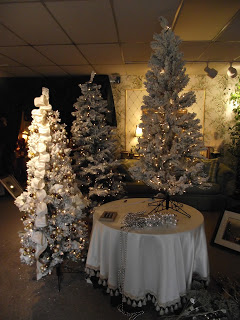 |
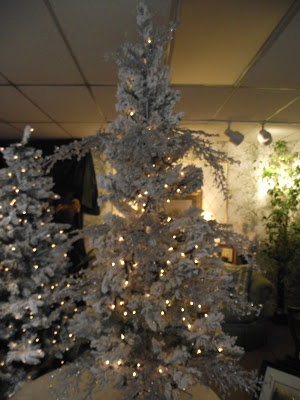
| Trees ready to decorate |
I decided to do a grouping of flocked trees just inside the front door. They will each be decorated in a different theme.
Below the Polar bear tree is started with an idea I came up with last year. 9" of ribbon is florist wired into a loop, 2" of ribbon is spaced between each loop. The result is what you see in the center of the tree.
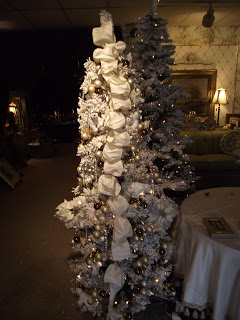 |
| Unique ribbon treatment starts off Polar bear tree |
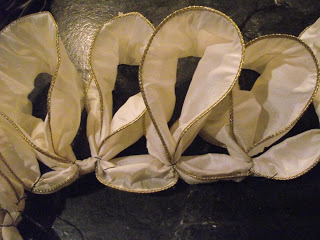 |
| A looped effect is created with wired ribbon |
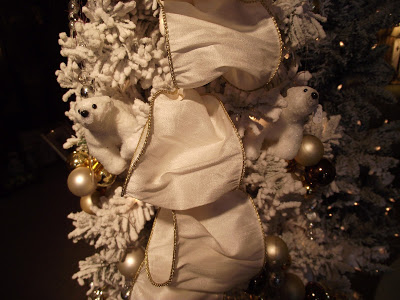
The tree is finished with polar bears, clusters of small wired balls in satin white and tan shiny dark copper. It also has white poinsettias and white and clear icicles.
 |
| Table tree |
The tree on the table first has several branches that look like they are full of ice, placed evenly at 4 levels.
The inside of the tree is filled with silver balls.
It is finished with 5 1/2" clear and silver balls, silver and white birds and three lengths of glass icicles hung together on one hock.
 |
| Tree is finished with large clear glass balls, white and silver birds and white and silver ribbon |
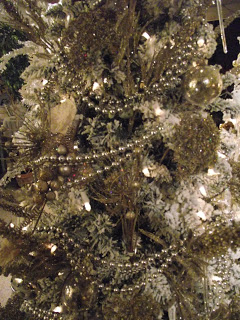
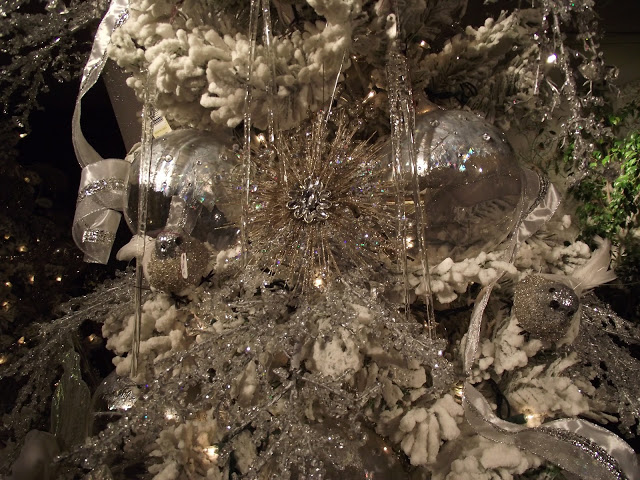
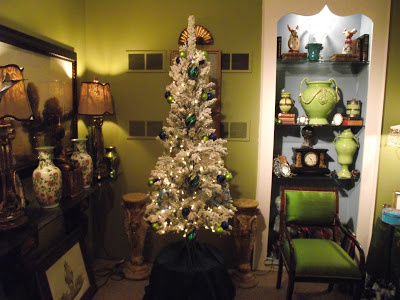
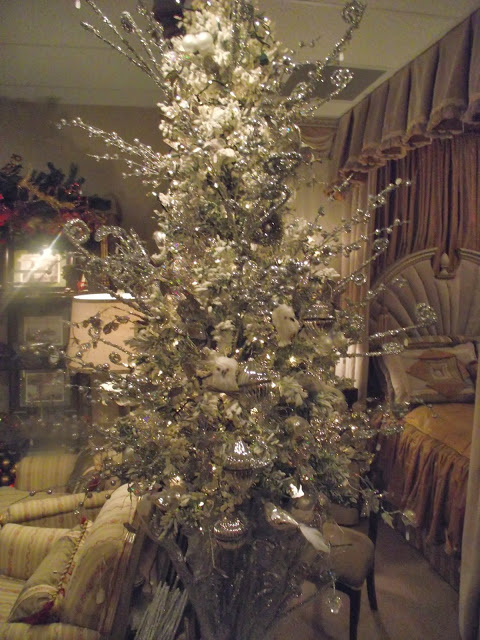
The third tree was harder to photograph. It was decorated in platinum or as I call it ,antique silver.
It has large glitter spikes and balls, beautiful Queen Anne's lace, antique mercury glass balls and glass icicles..
 |
| Platinum Silver tree |
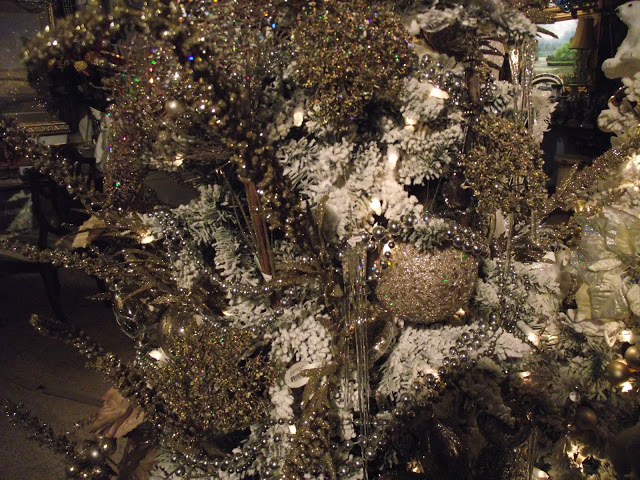 |
| Platinum glitter spikes, 6" glitter balls, three strands of silver beads, and icicles finish the tree |
Mark your calendar. My Holiday Open House is Dec1 and 2. Because I plan to move to a smaller space sometime next year, I need to reduce inventory. EVERYTHING is 1/2 off during the open house!
Bill Gantt
How to make a 1/2 Upside Down Christmas Tree

INTERIOR DECORATOR INTERIOR DESIGNER
A few years back I bought 3 Upside Down trees for the shop. They are great for display because the keep your table tops open for other things. Also the ornaments show well. I have two areas in the shop that are like little foyers. I thought it might be good to put 1/2 upside down trees there, since they would be up and out of the way. Now that I have been doing them, I think they are perfect for a very small areas where you might want a tree. Otherwise I think they should be used for display only.
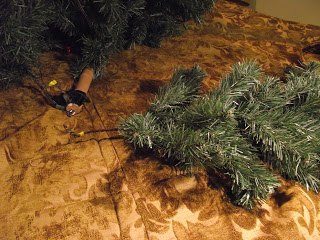
I have a place in the stock room for trees so that I don't have to disassemble the each year. Among the trees I had was one that had hook on branches. It was particularly annoying because every time I moved it the branches would come off.
 |
| Branch holder cut in half and attached to dowel |
Once they were slipped off the metal pole I cut them in half. These half pieces were then glued and screwed to the wooden dowel. At this point it is important to remember that what was the bottom of the original tree is now the top and visa verse
The branch holder for the longer branches is attached to what will be the new top of the tree and in the opposite direction. Before you attach it permanently hook a branch in to be sure the direction
 |
| Old hook on branches color coded for length |
they were on the original tree.
I used hot glue to hold the branches in place so they wouldn't come out any more. Keep some of the smallest branches for the bottom (former top) of the tree. Use pliers to bend a small hook shape on the ends of the branches. Hook one or two branches over the ones above them to create the top (at the bottom) of the new tree.
 |
| Screw eye attached to top which gets attached to screw at ceiling |
(old bottom) of the tree. Since there is always a stud at the top of walls, Use a large drywall screw .
Screw it into the stud about an inch down from the ceiling. Only leave about an inch of the screw exposed on the wall. It should be so hard to see you can probably leave it there to use year after year. I use a double piece of heavy florist wire first hooked to the screw eye and then holding the tree against the wall and ceiling; wrap the florist wire tightly around the screw several times. Put on the lights, shape the branches, decorate. DONE!
Please leave a comment. I want to know what you think. Check out my other blogs at ganttsdecorating.com.
Mark your calendar. My Holiday Open House is on Dec. 1 and 2. Because I am downsizing and need to reduce inventory, everything in the shop is 1/2 off. Furniture,lamps, accessories,Christmas Decorations,
EVERYTHING.
Bill Gantt
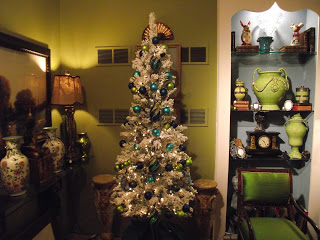
Peacock Christmas Decorating
I would like to show you how I decorated this peacock colored room for Christmas.
 |
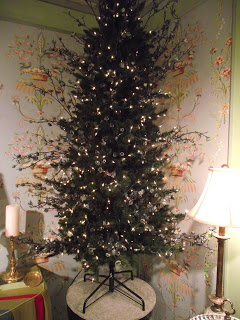
| Flocked tree on 18" riser |
Because the items I intend to put on the tree are on the dark side, I started with a flocked tree.
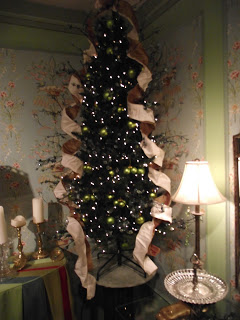
 |
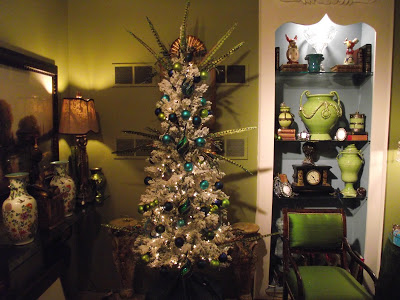
Major decorative elements on tree |
The first step was to put the major elements on. Four large peacock balls were hung up the center of the tree. The colored balls were added next. It is crucial to put everything on the tree symmetrically. Find the visual center of the tree. If you hang something on the right, hang the same thing on the left. Back and forth down the tree.
 |
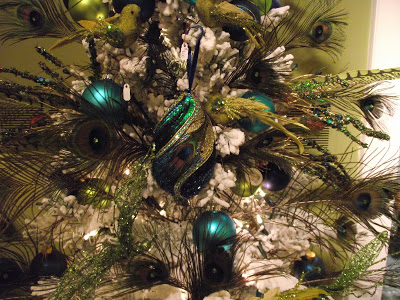
| Feather like ornaments are added symmetrically. Note what I am starting on the top. I rarely use tree toppers. |
Now that all the colored balls are hung, I begin to add the unusual stuff. These feather like things expand the dimensions of the tree and give it drama. I am starting something on the top that will replace the typical topper. Once again everything is balanced.
Next Peacock feathers are put on the tree along with some chartreuse colored birds. DONE
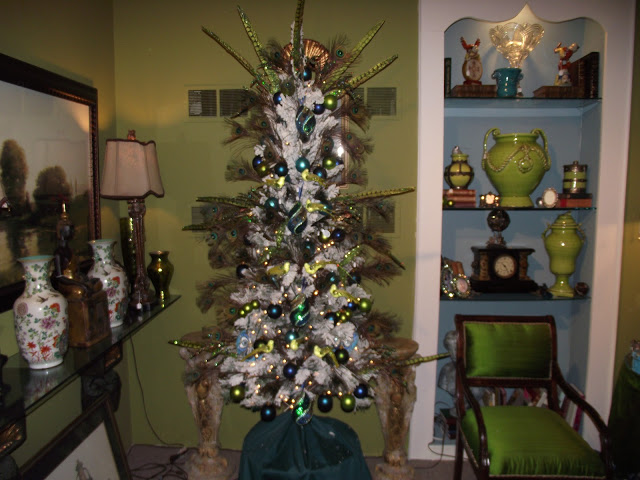 |
| Completed tree |
 |
| No tree topper here |
Now for the rest of the room.
When I first did the treatment I'm going to show you, I couldn't find ribbon the width or color I wanted.
I ordered some silk and made the wired ribbon. To make your own ribbon cut silk an inch wider that you want the ribbon to be. Press over 1/2" on each side. Don't bother trying to turn it over twice. With your
zipper foot sew close to the edge while holding florist wire in the fold. By making your own ribbon you can have any color or width you want. You can be as wild and crazy as you want to be.
 |
| My home made 8" silk wired ribbon |
 |
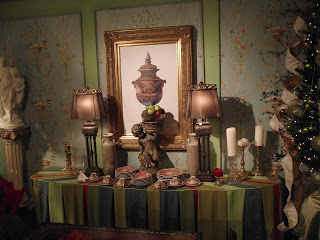
| Completed Swag. Something like this is good especially in a room without a tree. |
 |
| Nails are put in the wall to hold the roping |
 |
| This roping was done on the opposite side of the set. It consists primarily of glass balls and peacock feathers. |
 |
| DONE! |
I hope you enjoyed this. There's more to come so please check back. Mark your calendar for the Open House Dec. 1 & 2.
Please tell your friends about the open house and my blog. Write a comment. I want to know what you think.
Bill Gantt
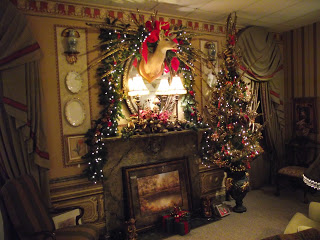
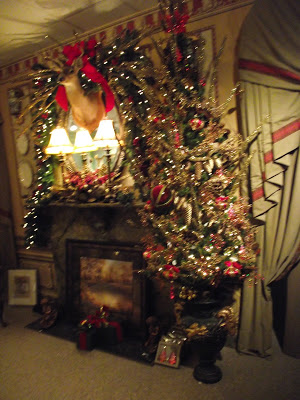
Christmas Decorating - Lodge Look
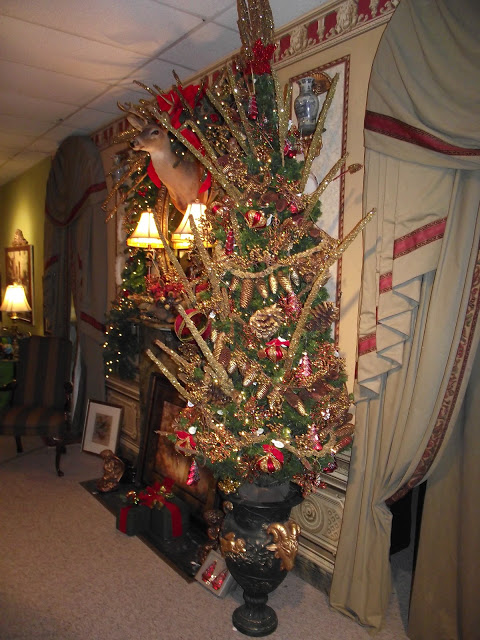 |
Lodge look tree and mantle |
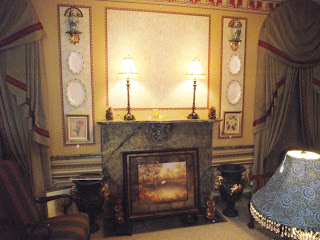 |
| Fireplace Wall |
 |
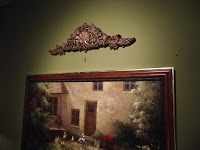
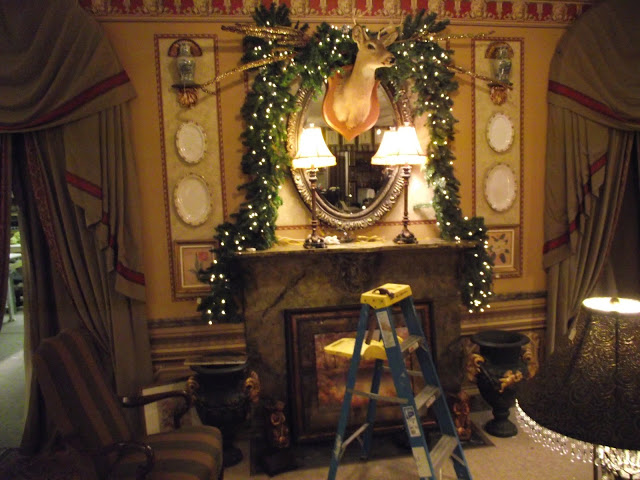
| Mirror is hung |
 |
| Deer Head on top of mirror |
Using florist wire and a hook in the wall about 6" above the top of the mirror the head is hung.
 |
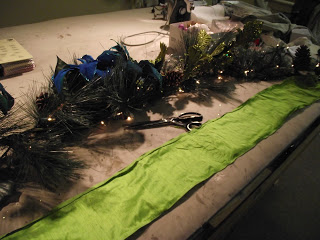
| 20' of roping lit dressed and ready for the mantle |
The center of the roping was attached with florist wire to the same hook holding the deer head.
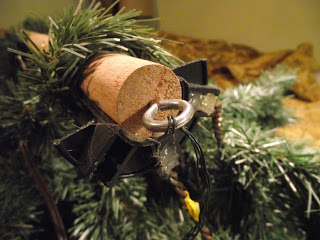
 If you refer back to the blog "making Christmas decorations out of road side weeds" This is how I use many of them.
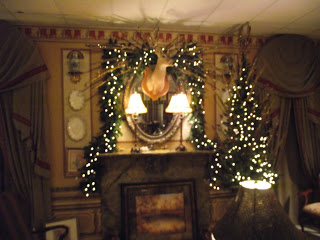
Once the roping is attached I begin putting the gold glittered spiked weeds above the deer head.
Keeping everything balanced, I put one through the roping on the right and then one of equal size on the left as much as possible in the exact opposite position. This is done over and over until I get the shape and effect I want.
 |
| Gold glittered spiked weeds are arranged |
 |
| 7' tree is anchored in fancy urn |
the decorative urn, I push the bottom of the tree
into the foam until secure. Because the bottom
of this urn is small, a piece of florist wire is attached
from the tree to a hook in the wall for a little extra
security.
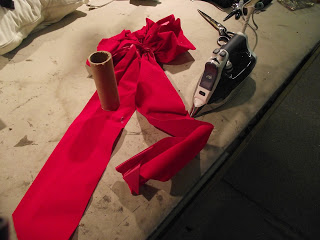 As with everyone when I get out last years bows they are a wrinkled mess. In the past I have used a cardboard roll to help steam them back into shape.
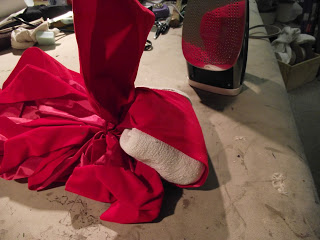 |
| Rolled up towel put into each bow loop allows you to actually use a steam iron and iron out the wrinkles |
This year I came up with a better idea. I used a pack of terry shop towels stuffed into each loop, one at a time. This allowed me to actually iron out the wrinkles.
Here are some more of the natural ornaments I made for the tree.
 |
| Garland made from sweet gum pods |
Sweet gum pods were painted red and then metallic
gold. The center of each one had to be drilled out
before they could be strung on florist wire.
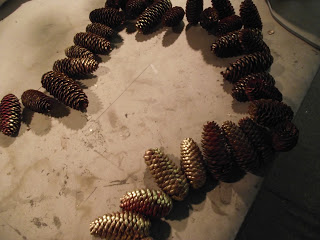 |
| Pine cone garland |
again, were sprayed red and then metallic gold.
Florist wire is wrapped tightly and into the cone, about 2" down the base. If it gets too much
manipulation pine cones can come loose. Wrap them back wherever they come loose.
 |
| Glittered spike weeds go in first. |
When decorating a tree like this put the spikes in first. Put them one at a time in on the left and one in the same place and position on the righ. The spikes will follow the lines of the tree.\
They will actually make the tree look much bigger.
Next I put some red ornaments on, a row up the middle about 8" apart and a row top to bottom on the left and right. At this stage is is important to work this way. Always put things on in a balanced way.

The pine cone and teasel roping are added along with more ornaments for color.
 |
| Center of the mantle is completed |
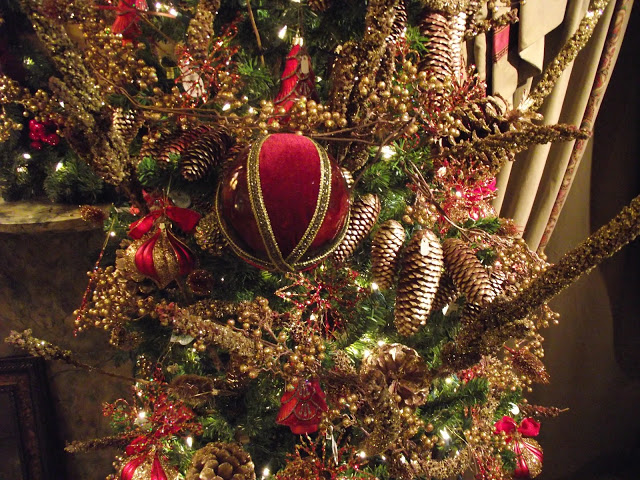 |
| Looking closely and you can see all the natural elements |
 |
| Lodge Look Complete. |
Check out my other blogs-more Christmas Decorating to come.
Please tell your friends and please leave a comment
about it. I want to know what you think.
Also mark your calendar for my
Holiday Open House
December 1 and 2
This year everything in the shop is 1/2 off!!!!!
How to Build a Chaise Frame to Finish
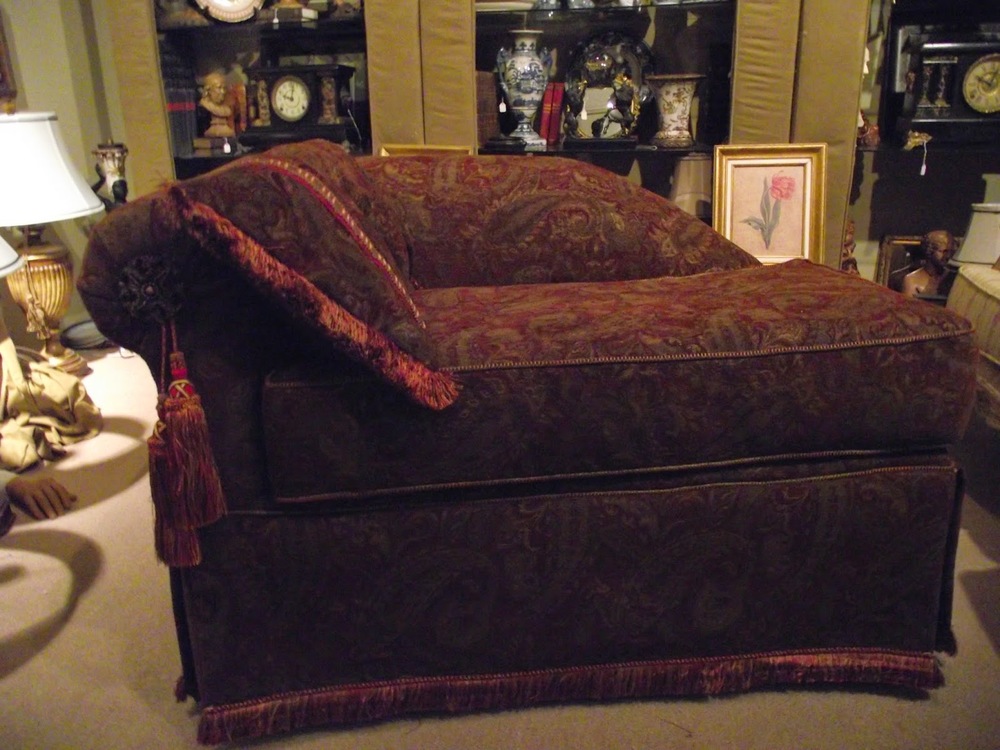
My client wanted a guest room that was masculine. The room had an issue that kept me pondering what to do for weeks. The only light source in the room was a corner window. As a result no matter what I did to the bed this window demanded your attention when coming into the room. After much consideration I decided to design a small chaise the width of the small window and approximately the length of the long window.<br>
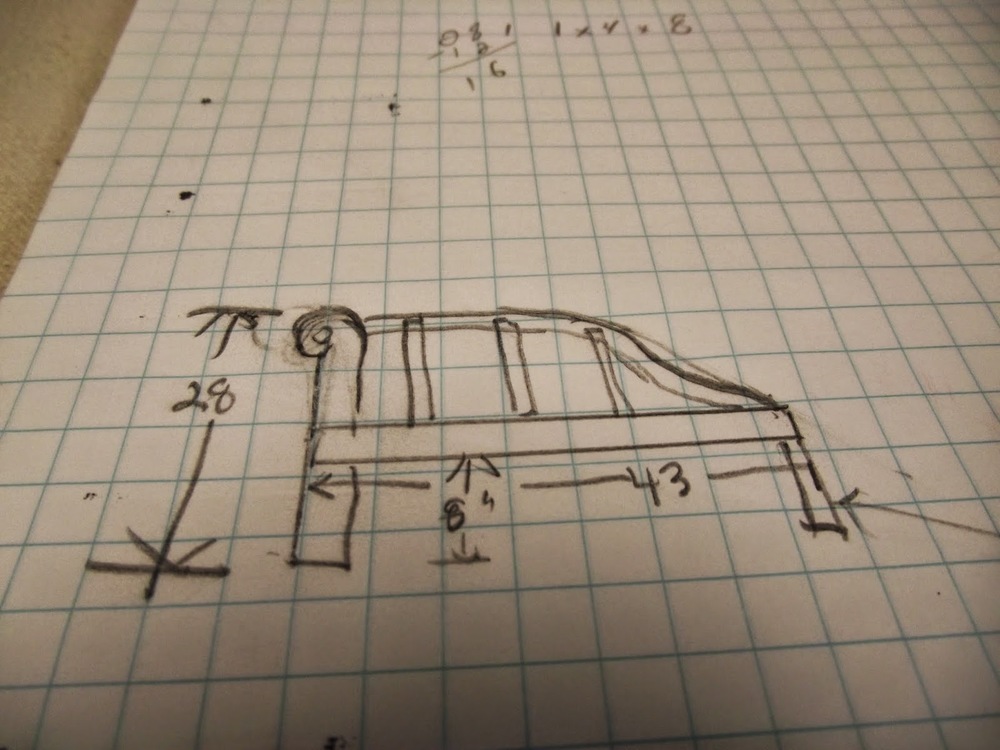
A drawing was done and a list of materials was completed.<br>
<br>
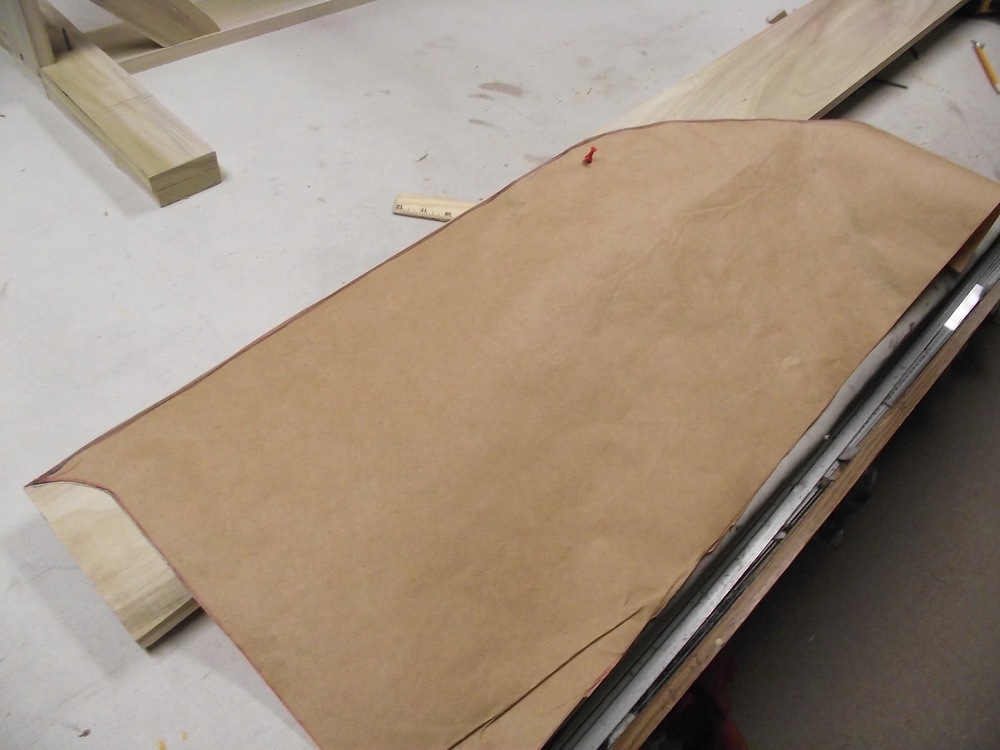
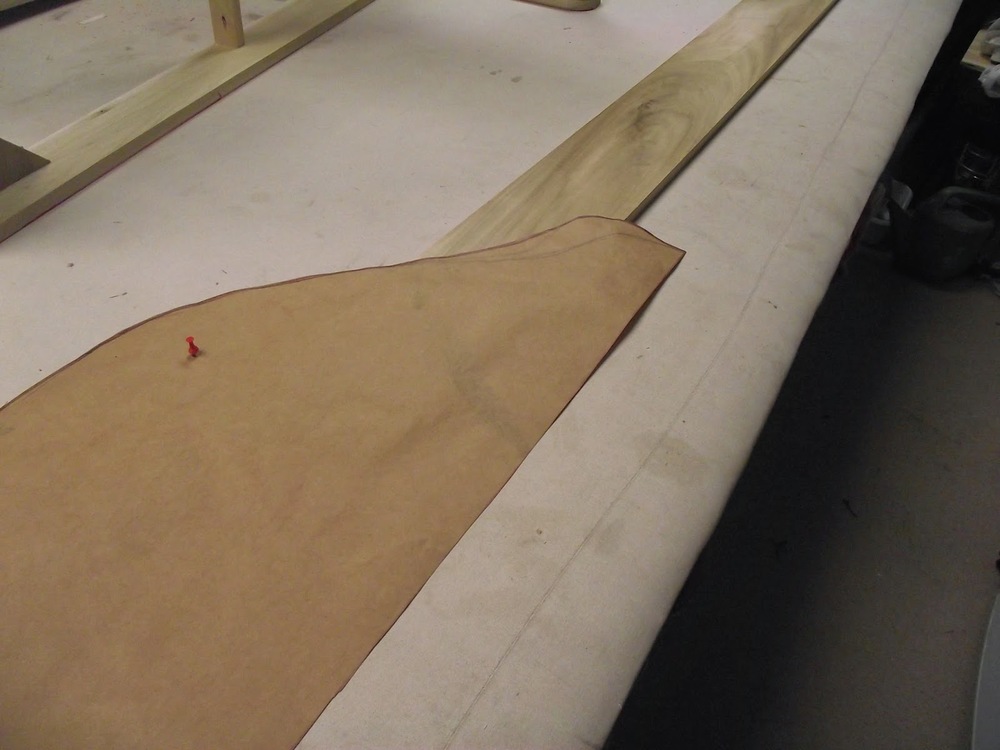
A paper pattern was made for the shape of the back and one for the arm of the chaise.<br>
<br>
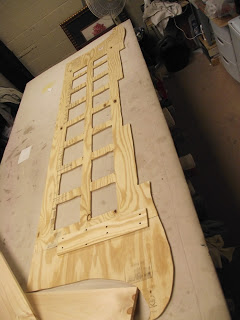
The hardwood lumber was laid side by side, the paper pattern secured on top and traced onto the lumber. The lumber was cut into the pieces to make the back.
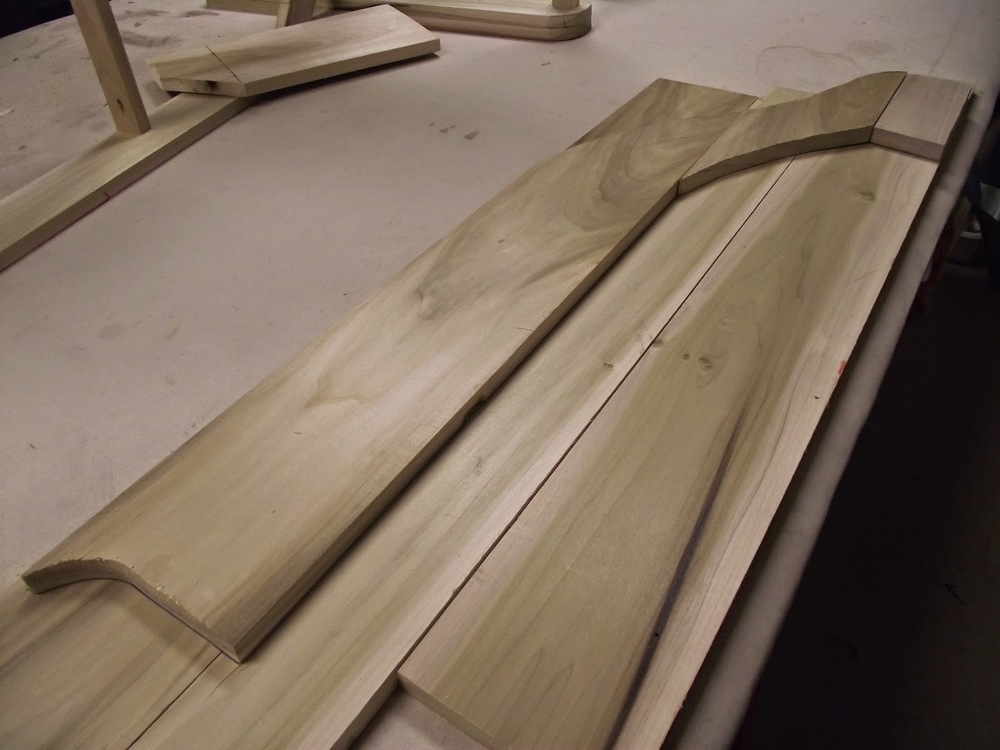

The cut out pieces were then laid in place on top of the lumber again. Care was taken to place them so the seams did not overlap layer to layer.<br>

The second layer of the back had places cut out to receive the vertical supports of the back.<br>
On the right you can see the back section fully assembled.<br>
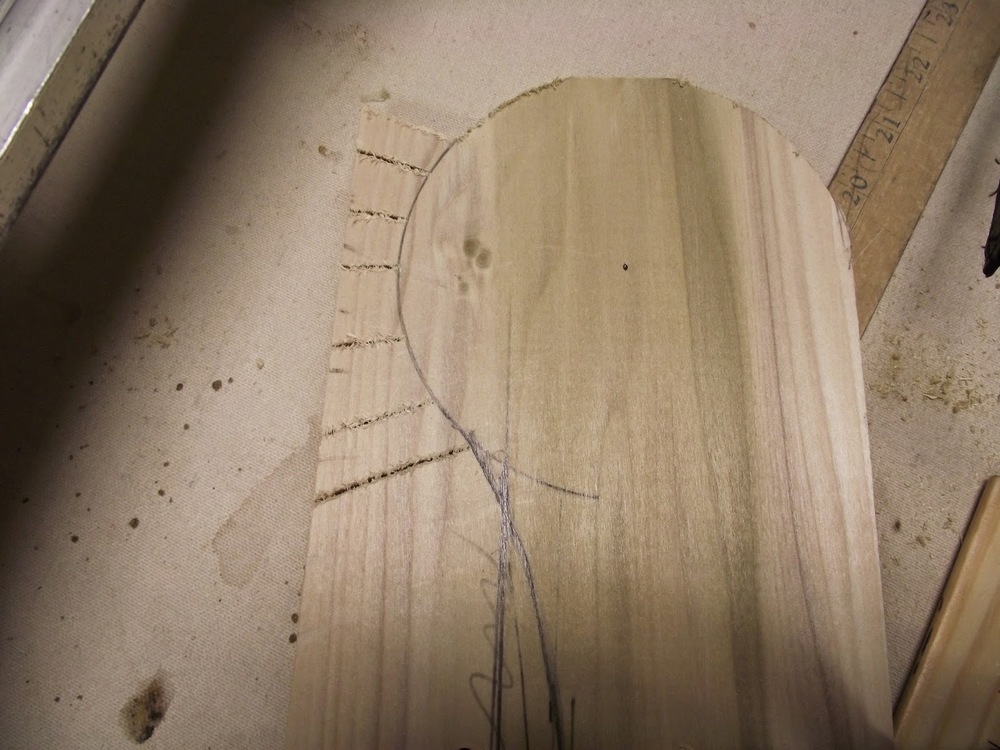
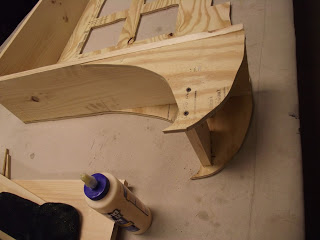
A pattern was also made for the arm. Note the cuts made in the wood before cutting the round part. They make it easier to cut the shape smoothly.<br>

<br>
The same shape is cut again for the second layer but space is saved for the square part of the frame to fit.<br>

Here you can see how the frame will fit snugly into the space saved for it in the arm piece.<br>

<br>
Not only is the frame stronger by constructing it this way, it provides a smother front surface<.br>
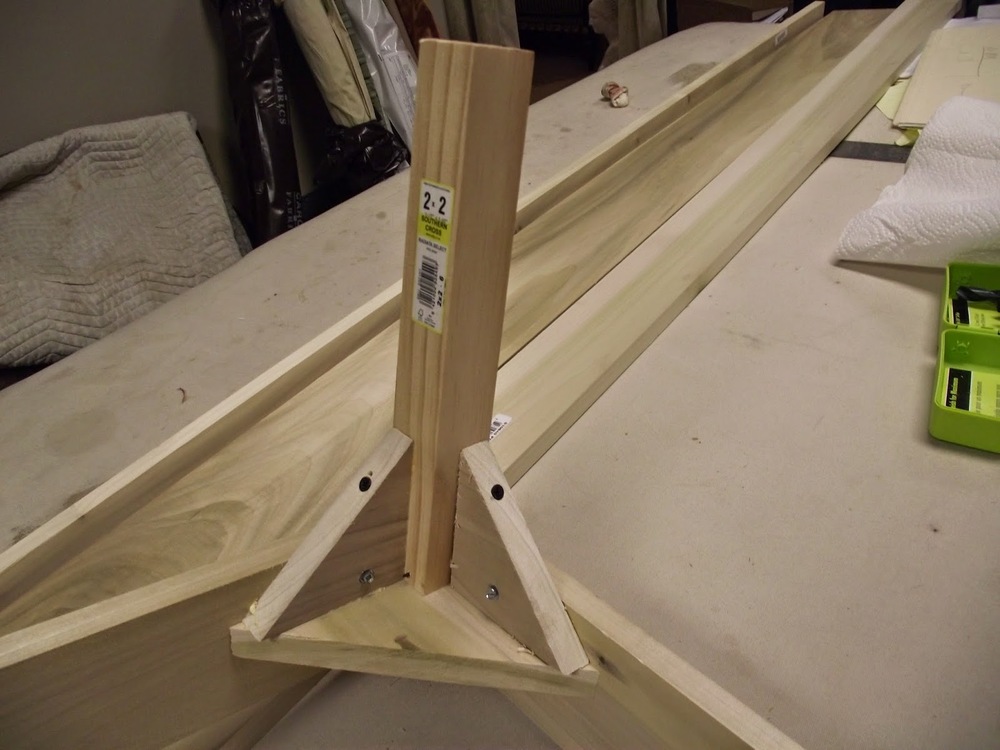
The other legs are attached to the main frame corner brace. For added strength the leg itself is corner braced on two sides.<br>

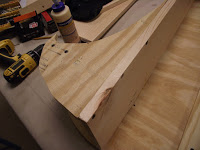
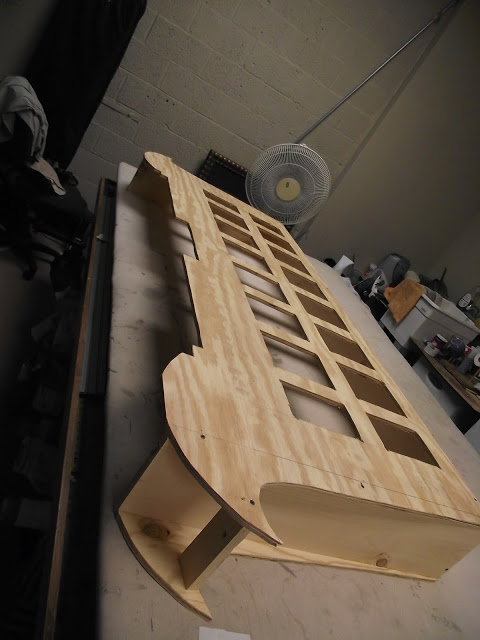
The back section is attached along with a support in the center and one between the front and back arm.
Also notice the space left between the vertical support and the back arm. This is where the fabric will have to be pulled to the back and fastened. I later realized I should have left more space than what you see here. Also on the far right of the back section two spaces were left to allow the webbing to pass through.<br>
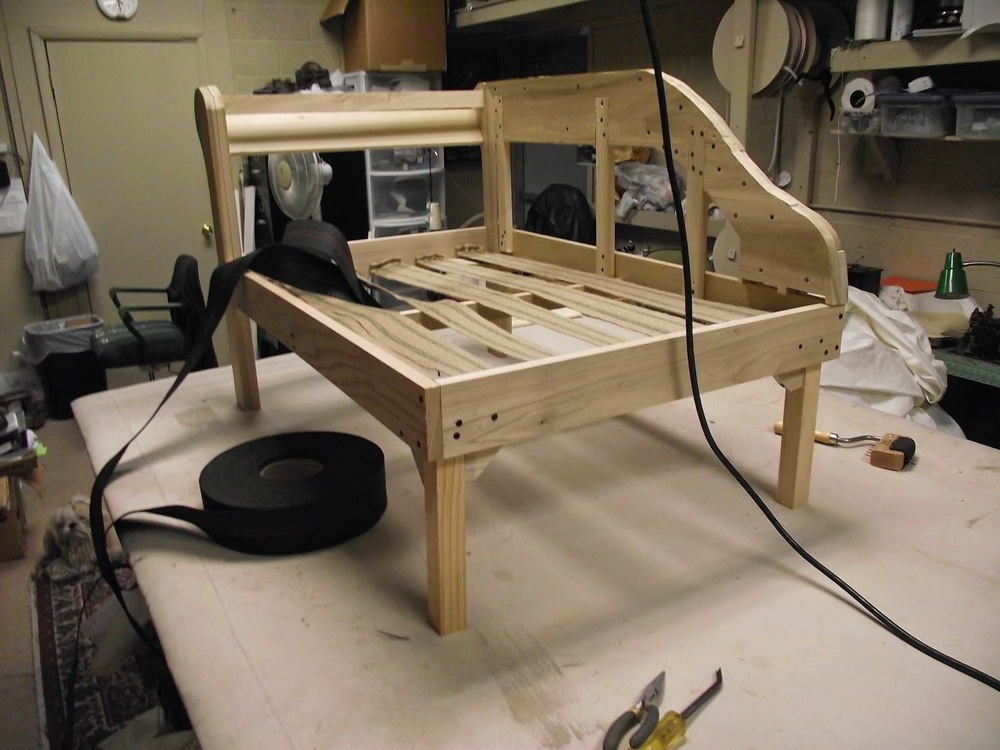
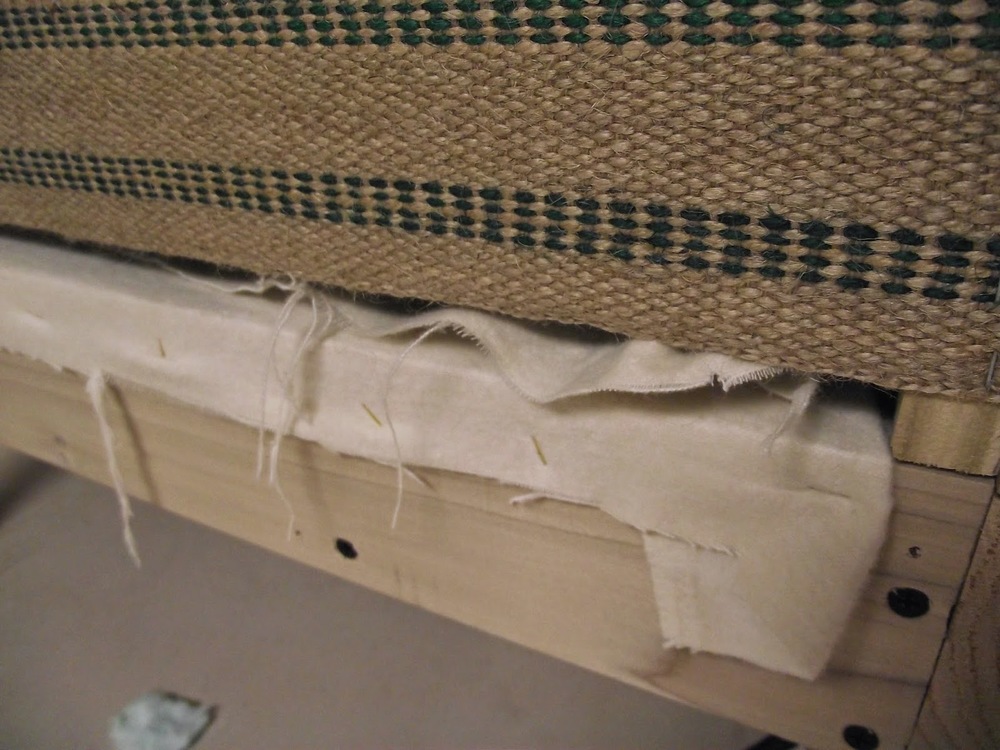
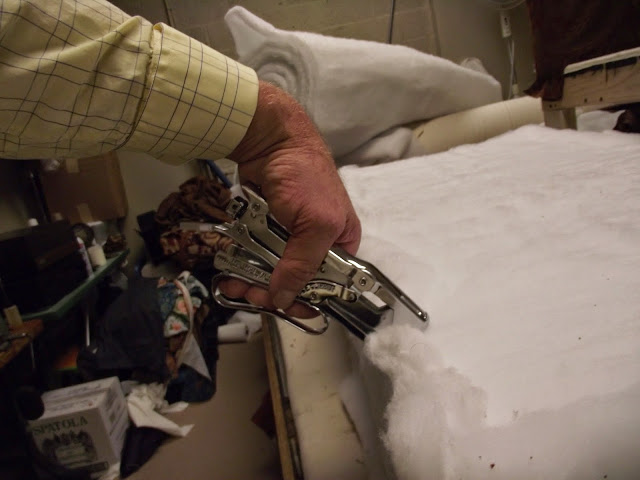
Next I web the bottom in an abundance of caution with traditional webbing. This is where I want the lowest point for the seat. The black rubberized webbing is stretched and attached to the top of the frame. It is used in place of springs.<br>
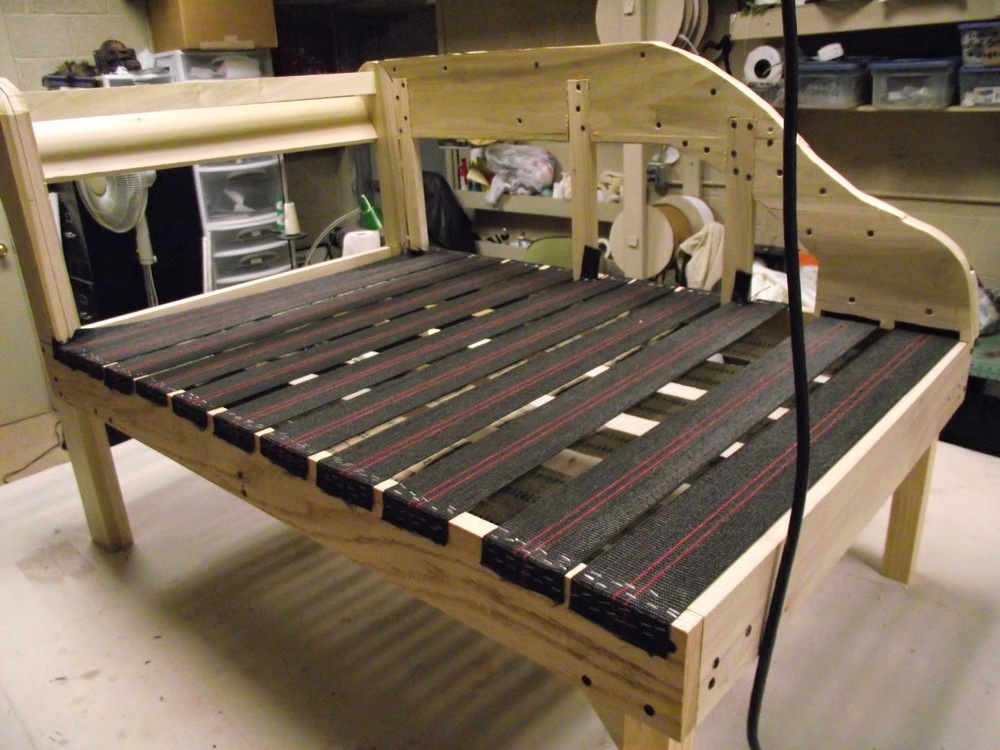
The rubberized webbing is always run from front to back. Unlike traditional webbing it is only attached in one direction.<br>
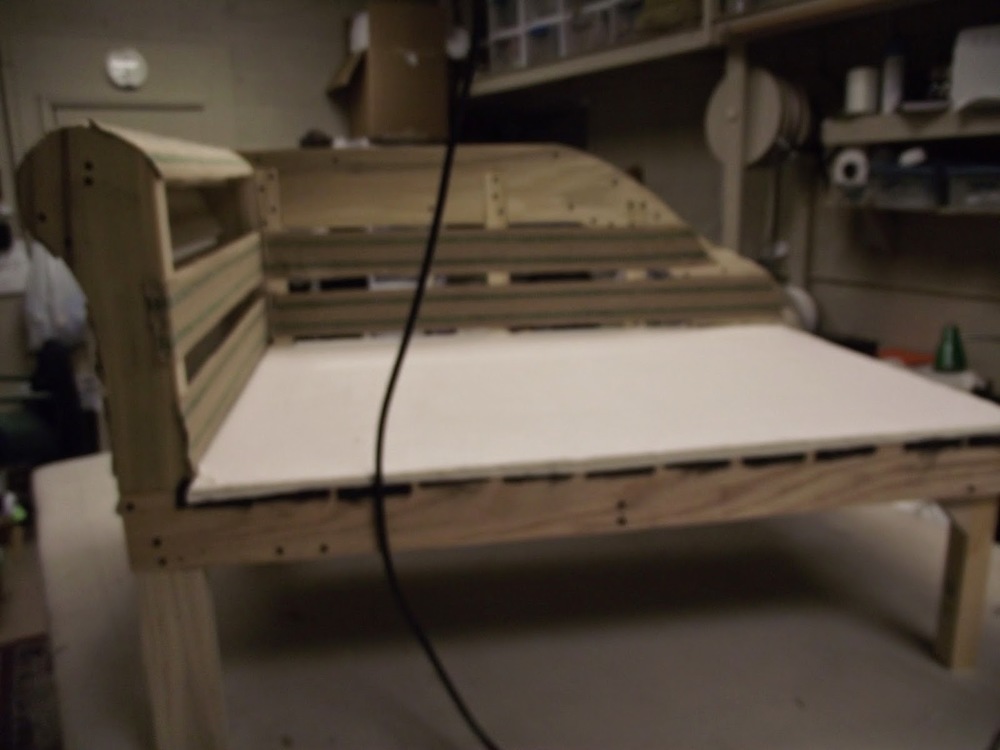
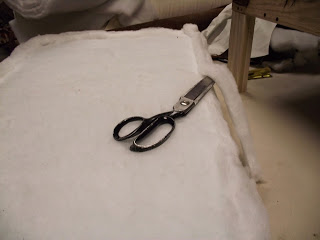
Heavy flannel is attached over the webbing.

When designing a frame it is important not only to allow space where needed for webbing and fabric to pass through , it is also necessary to be sure to have frame where you need to attach fabric. Notice that a piece has been added at the bottom of the top curve of the arm. You can see her that the arm is also webbed.<br>
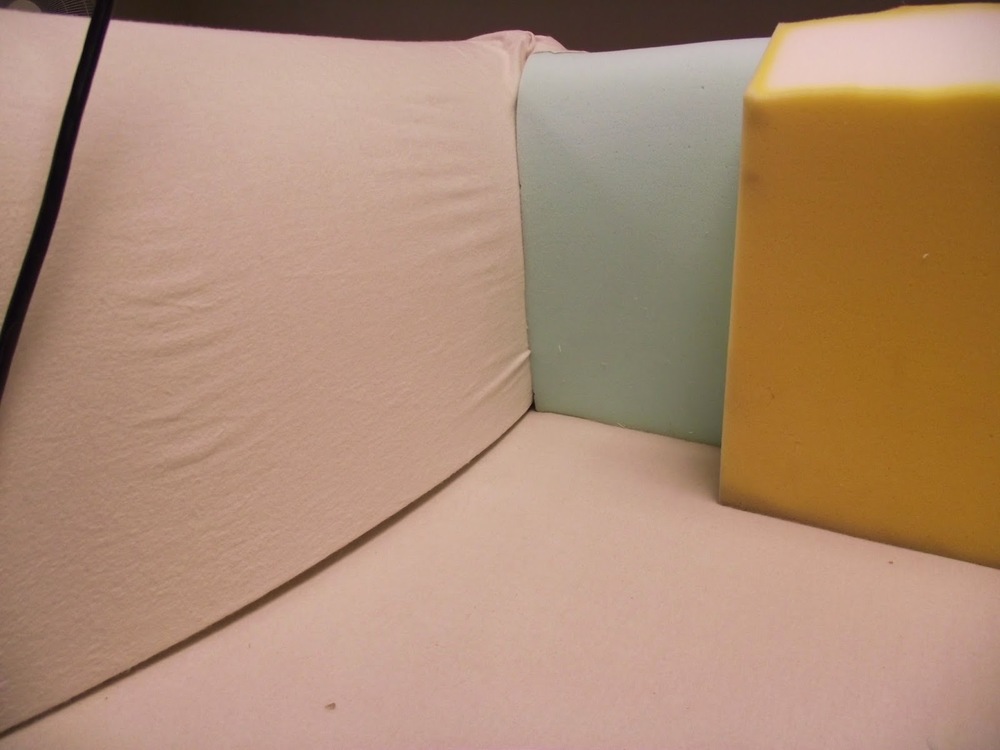
Foam is now cut to the size needed.
At this point it is important to review your original plan for the seat depth and length.
This foam must be deep enough that the space
left on the deck is the size planed for the seat.<br>
On the left the heavy flannel is being used to pull the arm foam into the desired shape. It is fastened only on each side and the top. The bottom as you can see must be left unfastened to allow for the fabric to be pulled through<.br>

Here you see the flannel being pulled through the space allowed in the frame. In the upper right see the rounded part of the top of the arm coming into shape. When the foam is pulled to the desired shape this flannel can be stapled to the frame because it will not block the fabric application.<br>

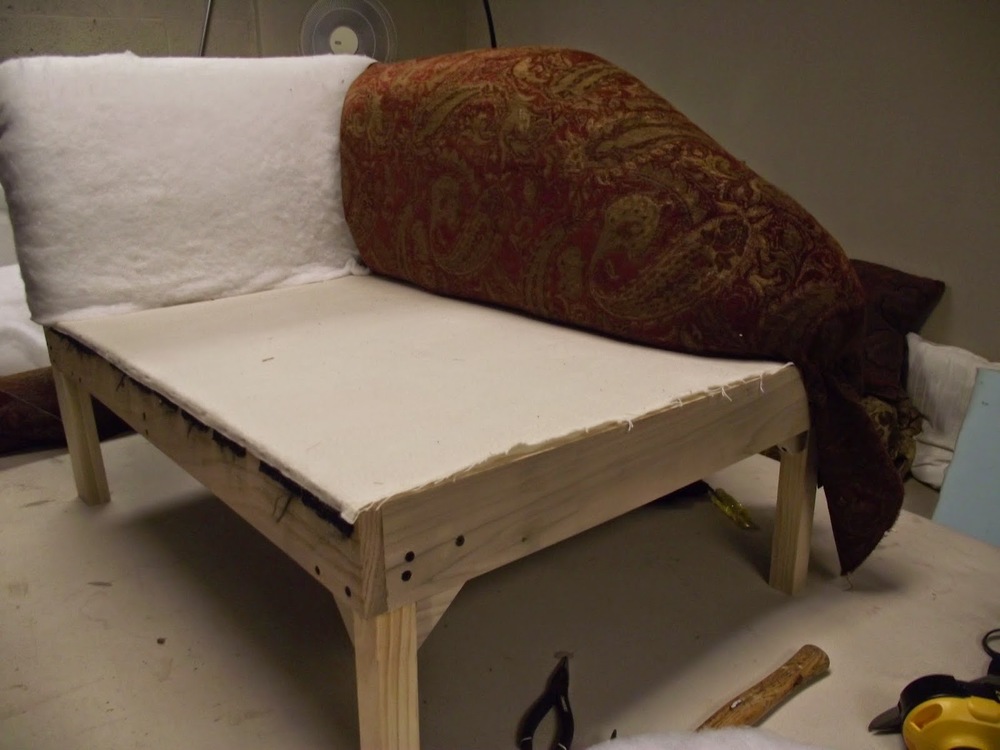
Here you can see the foam has been pulled into the basic shape of the finished chase. There will still be opportunities for fine tuning the shape as the fabric is stretched onto the form.<br>

The next step it to cover the arm and back with 1" polyester furniture batting. The batting gives the finished piece a soft luxurious feel.<br>

It is time to begin putting on the fabric. Here you can see the back fabric bring worked into place . Notice the relief cuts where the arm and back meet. The cuts are made larger as the fabric is gradually worked into the the area and pulled through the space left for it on the back.
There is not space for all the fabric to be hooked in the back some that will not fit through the space will tucked in unattached. It will remain in place as long as the fabric is pulled tight and attached firmly to the back and arm.<br>
The back fabric is finally in position. The pattern is level with the deck.<br>

The back fabric is stapled to the top of the back frame. Notice it is pulled over and stapled about 3" below the crest of the frame.<br>
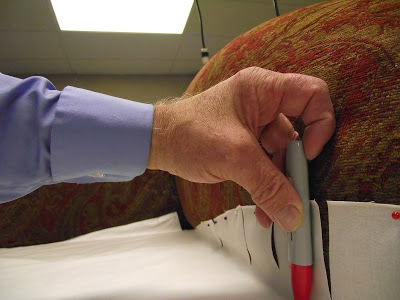
Needle nosed pliers are being used to work the fabric through the frame so it can be tightened and and attached.<br>
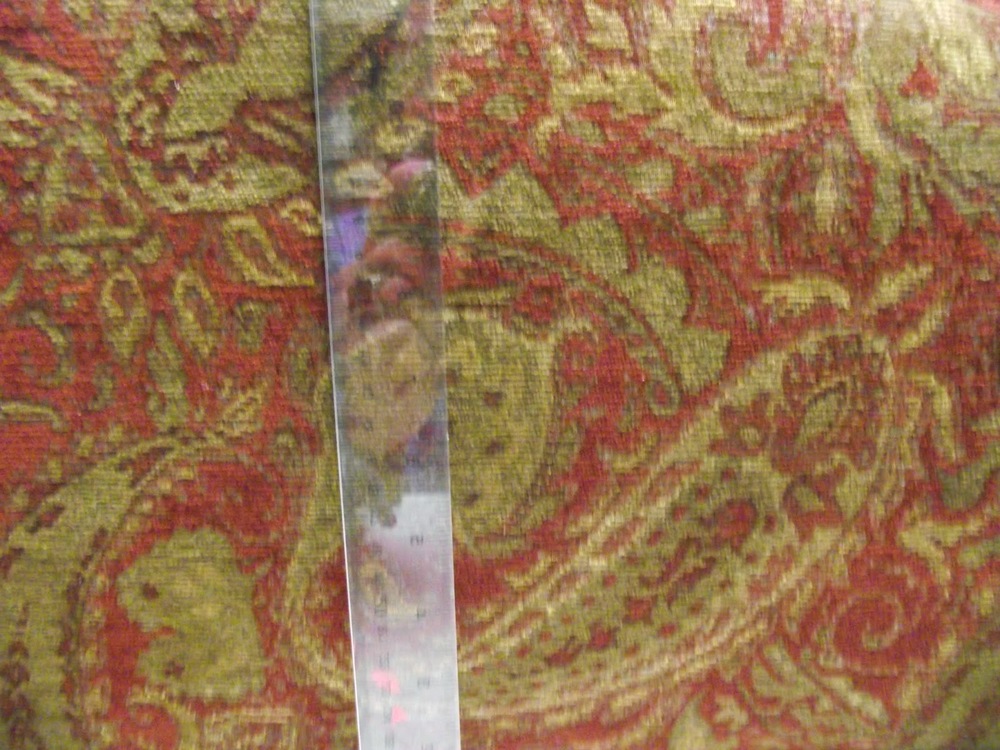
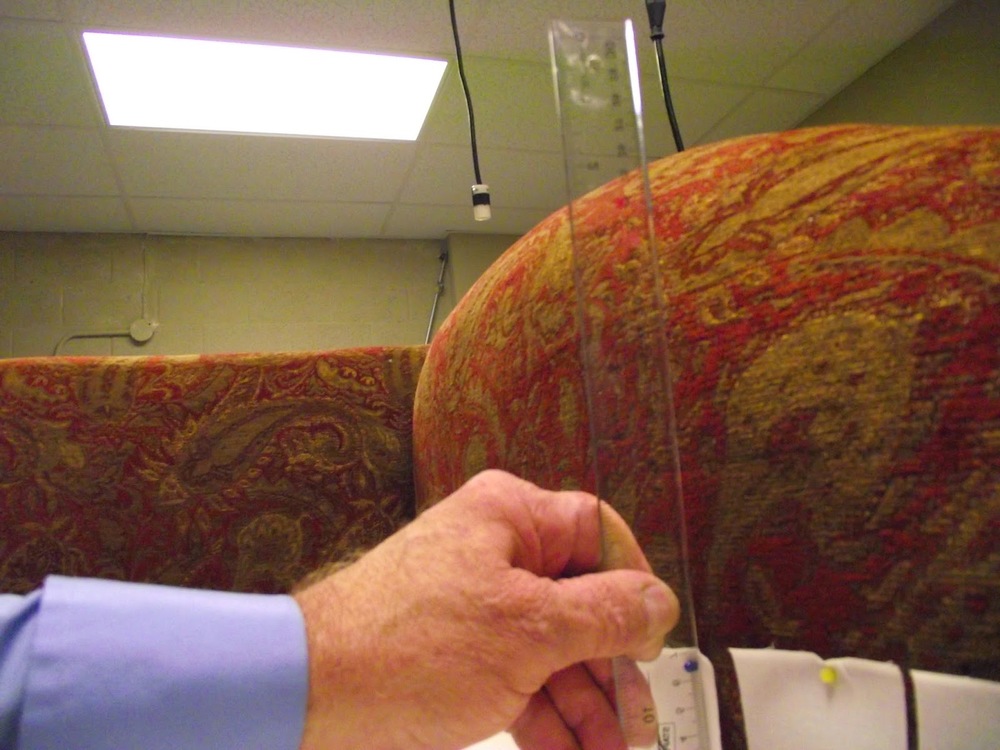
A ruler is used to measure the distance of a point in the pattern repeat to the deck. This helps check if the pattern is in alignment as the fabric is being stretched and attached to the frame.<br>
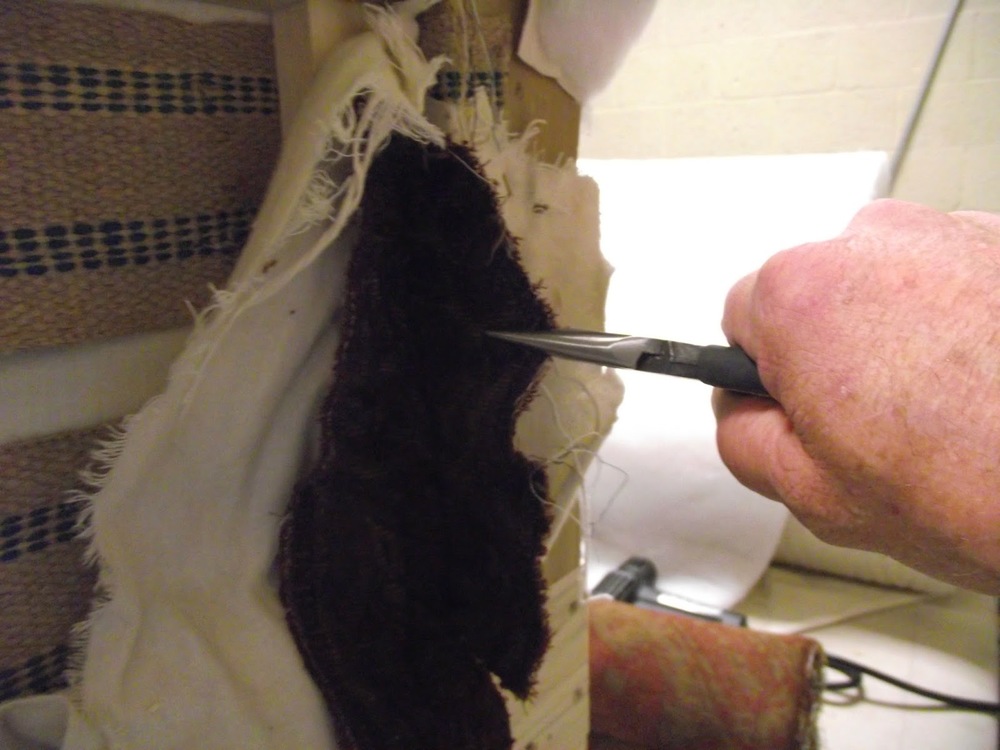
More relief cuts are made to allow the fabric to go around the point where the deck and arm part of the frame are attached.<br>

Because the fabric cannot be attached to the frame as it goes over the top if the back and the arm, you must be careful to allow plenty of fabric to be turned under and for lots of overlapping of fabric.<br>
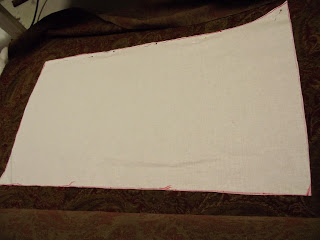
Now that the back and arm fabrics are attached it is time to make a pattern for the seat.
Lining is cut to the approximate shape plus the thickness planned for the seat cushion. Relief cuts are made and the part of the pattern representing the cushion thickness is pinned to the back of the love seat, The thickness is is double checked with a ruler.<br>
This part is important because the foam must be cut to fit the shape of the back where the top edge of the seat will meet the back.<br>
Cut the lining to the marks and pin it to the top of the foam and mark the outline on the foam.
Using a foam cutter or an electric carving knife cut the seat foam to the shape needed. <br>

Because the foam did not come as wide as needed for the seat it was necessary to use foam adhesive and glue an additional piece to the side of the piece. <br>

The small picture shows that it was necessary to glue two thickness of foam together to get the proper seat thickness. Also The fiber furniture batting is ready to be cut to shape and attached,<br>
Two large pieces of furniture batting are cut for the top and bottom of the seat. Then strips are cut the height of the seat. A "clipper" type staple gun is used to attach the pieces together. Staple every 2 or 3 inches. This also helps give a crisp edge.<br>
After all the batting is pulled tight and stapled the excess batting is cut to within 1" of the stapled edge.<br>

Next put the cushion in place of the deck. Lay the fabric on top of the cushion. Position it until it matches-back of cushion to back of chaise. A light chalk mark can be made to show where the match is. Put the fabric on the table. Place the cushion
pattern
on top of the fabric with the edge of the pattern against the chalk line. Cut the fabric 1/2" larger than the pattern all around. This allows for the seam. In the interest of saving fabric, often the fabric for the front of the cushion is allowed to mismatch enough to accommodate the 1/2" seam allowance top to side. Use your judgement to see if that is acceptable. If it isn't you will need to go to the next repeat for the perfect match. After all the pieces are cut sew together to make the cover with a zipper across the back.<br>

Now it is necessary to create a bed for the cushion to rest in. You will need 8" strips of fabric. Since the bottom three inches will show you should lay the cushion on top of the fabric and find the pattern match. Then measure out three inches and mark the fabric. Remove the cushion and measure up the fabric 8" mark and cut the strip.<br>
Repeat the process with the end of the cushion. Cut them at least 1 horizontal repeat longer than the length of the seat cushion. Cut another 1 horizontal repeat wider than the width of the cushion.<br>
Measure in from the edge 3" and mark the deck. Now measure from the mark under the are and the back to the opposite edge of the frame. Cut a piece of the upholstery fabric or lining a few inches longer and wider than that measurement. Sew the strips as shown to the edge of the lining. Use a curved needle and sew the deck piece through the lining/fabric seam at the 3" mark on the flannel deck. (see picture) Once the front and end is secure it will look like the picture. Pull the deck fabric under the back and arm. Make the necessary cuts to go around the frame so it will pull tight. Pull it tight and staple to the arm and back frame.<br>
Roll fiber furniture batting to be the width from the deck and fabric seam and about 3" thick. You can spot staple it to the frame,
Cut batting strips of batting to pad the surface of the remaining frame. Spot staple it in place.<br>
Now pull the 8" strip over the rolled up batting and over the edge of the frame. Pull it snug and staple it evenly to the frame. Your staple line should be 2" below the top of the frame. This will keep the cushion from sliding out of place when the piece is done.<br>
If you plan to have the skirt cover the rest of the bottom of the chaise you will make a weld and staple it to cover your last staple line. How to make and attach a skirt should be covered in my blog on "how to build and cover an ottoman.<br>
I appologyze for the shortage of pictures on these last steps.

Completed Chaise.
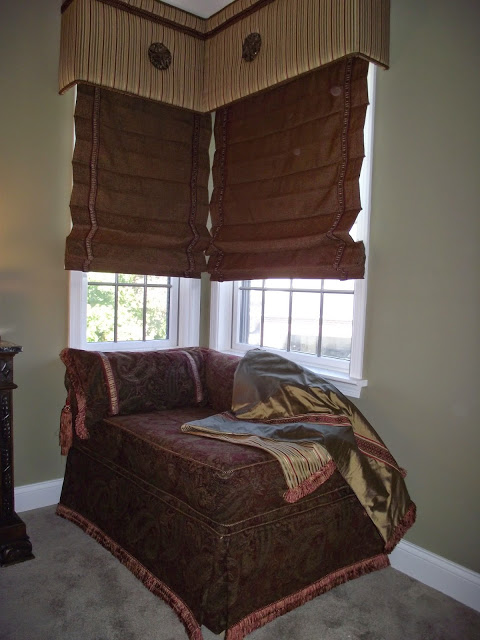
Chaise under the window it was designed for. I hope you found this useful.
Bill Gantt
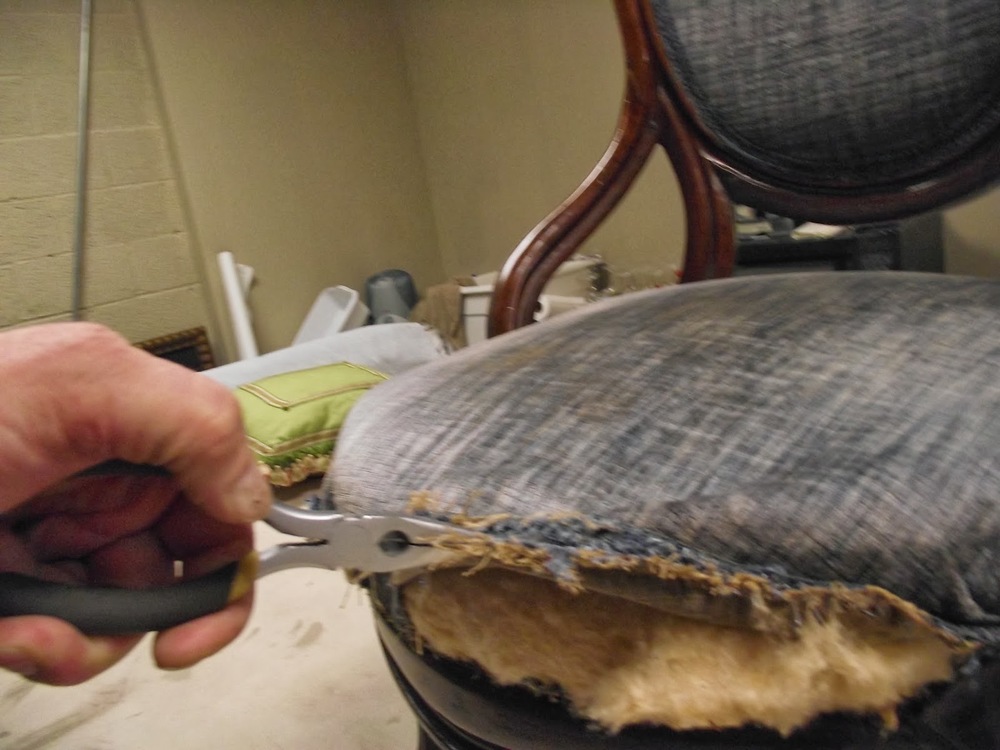
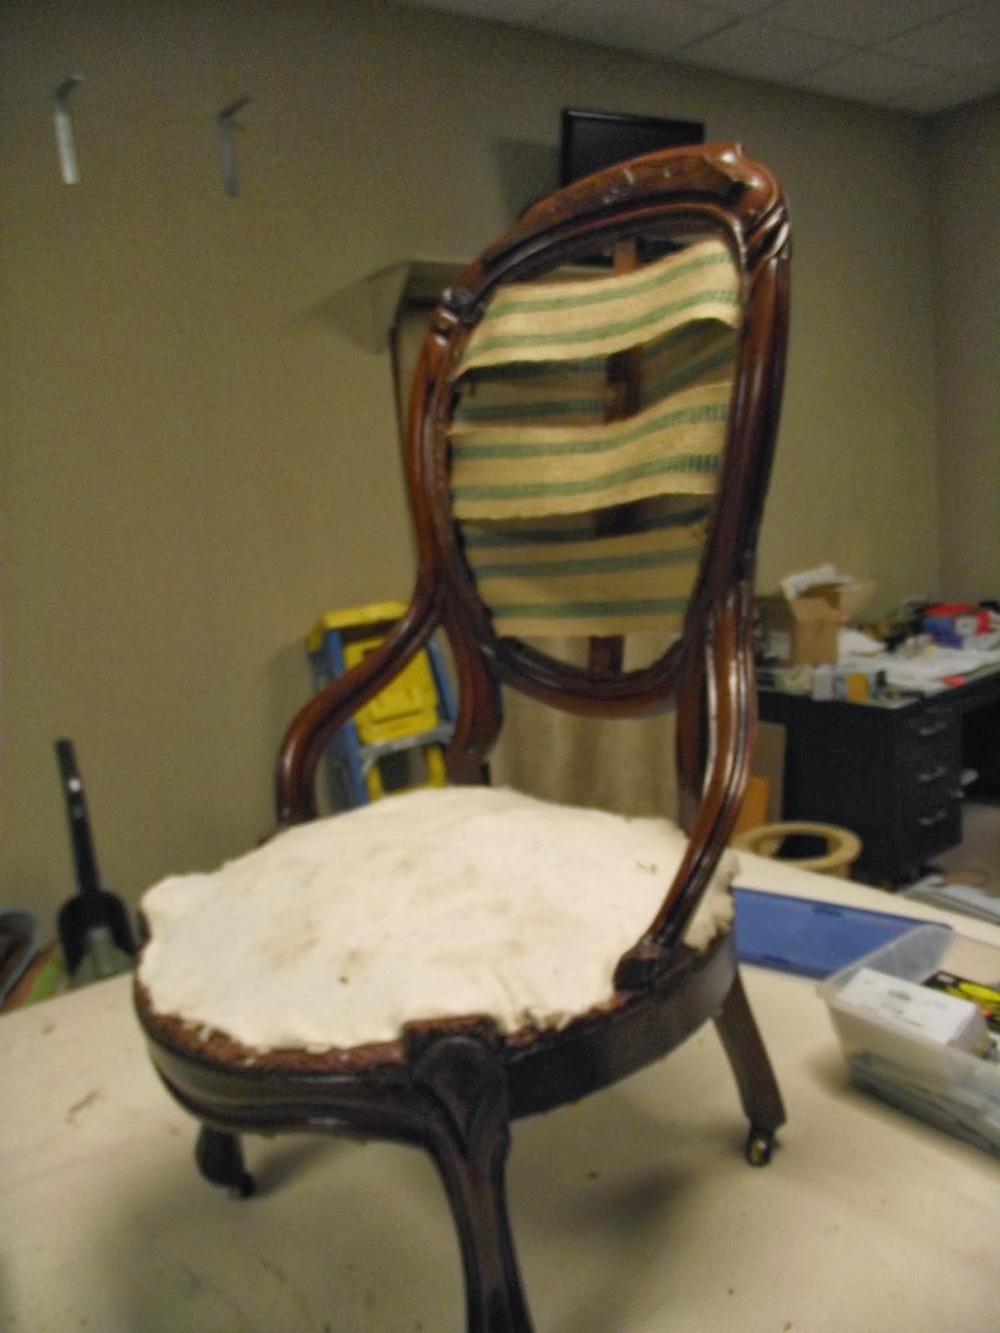
Re-Gluing and Recovering a Victorian Chair
Gantts Decorating

<br>
This is the chair before the work began. It had a loose arm and almost all the joints were loose. There had also been some "finish nail repair". (Never try to repair with finish nails. They don;t hold and damage the wood.

<br>
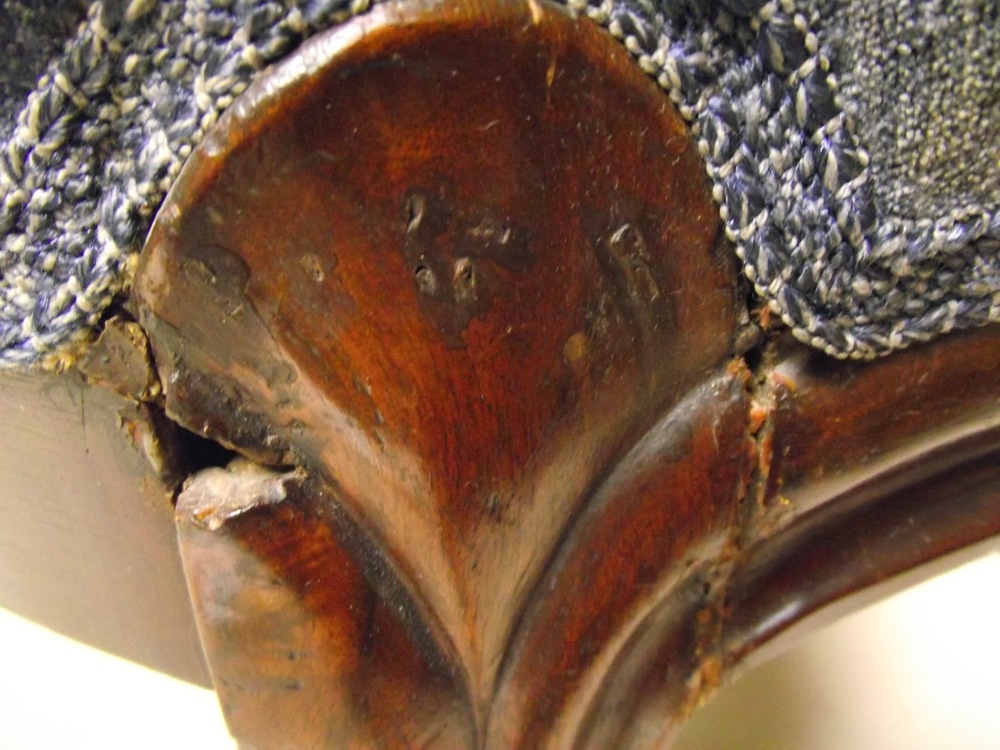
These pictures show how loose and deteriorated the joints
had become. The more fabric I removed the more it seemed
the fabric and webbing was about all that was holding the
chair together.<br>
I started by pulling the fabric loose from the inside
back of the chair. The gimp that had been glued
on the last time it was covered strengthened the edge
of the fabric and allowed most of it to come off along with the tacks. This then exposed the old dusty cotton batting.<br>
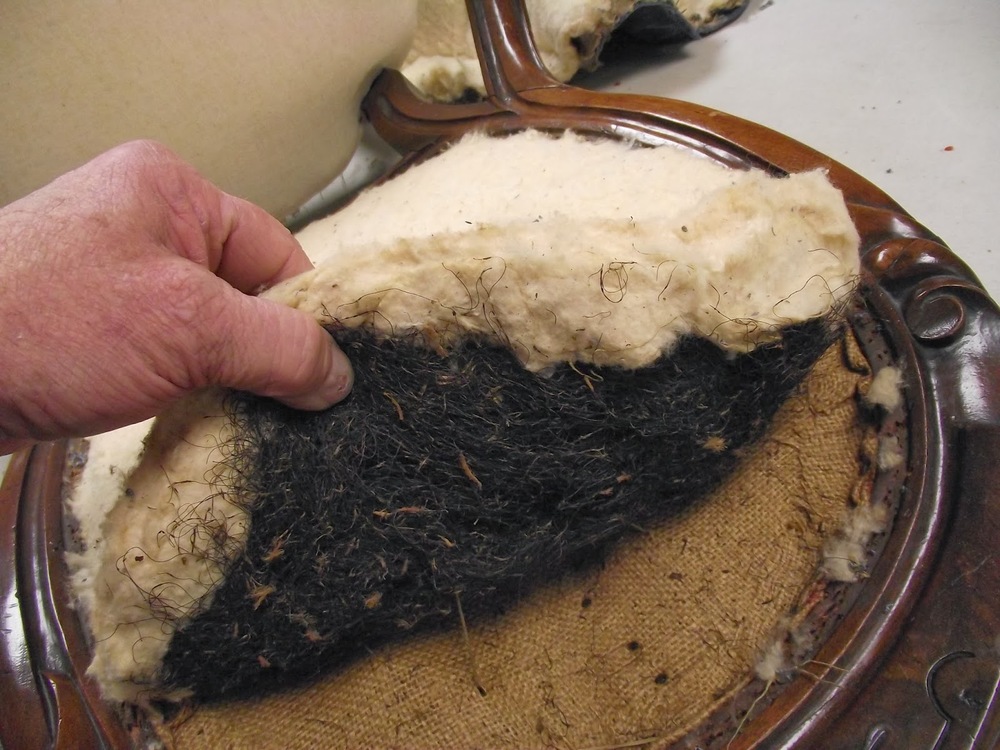
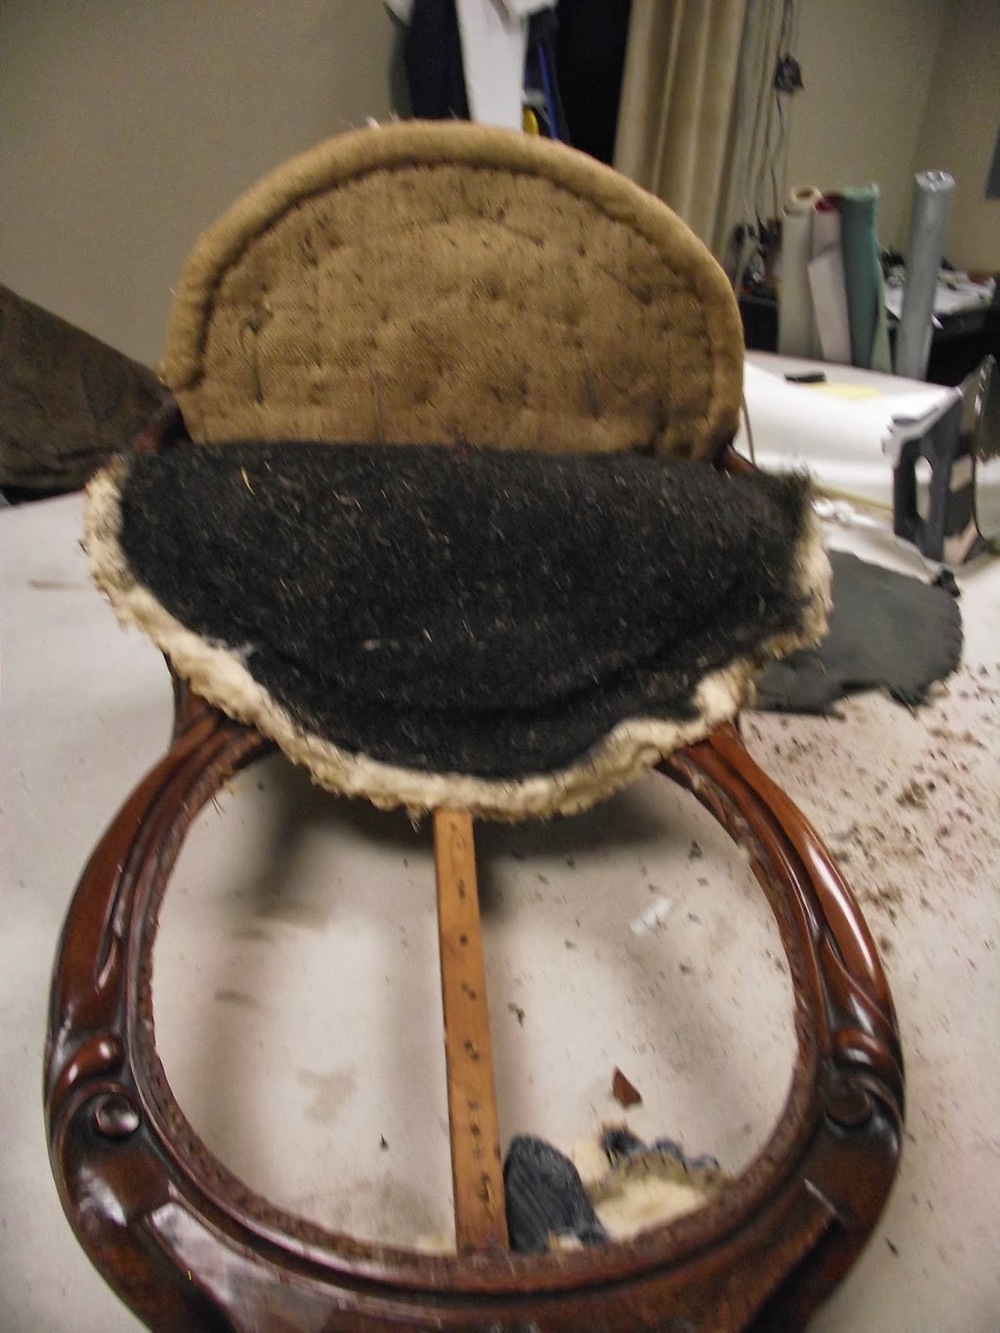
Under the cotton batting is a layer of old dried out horse hair. The horse hair is tacked to the burlap under it.<br>
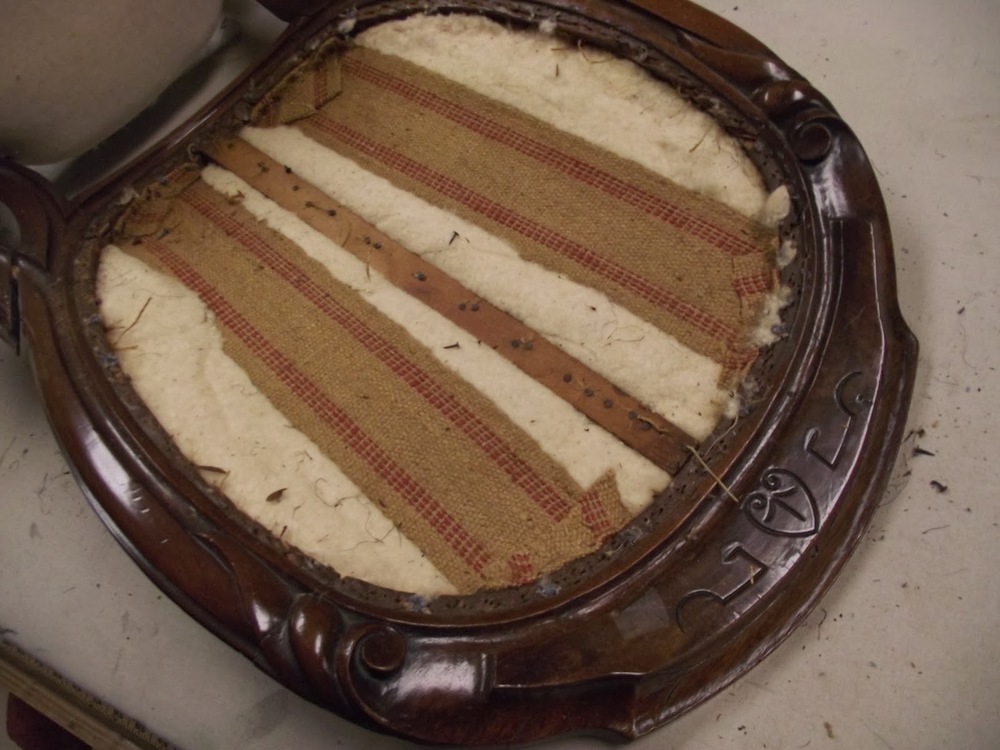
With the cotton and horsehair removed, the burlap is removed revealing a wooden center support, webbing and cotton batting used to pad the back of the chair back.<br>

The webbing must be loosened and all the old tacks pulled out. With all this removed all that is left is the fabric on the back side of the chair back. It is removed and all the old tacks or staples must be removed from the frame. Care must be taken not to damage the part of the frame that will show after it is rebuilt and covered.<br>
An old leg repair shown here is wrapped in duct tape. Surprisingly enough when I removed the tape the repair was sound. Apparently whoever repaired it used the duct tape to hold it in place until the glue dried and never took the tape off.<br>
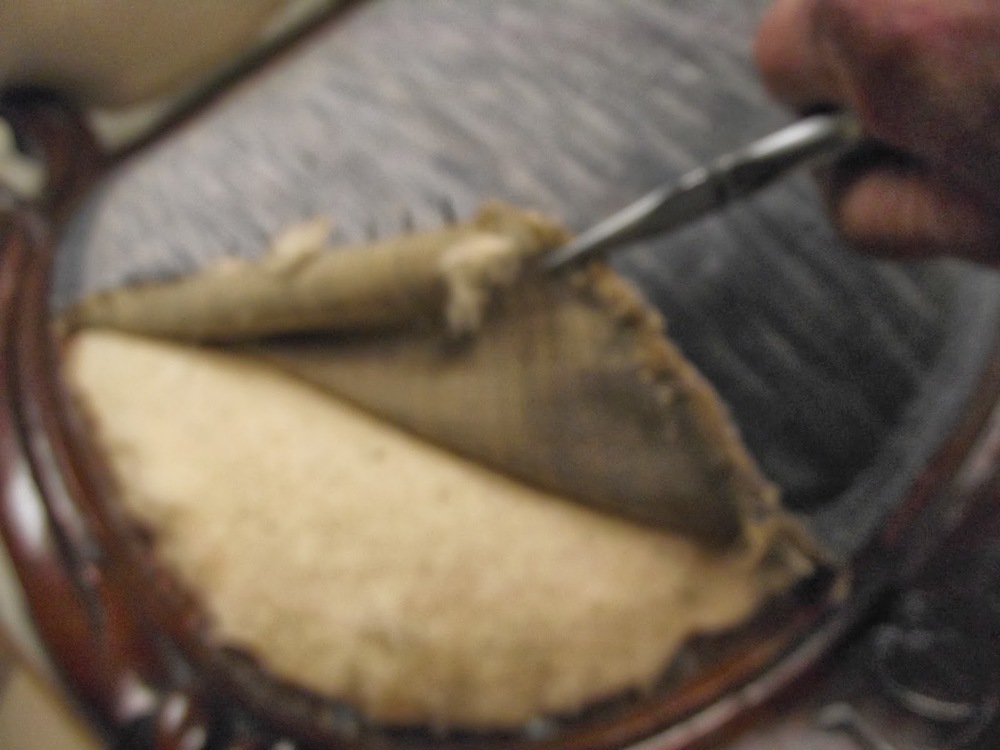
Now it is time to attack the seat. I used needle nosed pliers to pull the gimp and fabric off the frame. This exposed more cotton batting and horsehair. You really should wear a face mask while doing this. This old furniture is a Pandora's box of long forgotten allergens<br>
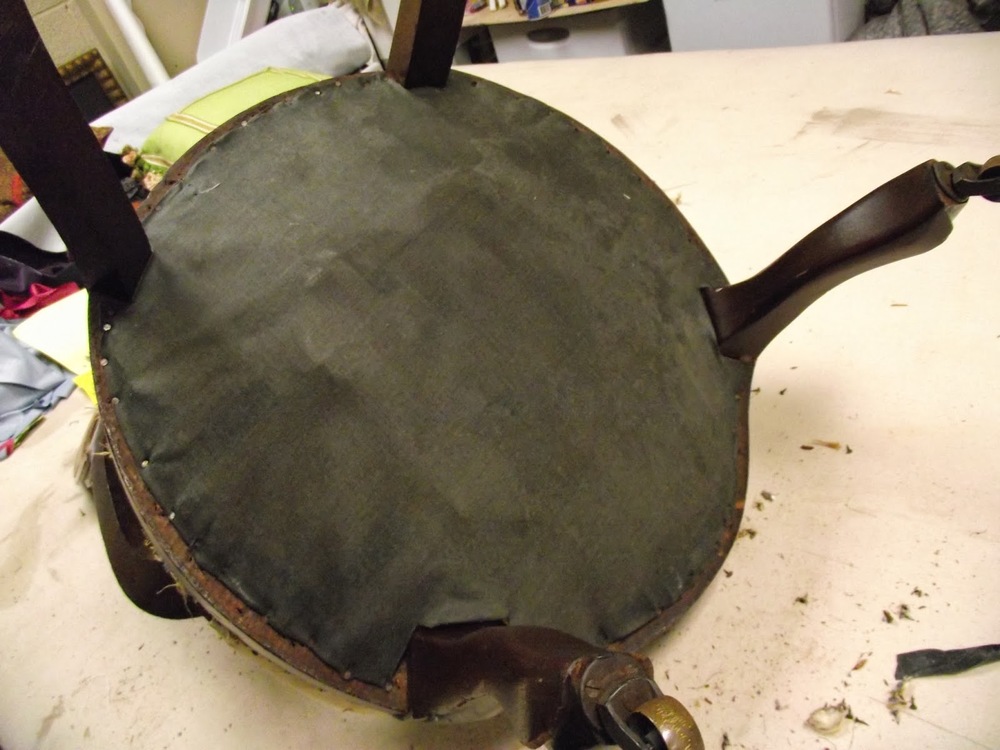
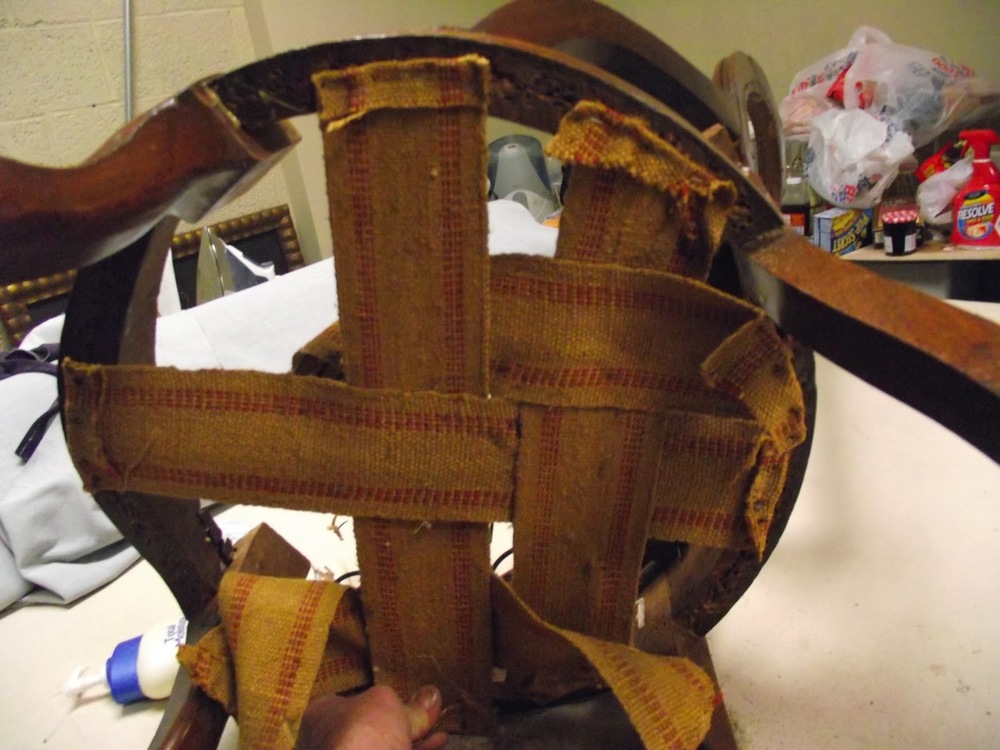
With the seat cover, horse hair and cotton batting removed another layer of burlap appears.<br>
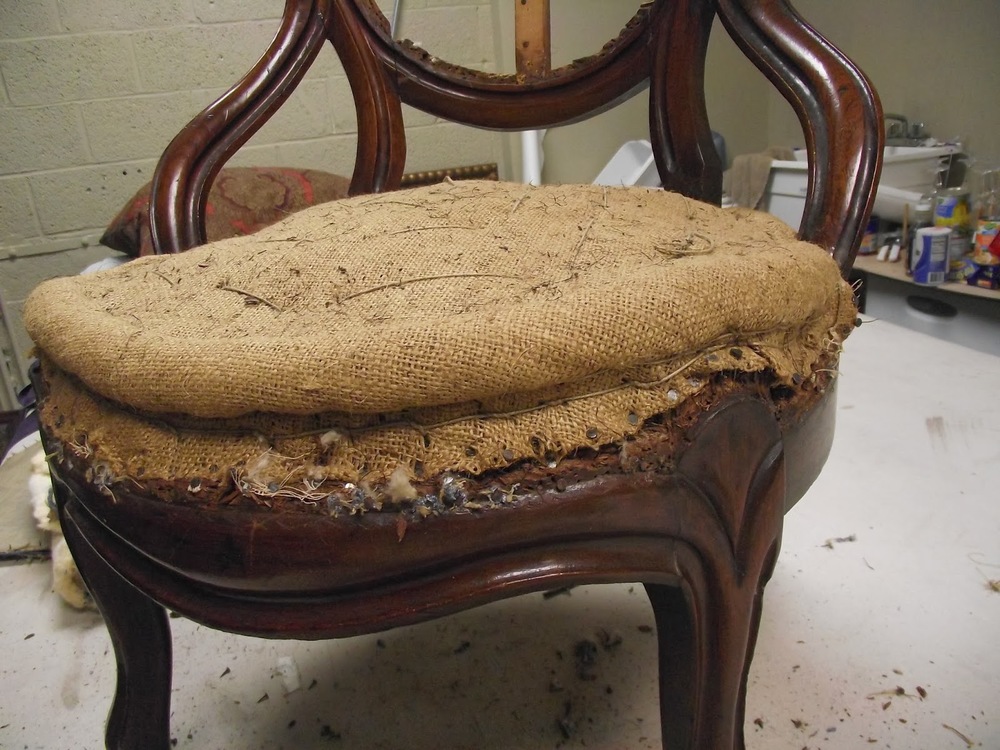
All the furniture tacks or staples must be removed to pull this layer off.
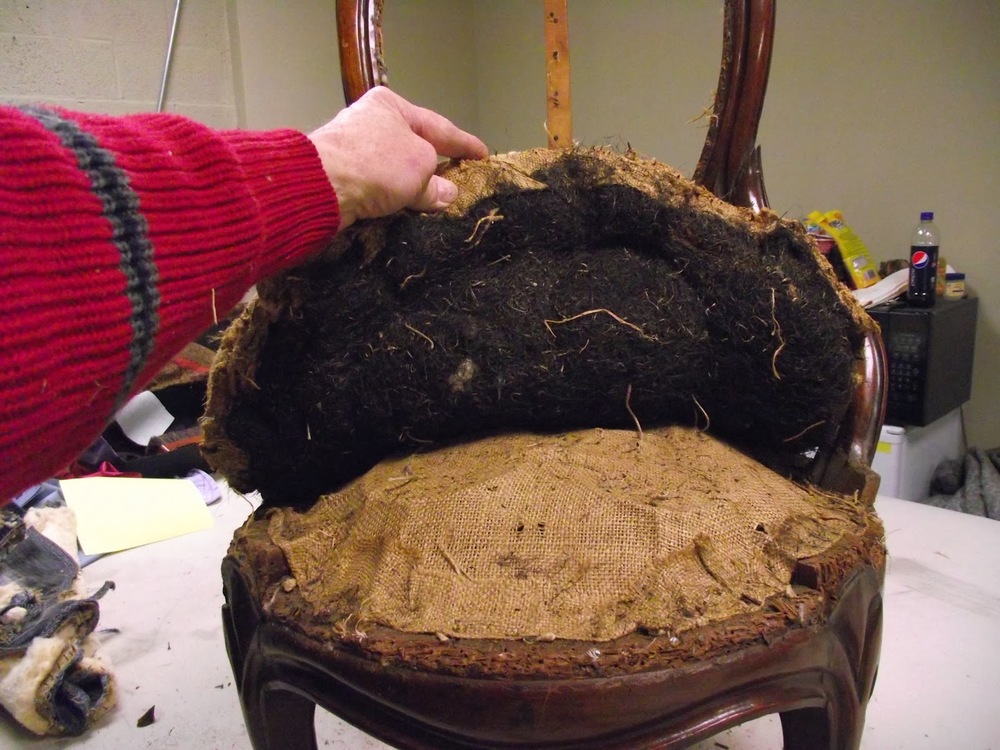
Removing this layer reveals burlap stretched over the top of the springs.>br>

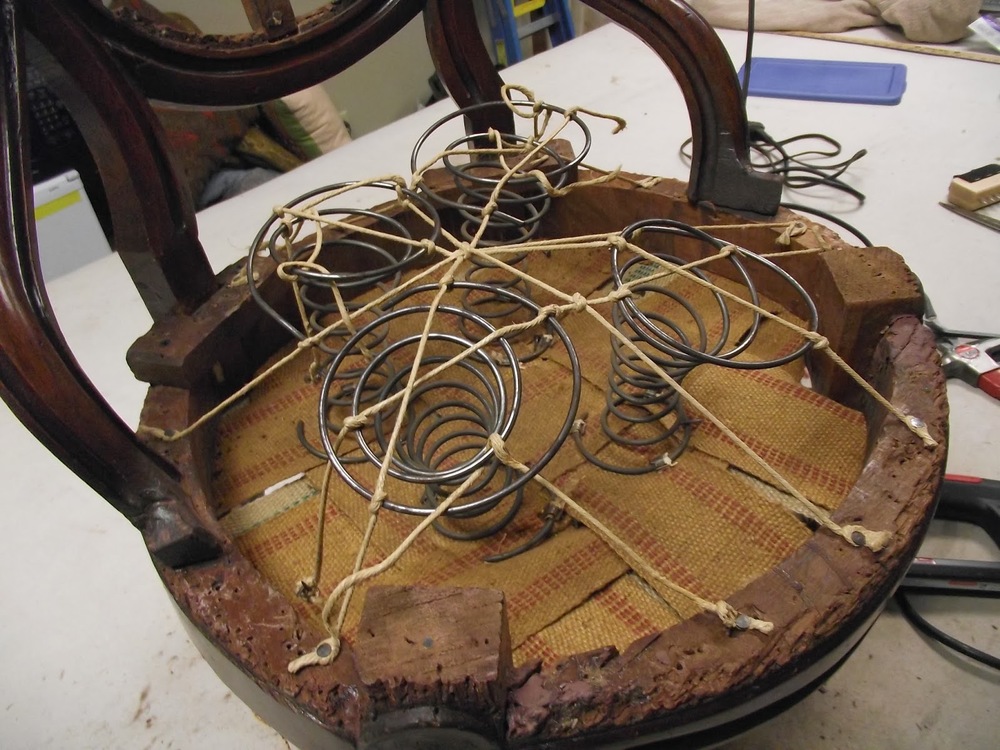
With the springs exposed, be sure to pay close attention to how they are tied. It is a good idea to take a few pictures for future reference. If the frame is sound, often the springs are retied tighter and not removed. At this point of the project it was obvious that the chair was being held together as much by the webbing and fabric as it was by joints, So the springs had to be removed. I loosened the old cord from the frame, but left it on the springs to be a guide when it was time to put them back.<br>
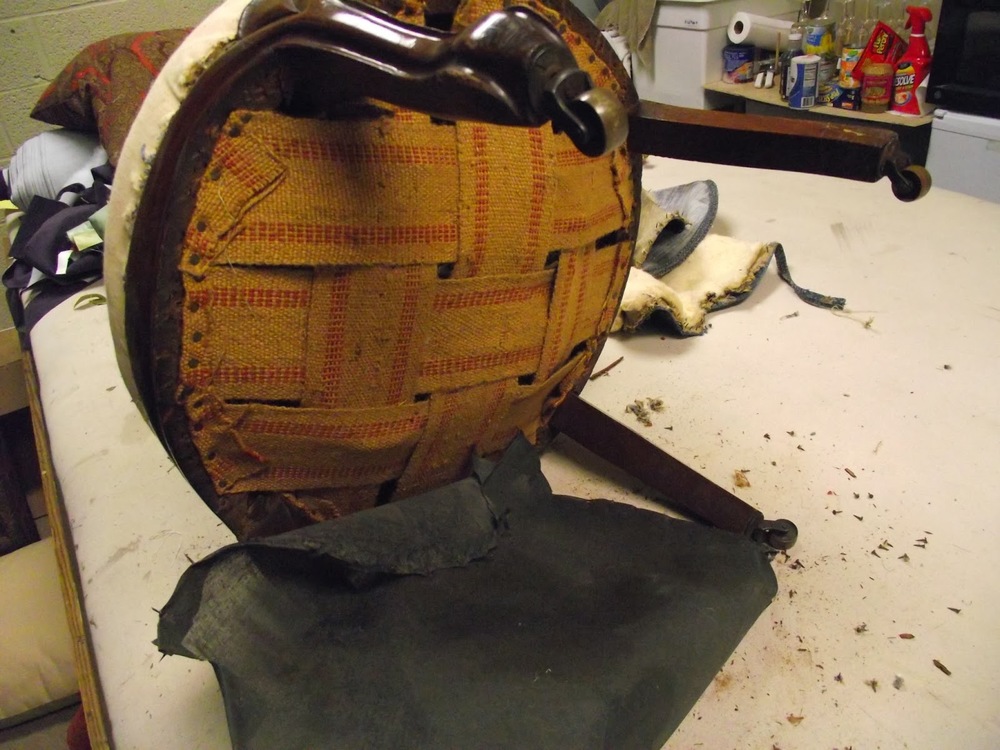
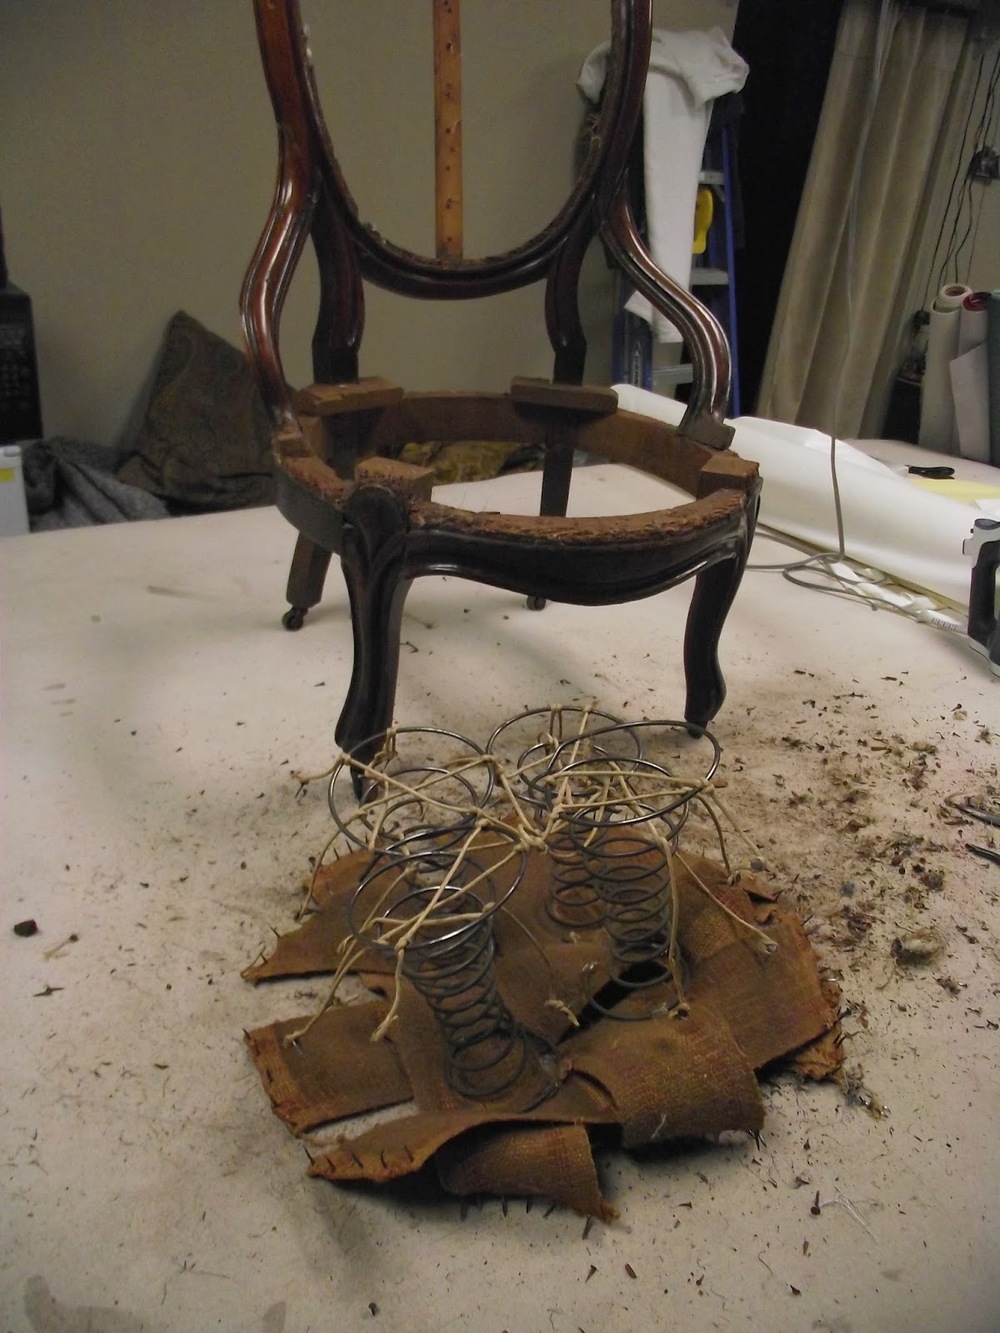
The chair is turned bottom up, tacks are removed. This then exposes the webbing to which the springs are attached. Since I do not have the necessary tool to attach the springs to webbing. I took the old webbing off the frame and left the springs attached to it.<br>

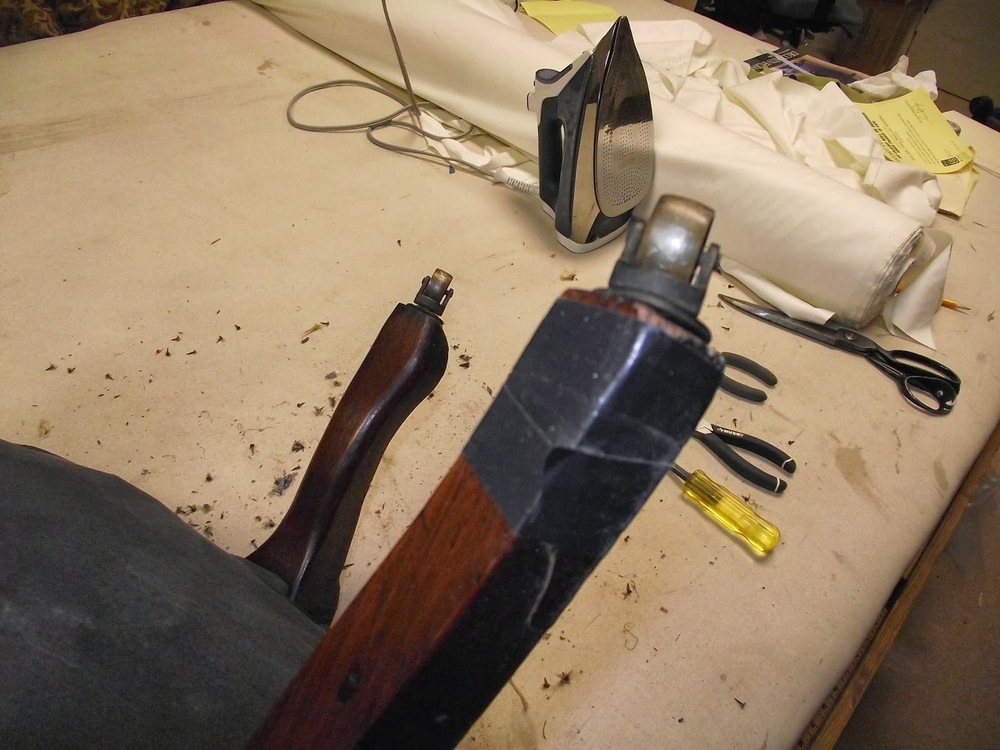
Now with a rubber mallet, it is time to dissemble the frame.


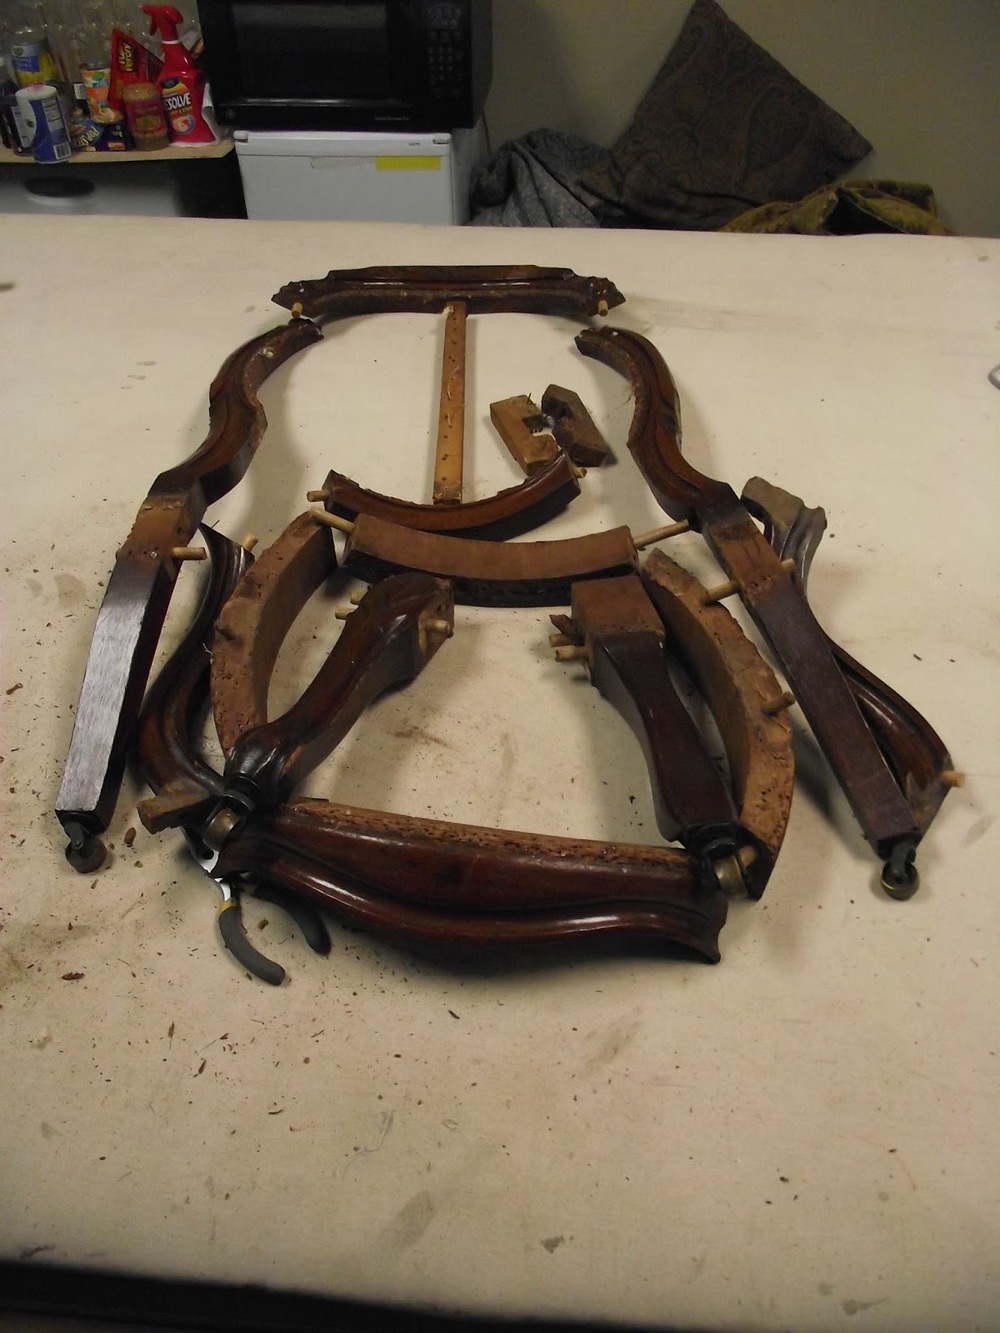
Carefully piece by piece, joint by joint the frame is taken apart. Every joint in this chair needed to be taken apart and old glue sanded off and removed from the holes and re glued. If you have any joints that are sound do not take them apart. Trying to loosen sound joints can cause breaks in the frame. In this case as you can see there were absolutely no solid joints.<br>

Reassembly
is like putting a puzzle together. Once all the joints have been cleaned of old glue it is time to re glue and reassemble.
There may be specialty clamps I don't know about for curved pieces, but regular clamps are difficult to get placed to hold the joints in the proper position.
As you can see I resorted to using strong cord and pulling the parts tightly together with tourniquets. Be sure the part you are gluing can be fit together with the other parts before letting the glue set.<br>


The back pieces were glued and dried overnight.
Now I am able to use regular clamps to attach the back assembly to the seat and front leg assembly.<br>
The old webbing with the springs still attached is stapled to the bottom of the frame. Because it has sagged over the years and because I can't stretch it, I reinforce the seat using new webbing. This webbing I can pull extremely tight and do. <br>

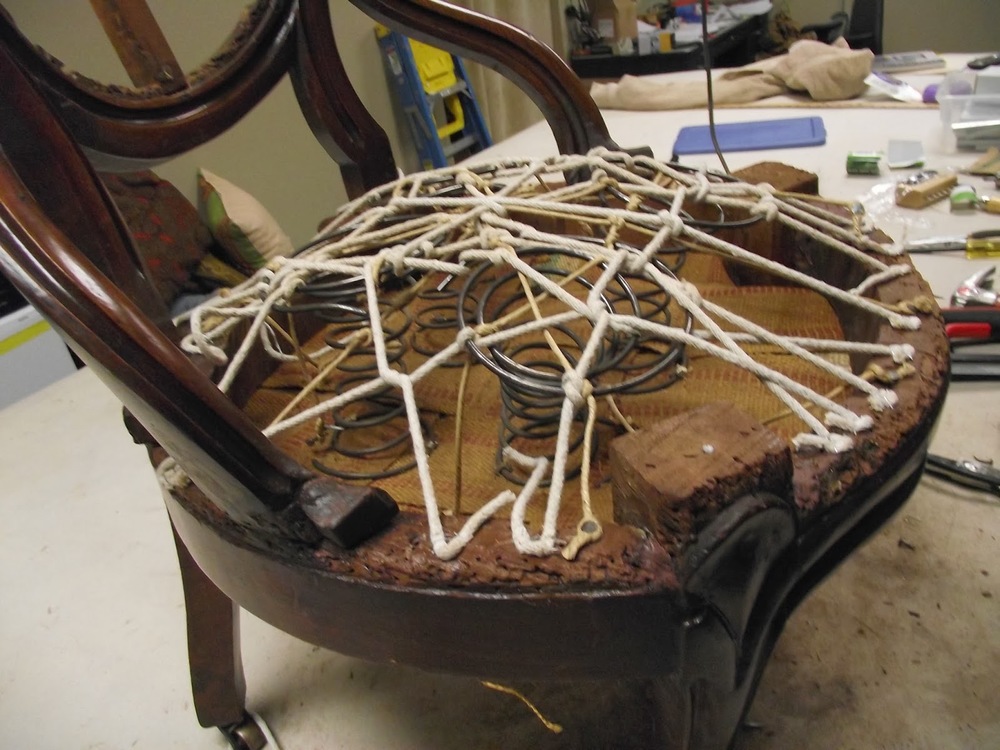
The old ties are attached to the frame as close to the way they were as I can get them. Now the springs are re tied with new cord, leveled an tightened.<br>
Heavy flannel is pulled tight and attached over the springs.<br>
Next webbing is attached to the front and back of the back. I elected to
put it horizontally to bridge the vertical wooden back support. <br>


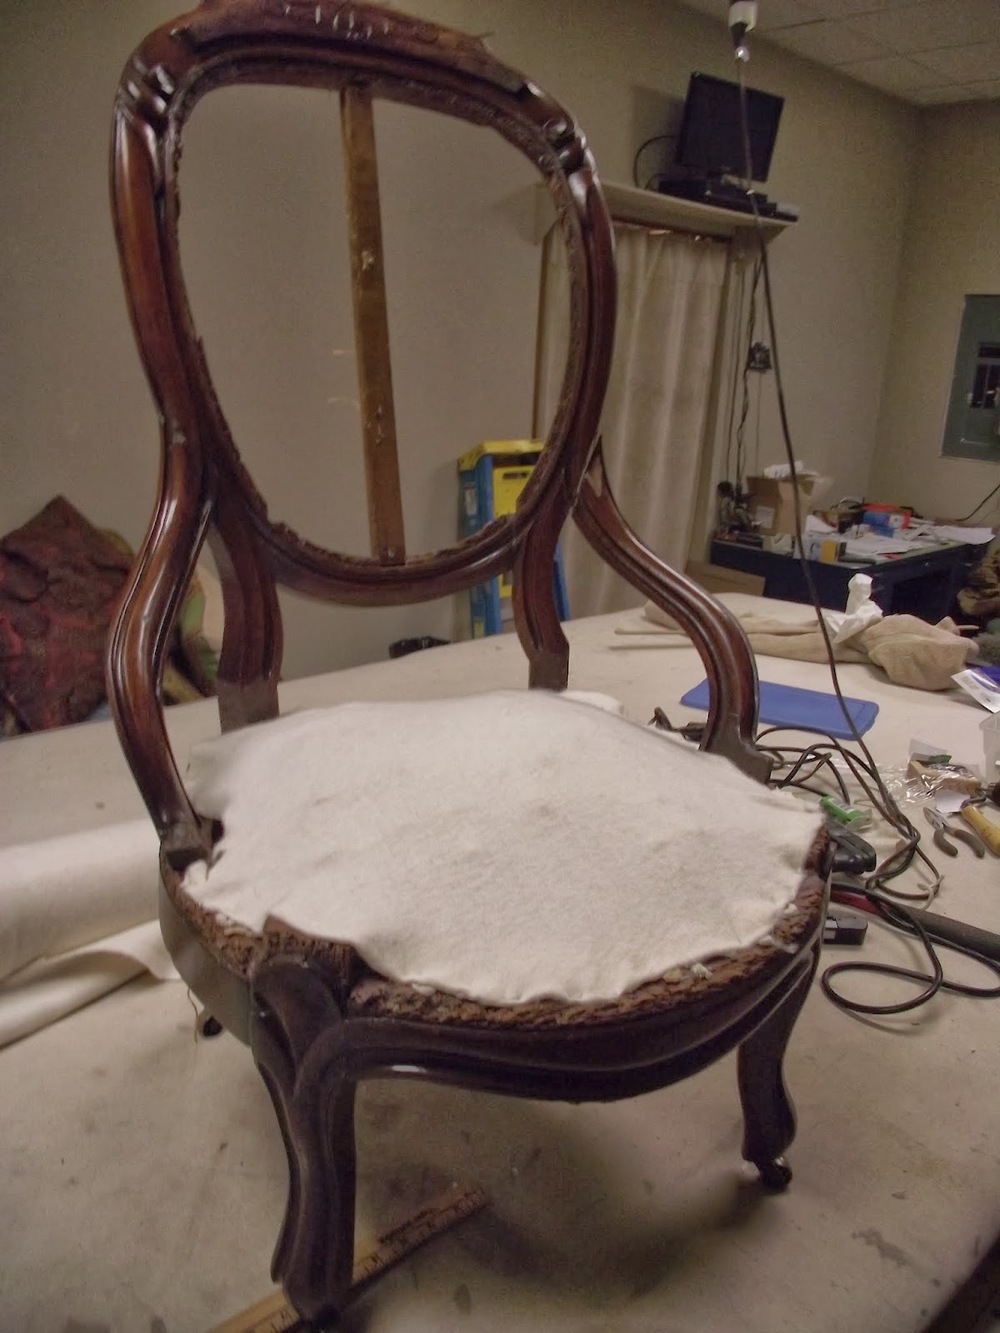
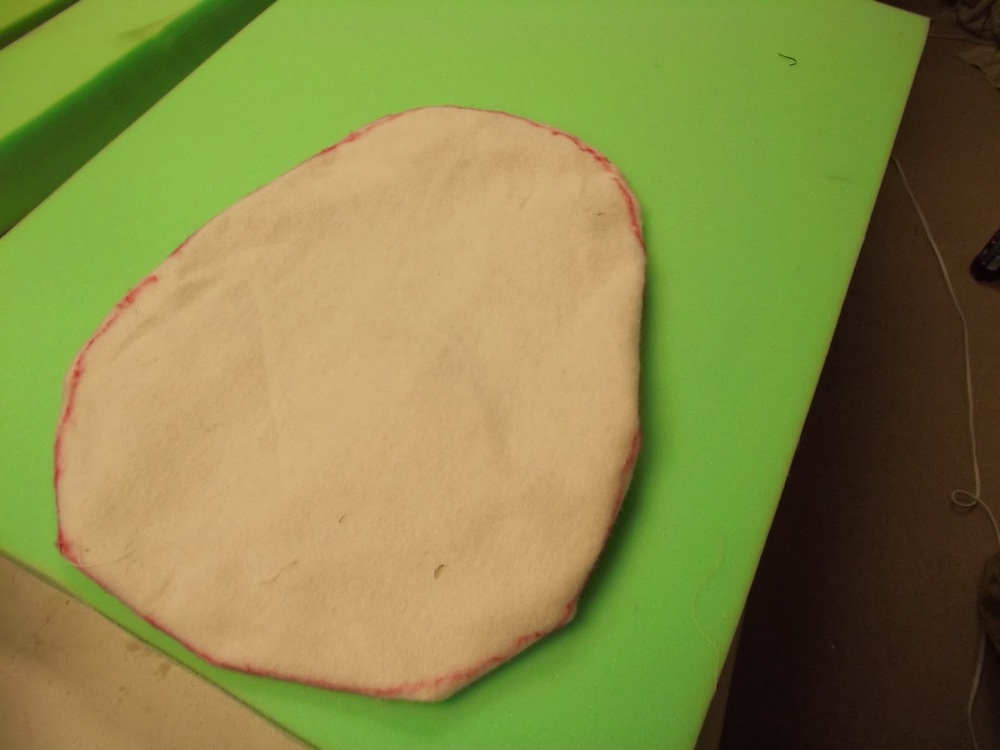
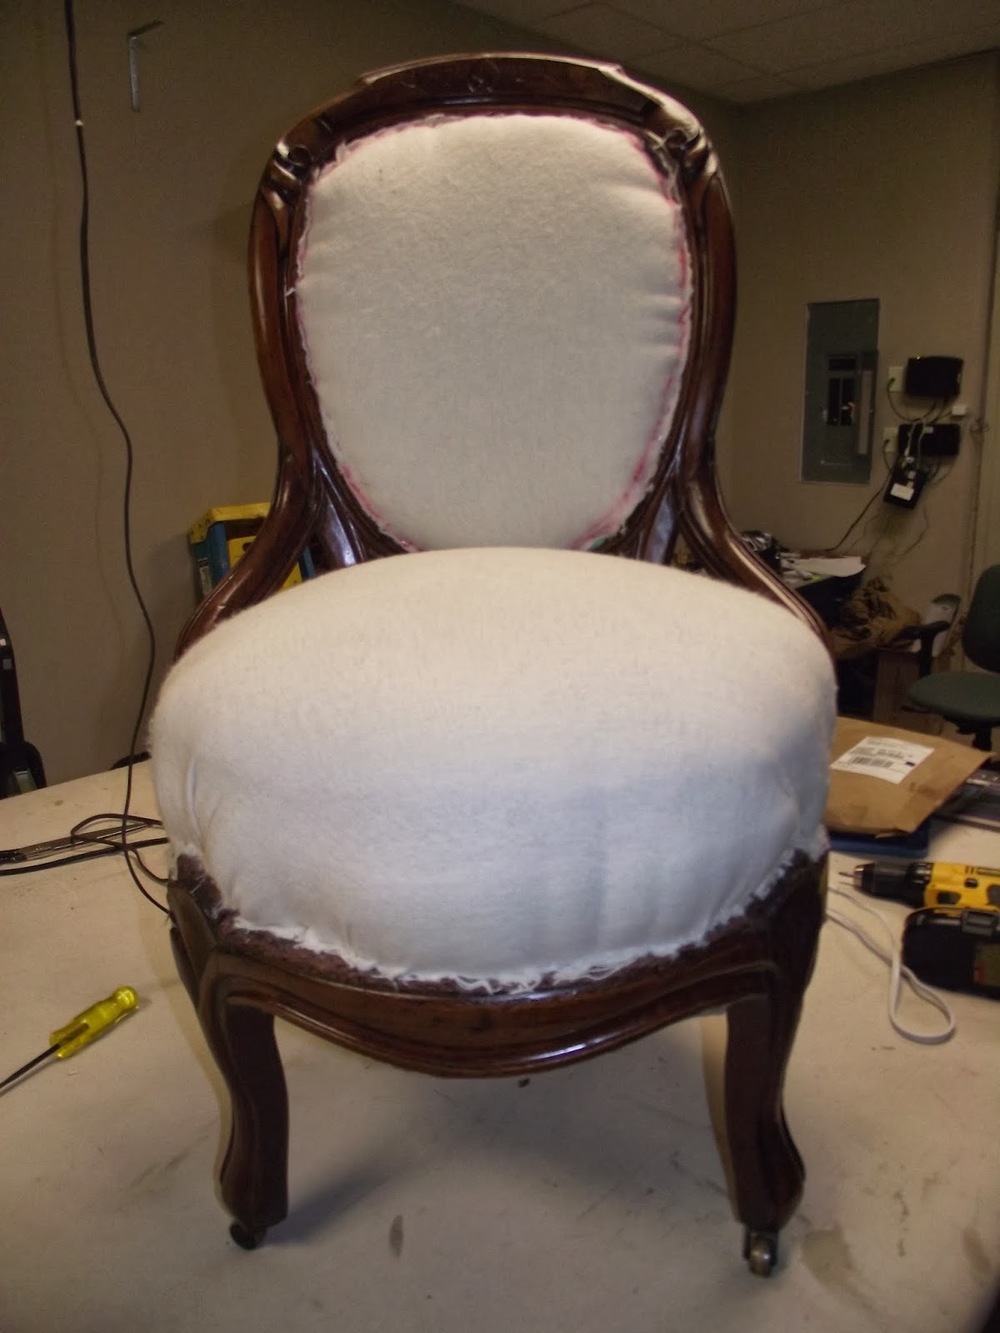
Heavy flannel is laid in the depression of the front of the back where the foam sill go. It is marked with a marker. The edges are turned under rather than cut off and it is used as a pattern to mark the two inch foam.<br>
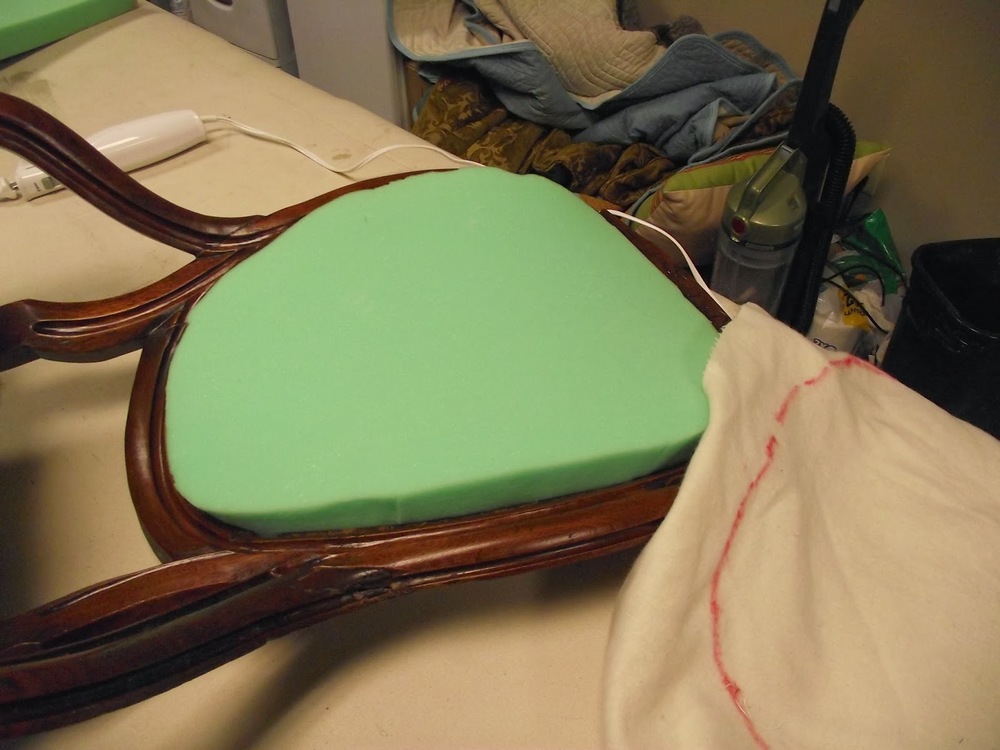
The pattern is positioned on the foam. The shape is ,marked on the foam. Using an electric carving knife, cut the back foam to shape.<br>
The foam is placed in the recess on top of the webbing and the flannel pattern edges are unfolded and is stapled over the foam.<br>


Using 1" foam the same method is used to pad the back side of the chair .<br>
To make a pattern for the seat, flannel is laid over the springs and thumb tacked into place, marked cut and used as a pattern to cut the 3" medium density foam. Don't forget when you make any pattern to fold it double and trim so both sides are the same. As you can see in the photo, the foam is marked and cut where it will have to fit around arms and legs. After the seat foam is cut, staple the flannel pattern on the seat to cover the retied springs.<br>

Next using brute force, patience and persistence, work the foam into position on the seat above the springs.<br>

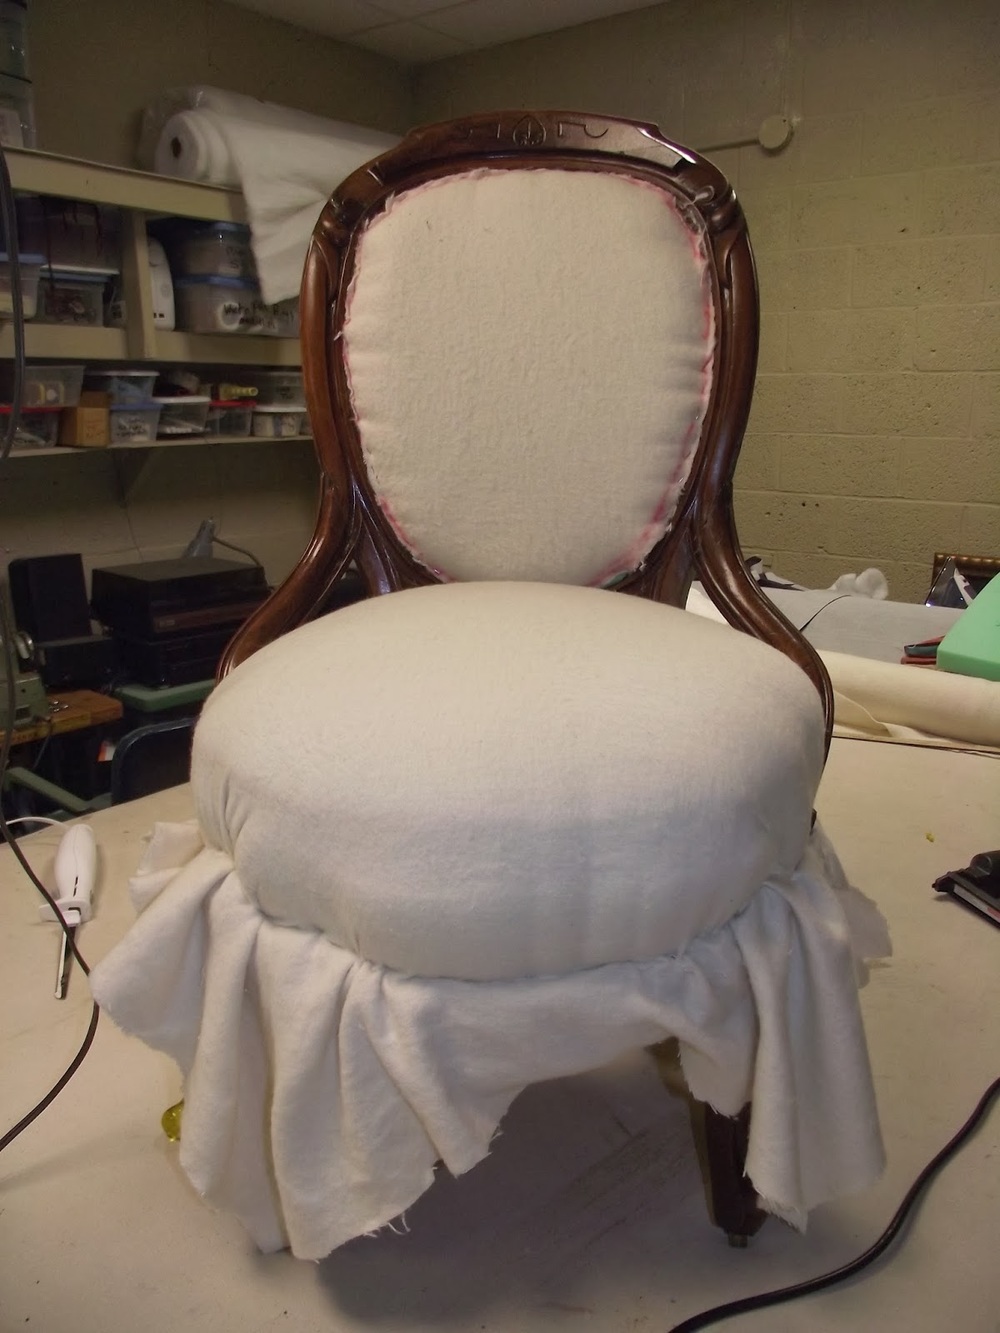
In order to get the seat to a comfortable height, I elected to use two pieces of 4" medium density foam. A large piece of heavy flannel is used to shape and hold the foam seat in place.<br>
Once satisfied that the shape and height is as I want it, the excess flannel is cut off using a single edge razor blade.<br>

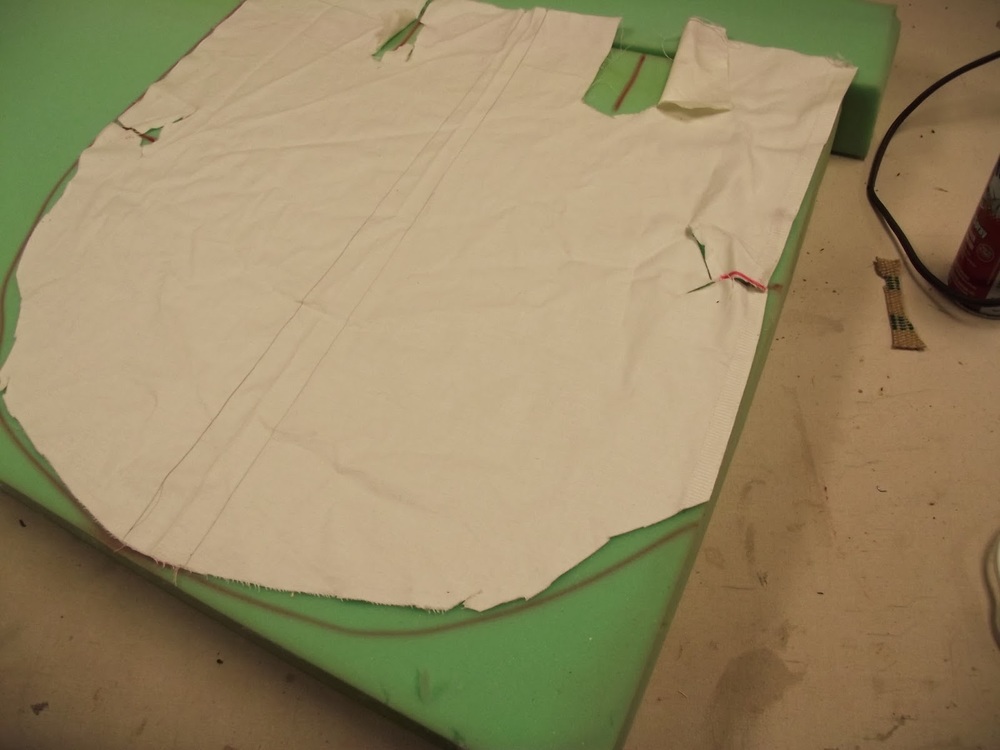
Since we could not find a stripe with the colors we wanted I elected to make my own. This gave me the unique opportunity to sculpt the stripe to conform to the shape of the chair (See blog on making your own stripe). <br>
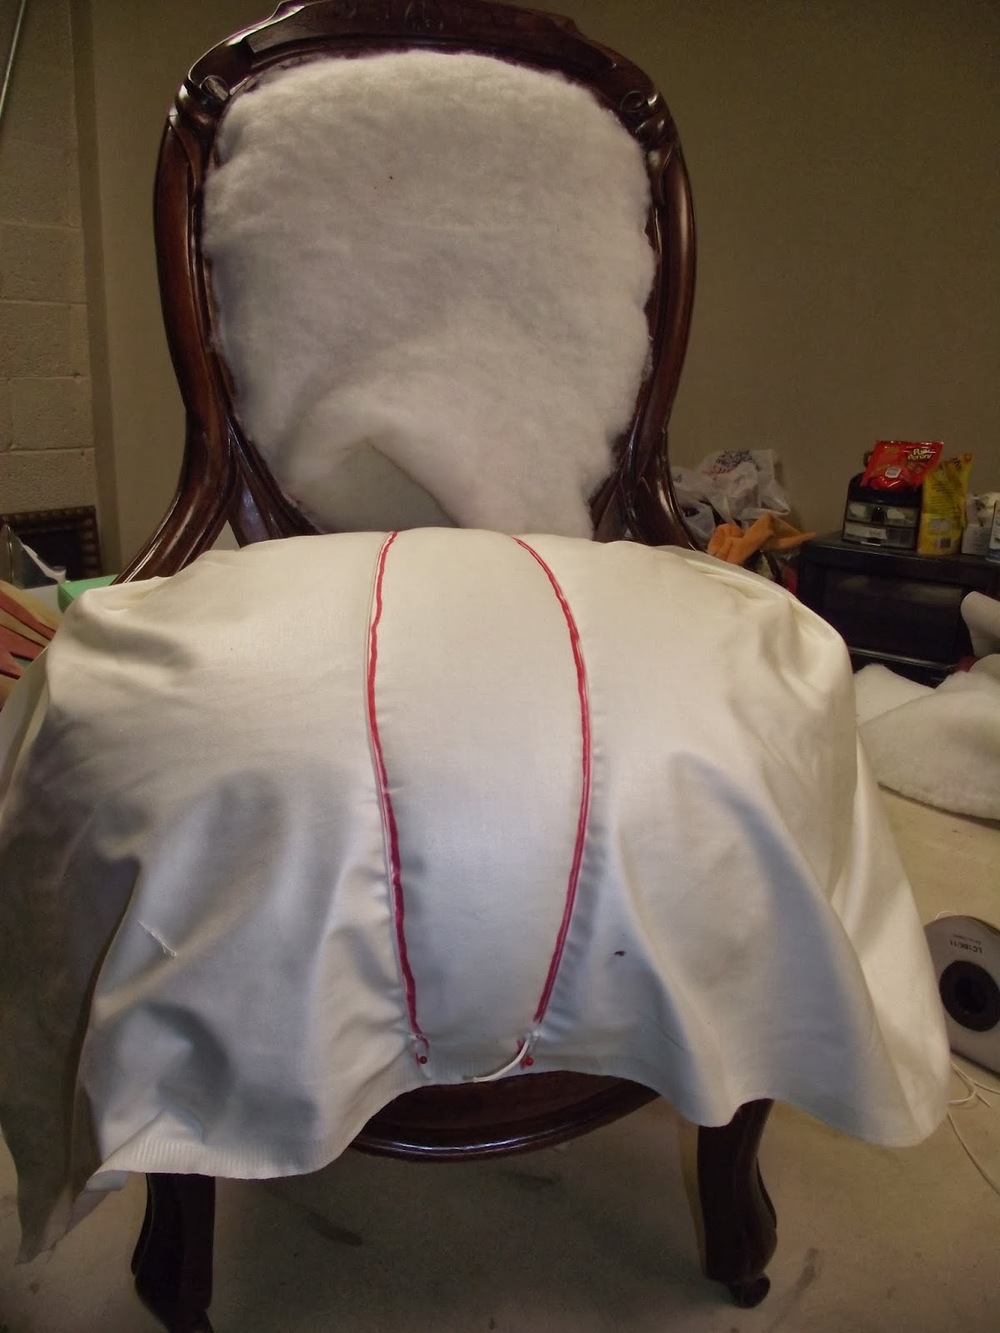
The stripe for both sides of the back were made as shown in the photo above. To make the seat stripe conform to the shape of the seat a piece of lining was pinned over the chair. Then two pieces of string were run from back to front. The strings are farther apart where the seat is wider. Lines are drawn on the lining and this shape is the shape all of the different color pieces of fabric are cut.<br>

Here you see the fabrics aligned and stapled to the frame.
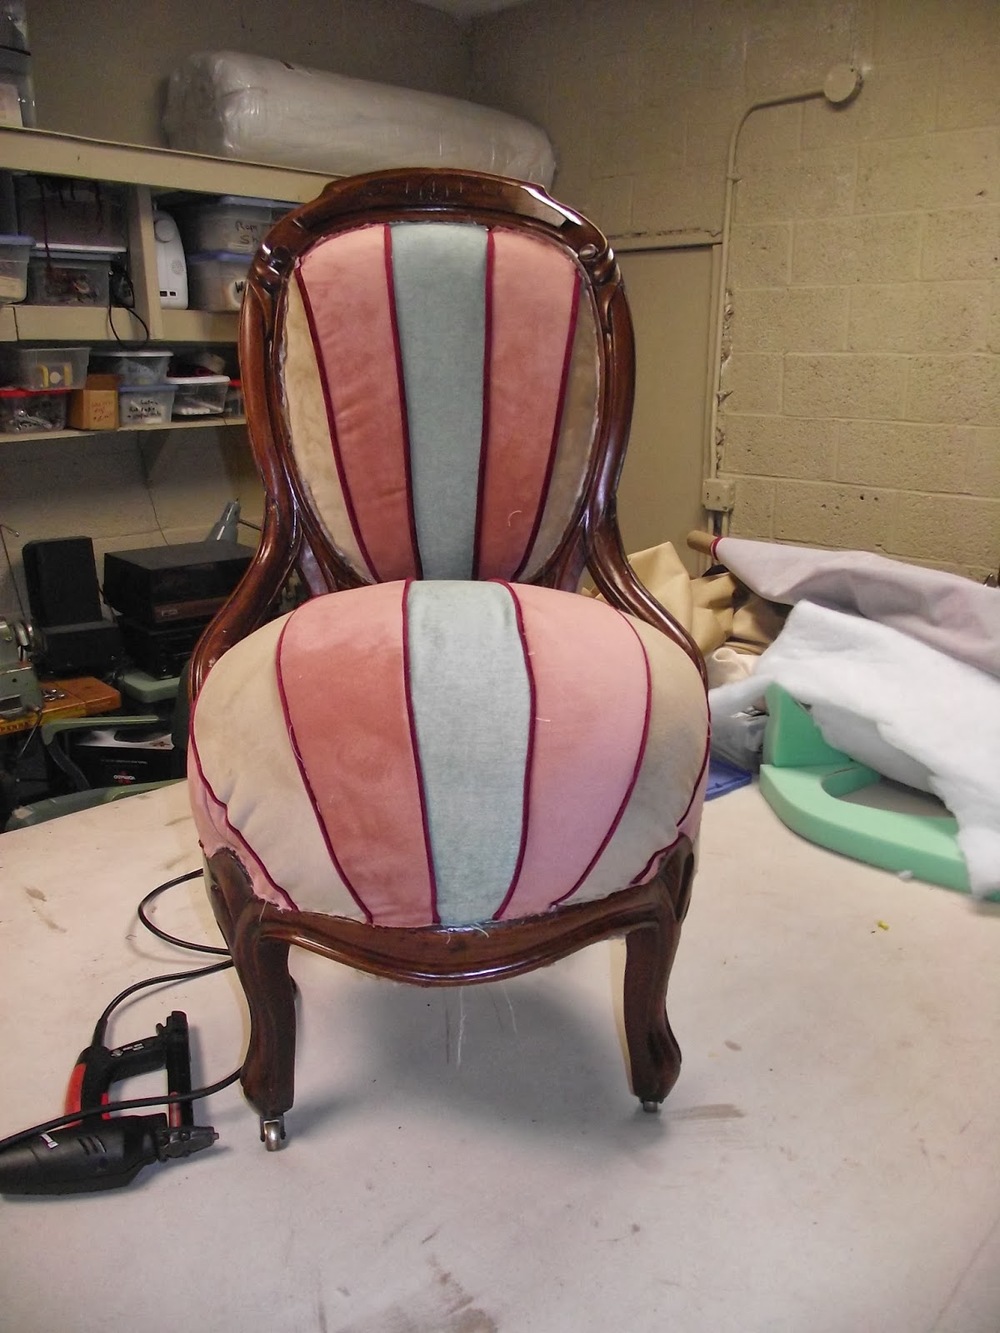
Once satisfied with the shape and stripe placement, the excess covering is removed with a single edged razor blade.<br>
The last step is to make a double welt and staple and glue it to finish the edges.<br>
I also made and covered a round ottoman to go with the chair. Instructions "
How to make a round ottoman"
will be shown in the next blog.

My client was delighted with this interesting treatment of her chair.
I hope you found this useful . Please let me know what you think or share any questions you may have.
Bill Gantt
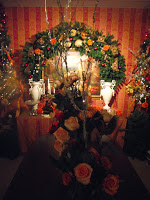
Flowers from Christmas to Valentines
 |
| Flowers for Christmas table arrangement-br- |
If you have fresh roses for your Christmas table, you can re purpose them. If they are in an arrangement it is impossible to fresh cut stems to prolong them. You can, however leave them dry in the arrangement. Once dry simply cut the blooms off and re use. It's amazing how much better a dried rose looks without the stem. You can do the typical things make sachets, add them to potpourri or put them in a bowl. If you have any cherubs around you can also use them for valentines day.-br-
INTERIOR DECORATOR INTERIOR DESIGNER

-br-
Arrange them around the base of your cherub or centerpiece and your ready to go.-br-

Happy Valentines Day in advance,
Bill Gantt
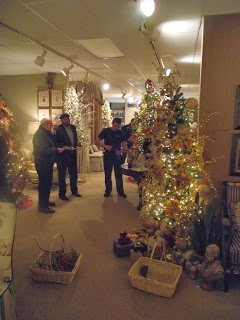
2013 Christmas at Gantt's Decorating
Welcome to Gantt's Decorating at my new location, 829 State St. Lemoyne, Pa 17043 Suite 3004.<br>
This is a collection of pictures of the studio ready for Christmas and some of the Open House and Grand Opening December 7 and 8.
INTERIOR DECORATOR INTERIOR DESIGNER
<br>
<br>
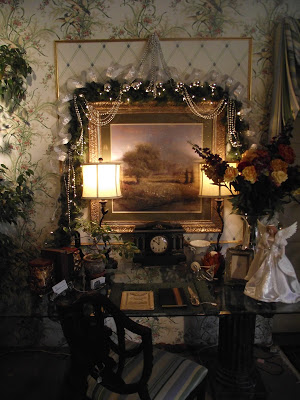
 |
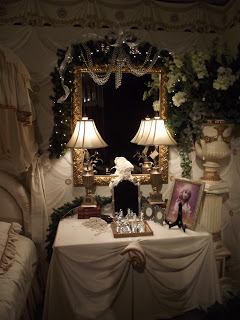
| Foyer table skirted with a silk plaid fabric is against an eggplant wall and continues the peacock color theme. |
<br>
 |
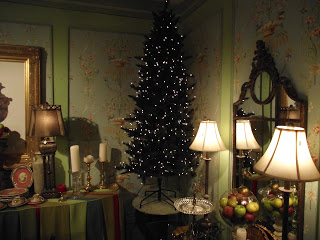
| 1/2 upside down tree inside door continues purple theme<br> |
 |
| Color theme is continued on opposite side of the door<br> |
 |
| <br> |
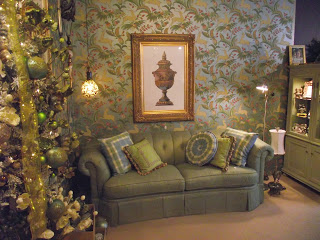 |
| Room set features Ronald Reading paper, a silk covered sofa and a pull down inspired light by Luna Bella<br> |
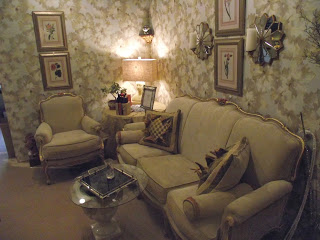 |
| Monochromatic room set features custom build furniture by Bill Gantt, imported English wallpaper by Carl Robinson and my original designed "explosion pillows" with woven silk strip center<br>. |
 |
| Another big year for polar bears<br > |
 |
| <br> |
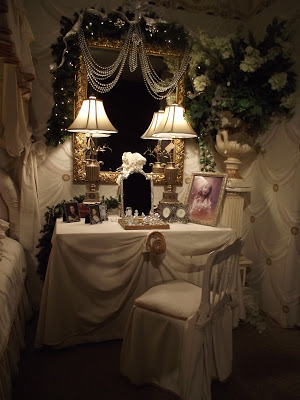
 |
| Silver on white is always right!<br> |
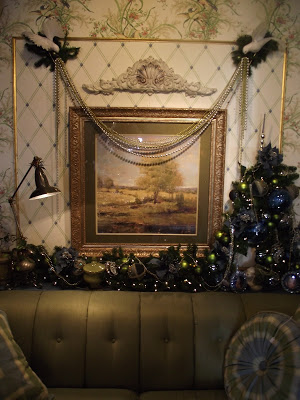
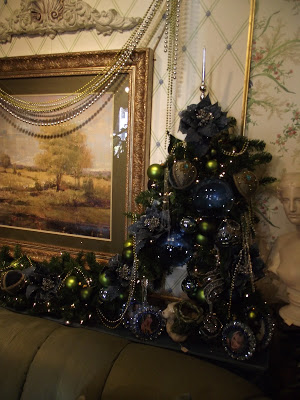
 |
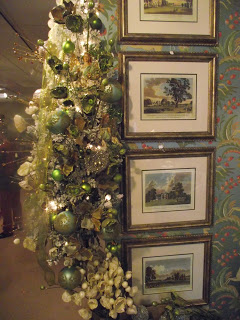
| One tree decorated for two spaces . Green ribbon starts aqua decorations<b> |
 |
| Iced white poppies<br> |
 |
| <br> |
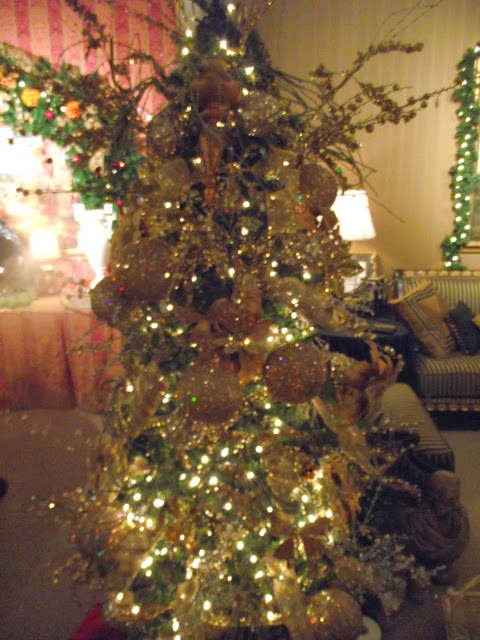 |
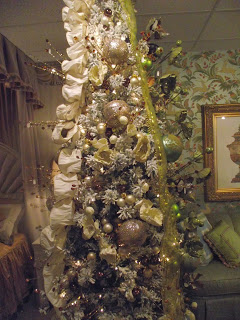
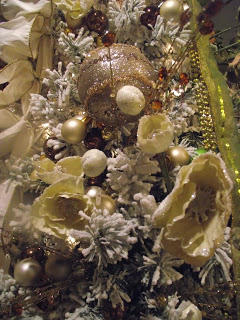
| Gold is always good!<br> |
 |
| chartreuse and green with white polar bears<br< |
 |
| Zachariah Mitchell mugs for the camera<br> |
 |
<b> |
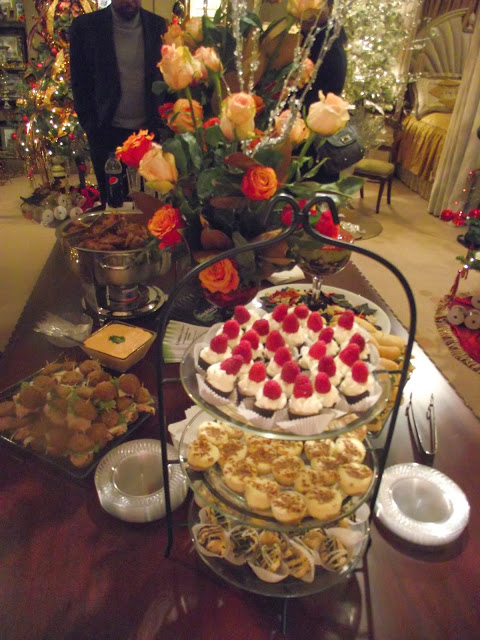 |
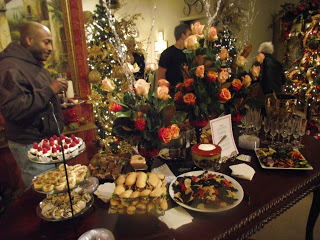
| Incredible food by Sophia's on Market and on Walden Incredible service by Gerad<br> |
 |
<br>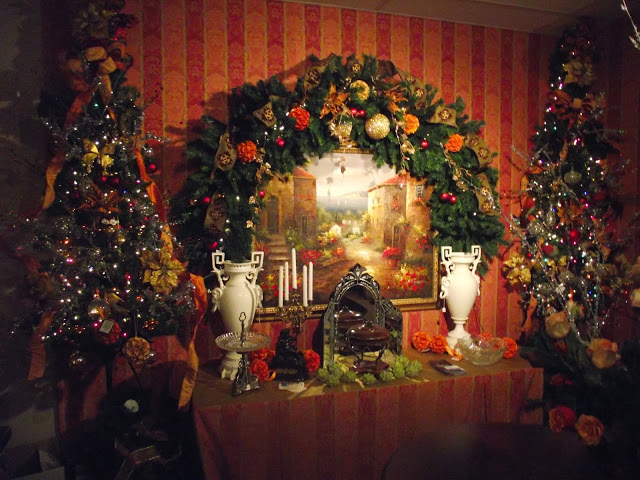 |
 |
| <br> |
 |
| <br> |
 |
| <br> |
 |
| <br> |
 |
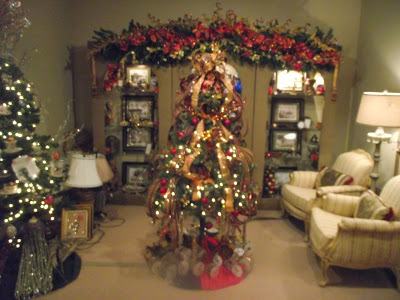
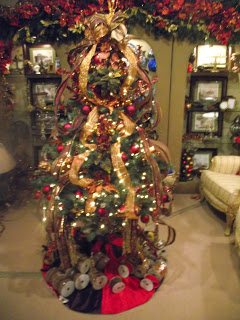
| Tree decorated with 4 types of ribbon brown copper and burgundy<br> |
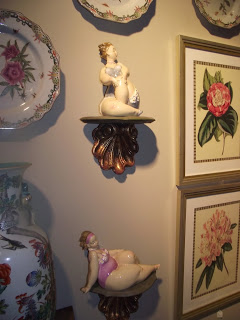
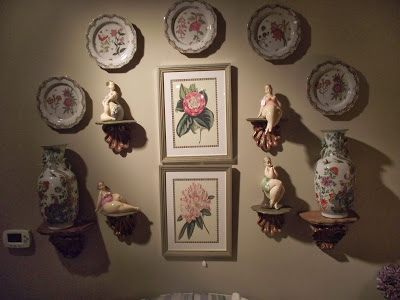 |
| At Gantt's I put all women on pedestals, even those with generous derrieres.<br> |
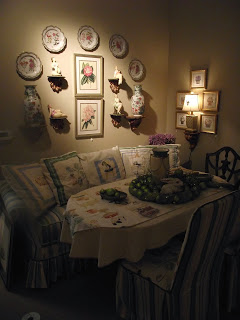 |
| Banquette.<br> |
 |
| <br> |
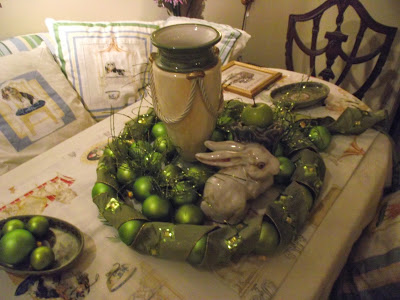 |
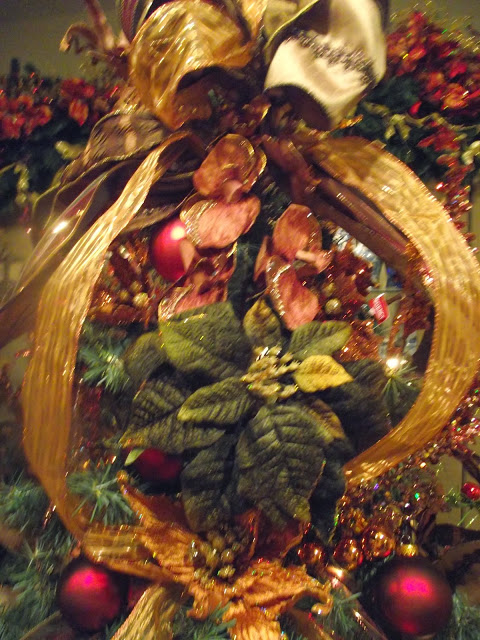
| Ribbon is simply rolled with glass balls inserted.<br> |
 |
| <br> |
 |
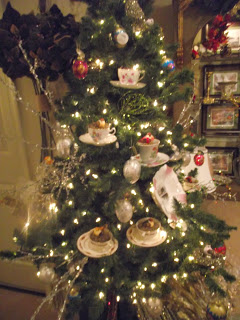
| A favorite for at least 15 years, the Tea Cup Tree.<br> |
Happy Holidays!!
Bill Gantt
How to make Gantt Explosion Pillows and Woven Fabric Pillows

For me throw pillows are the finish to the job. They offer me an exceptional opportunity to put my creativity and imagination to work. Throw pillows are a way for me to gather all the fabrics used in the room into one place. They put the stamp on my work that says, This is a custom design." <br>
INTERIOR DECORATOR INTERIOR DESIGNER
About three years ago I was preparing a room set for my showwindow. It included three colors of silk and a velvet. I cast about in my mind for a way to bring all these things into an interesting pillow design. On my short drive to the studio I thought about some sort of mitering, and it came to me. I would do a pillow only mitered part way to the center, contrast line the triangles and pull them back. Cover the center with another fabric put a big button in the center and smaller buttons to hold the flaps back. When my Peacock colored pillow was done it reminded me somewhat of an explosion in the center, hence "explosion pillow." <br>
I have done them for one client and a decorator showhouse bedroom pillow sham. I was not totally satisfied with the look though. After the name, I wanted it to look even more realistic. With that in mind I worked waiting for an opportunity to take it to the next level. <br>
 As I am preparing to move into my new studio, new room sets need to be prepared. Having selected an English Floral paper to go with with a light sofa, I first decided to work on another idea I had been tossing around in my head. I wanted to cut fabric into strips and make a woven checkerboard pattern. To soften the checker board I planned to overlay it with a soft curvy pattern. <br>
Two silks and a velvet that represented the colors of the paper were selected. <br>
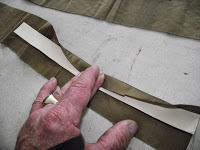 Three inch strips were cut in order to make 1" finished strips.<b>
To make it easier to get crisp accurate strips I cut a double thickness of file folder 1" wide and used it to hold the fabric while pressing in the edges. <b>
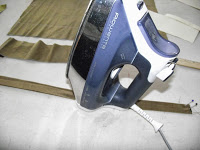 |
| End is pinned and edges pressed over cardboard form. <b> |
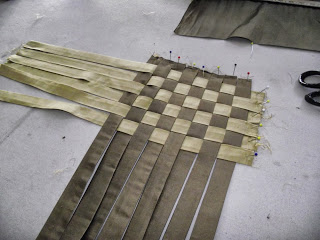

I don't show it here , but cut a piece of fabric a few inches larger than you want the finished piece. Pin it to the table first. Then for a checkerboard pattern pin the ends of all of one color strips 1" in from the edge of the fabric. Next pin the end of the contrasting color strip and weave it through the others. Keep the weave tight. Pin on the other end and start the next one. <br>
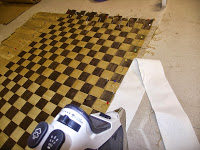 |
| Fabric strip being bonded to hold strips in ;place. |
 If you get annoyed by these how to blogs when it seems nothing ever goes wrong and when you try it everything goes wrong. <b> Well this was my first go around with this idea and I'll show you the things that went wrong and how I worked around them. <b>
For example when I started the weaving I thought about putting the fabric square under my work but didn't. When it is all pinned to the table I didn't want to start over so I used bonding tape and bonded the outside edges to strips of fabric as shown here. Trust me the next time I put down a fabric square first.<b>
 |
| Strips with fabric bonded on edges Don't do it this way! Put a fabric square down before you start. |
It was my original intention to overlay my checkerboard with a rounded Baroque type of shape. The two would play well off each other. I worked on a pattern. When I thought I had it, I cut it out and laid it on top of the checkerboard fabric.<b>

This is what I came up with. Obviously I didn't have it. Tired of working with this, I remembered I had been wanting to play some
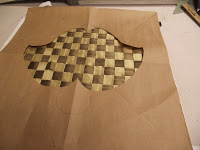 more with the explosion pillow concept. Make it a little more
realistic looking. <b>
So having a better idea how this would turn out I started working on another pattern.<b>
How to make a Gantt Explosion Pillow
 |
| Paper pattern for pillow |
I cut a paper square about 2" larger than I wanted the finished pillow and folded it in half, folded that in half, and folded it in half again. I knew that 8 triangle shapes would look much more like an explosion than the 4 I used on the first design.<b>
 |
| Pattern is cut from folded paper |
Looking back, it would be a good idea to write a number on each triangle on the large pattern 1 through 8. As each triangle is cut, number them . Trust me this will prevent a lot of ripping apart and remaking of triangles.<b>
 |
| Use a straight edge and mark the pattern on the fabric. |
Since I was working with velvet I wanted to be careful to cut all pieces the same with the nap. At the end I'm not sure I was totally successful doing that. Had I marked the bottom of each triangle with a number 1 - 8, I would have easily known what was the bottom of the triangle and where it went. Mark the bottom of each triangle you as you cut. <b<
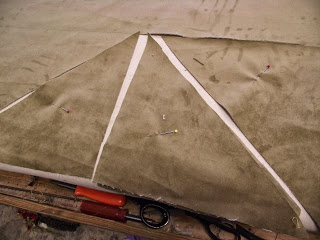 |
| Mark the bottom of each triangle by number as cut starting with # 1 |
In order to save fabric I cut the triangles as shown. I was making two pillows so I planned to use one nap direction for one and the next cut for the other pillow. I marked them with a yellow headed pin and a red headed pin. Mark the bottom of each triangle as you cut it with a number starting with #1.<b>
 |
| Measure 4" from the bottom on both sides of the triangle mark and cut a 1/2" cut to mark. |
When the lining is cut and marked on the bottom with a number as cut, match the bottom numbers and attach the two face to face. Measure 4 " from the bottom, mark and cut a 1/2" cut. Starting 4" from the bottom attach the lining to the face fabric with a 1/2" seam.<b>
In order to make my "explosion" stay in place and be a little more realistic, I found a wire intended for stems on artificial flowers that was very bendable.<b>
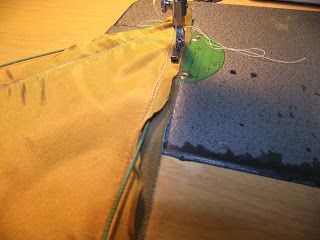
The wire was bent and stitched with a zipper foot into the seam of each triangle.<b>
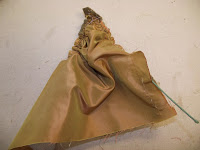
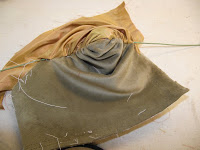

With the wires sewn into the salvage it is now time to "turn" the pieces so the salvage is inside.<b>
The pictures on the right show how that is done. Gather the fabric on the wire and push tight from both sides to the center. Pushing the center in gradually pull the fabric down the wire with the fabric turned salvage inside.<b>

Now it is time to attach all the pieces. If you lay them out on the original paper pattern in the numbered order they should look like the picture on the left.<b>

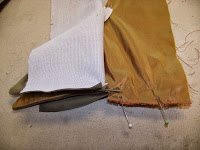 First turn the face fabric over the
upper part of the triangle. Attach the two from each side first. Pin the lining face to face and sew up to where the fabric is turned.
After the pairs that make up the 4 sides are attached use the same process to attach the linings of the four side pieces.<b>
Repeat the process with the face pieces.<b>
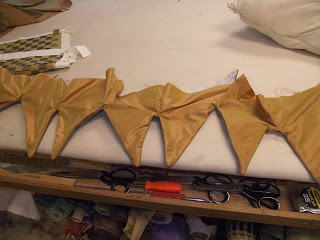
The picture on the right shows how it will look before you stitch the last linings and face pieces together.<b>
Now position this part into a flat square over the center fabric, in this case the checkerboard piece with both face up. Sew together. Turn these two pieces face down on top of the fabric cut for the pillow back sew together and turn. Spot tack the triangles to the checkerboard fabric about 2" to the middle from where the wiring begins.<b>
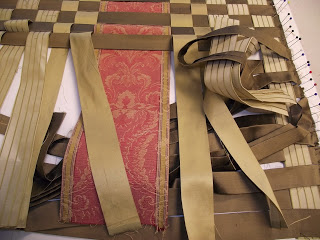 Shape the wired pieces to look explosive! <b>
On the right is a photo of another fabric weave I did. Notice this time I modified the strip widths and worked with more than two fabrics. Like everything you are only limited by your patience and creativity.<b>
Done<b>
I hope you enjoyed this process. Check out my other blogs and please let me know what you think.
Bill Gantt