How to Build a Pergola Style Upholstered Cornice

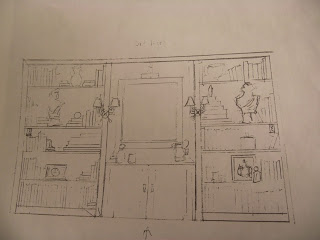
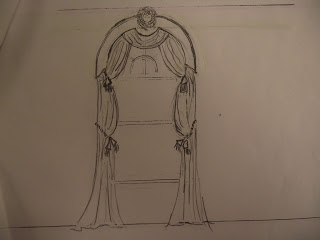
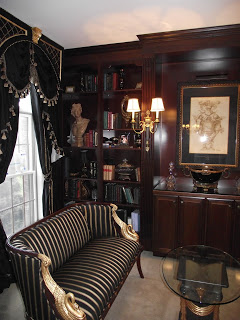
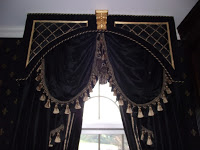
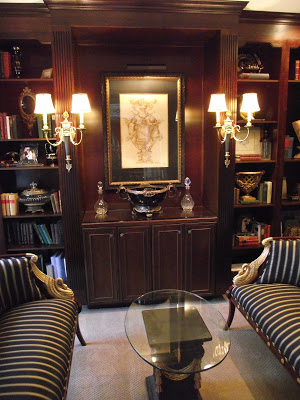
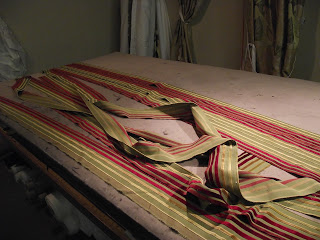
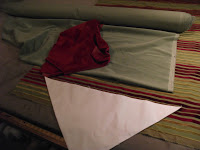
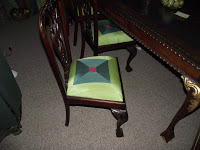
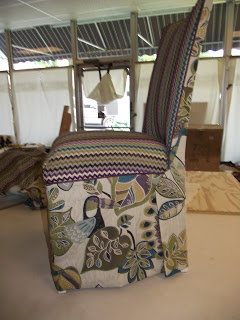
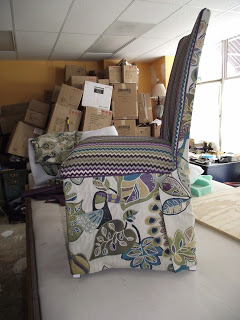
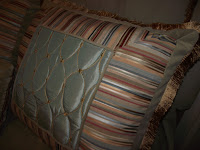
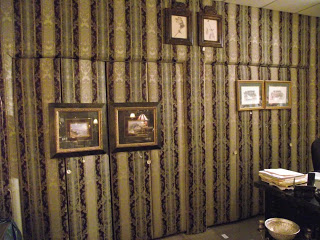
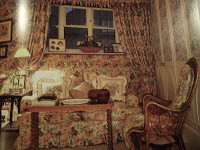
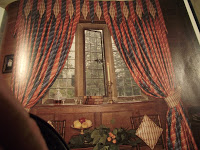
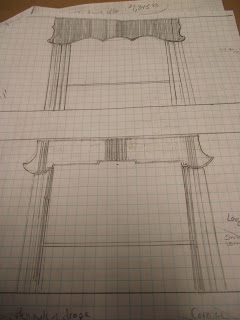
  My client had a number of oriental style accents and need new window treatments.  I suggested a pergola style cornice, showed her two sketches, she chose the one she liked best and I got started. <br>

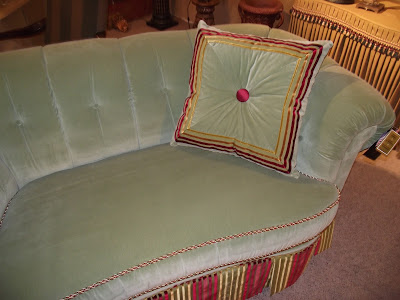
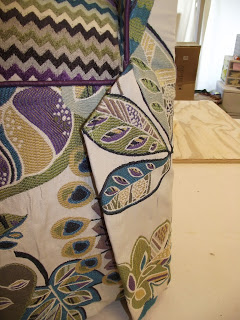
She chose the bottom design which featured a stripe fabric in the center and on each end.  The end stripes would then line up with the stripe trim on the standing

 panels.<br>

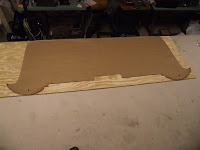
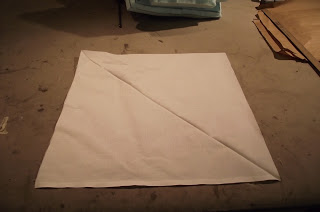
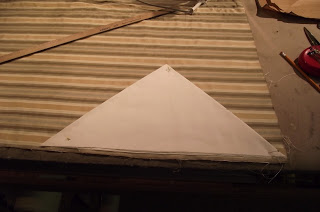
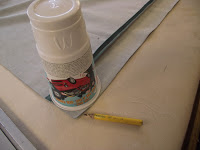
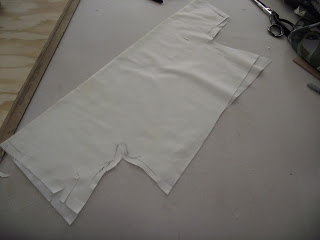
A paper pattern was drawn.   Always remember to fold your pattern in half and trim again so both sides are the same.   Sing a felt tipped pen the pattern was traced on to 1/2" plyboard.<br>

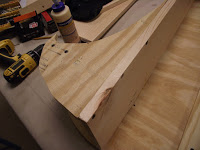
Since the window was wider than the 8 foot length

plyboard comes in,  a piece had to be cut and spliced on one end.   It was secured with a 4" piece of plyboard glued and screwed.  The splice was used on the inside of the cornice so that it would not show.

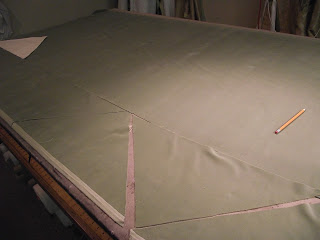
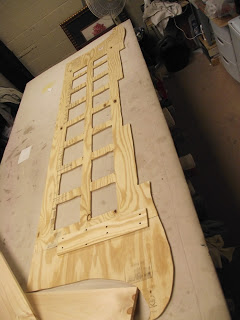
A grid pattern was marked and cut out of the plyboard to lessen the weight but maintain stability.<br>

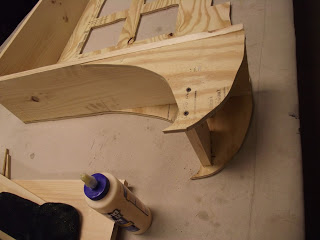
Side pieces were cut and aligned with the straight part of the cornice front, glued and screwed.  The board forming the top of the cornice was attached to the face and end boards forming the cornice "box." <br>

Two small end pieces were cut to align with the face board and were attached to the end boards of the cornice box.   A piece was attached to brace face board with the shaped end pieces.<br>

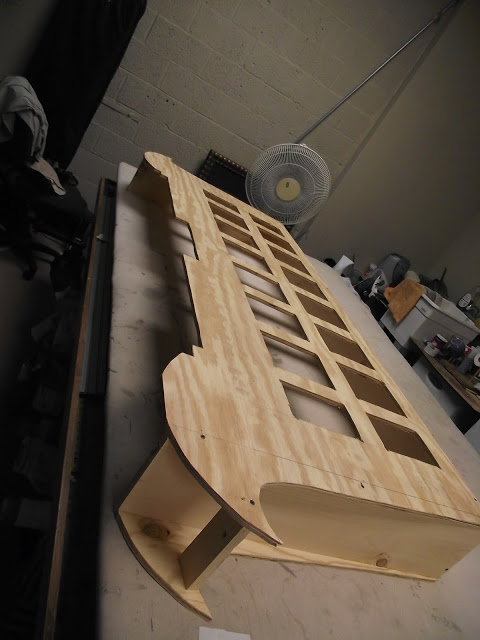
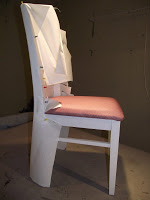
Here you see the final wooden frame of the cornice board.<br>

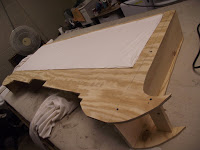
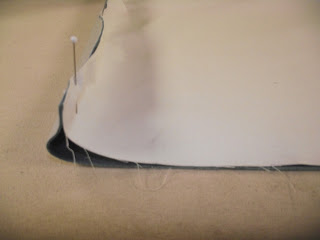
Black out lining is stapled over the geometric cut outs.  This is important to prevent the cut outs from showing through to the face of the cornice.<br>

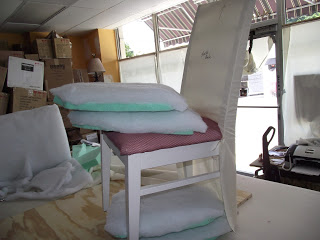
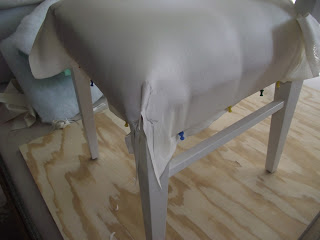
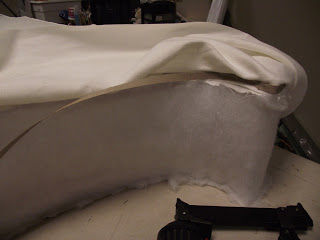
Next the entire board is covered in heavy flannel inner lining.

Note that the flannel is stretched and stapled to the underneath part of the rounded portion on each end.<br>

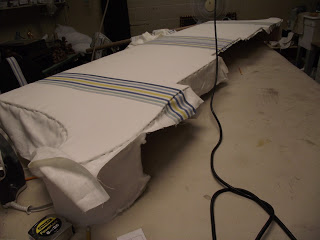
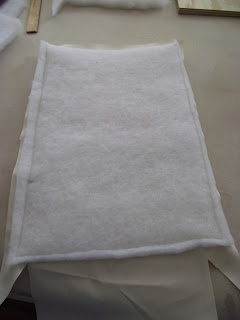
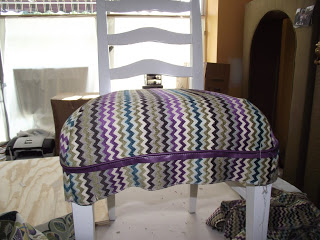
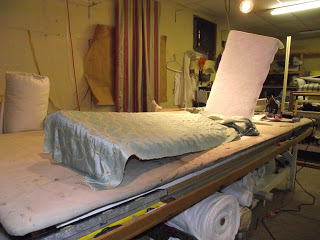
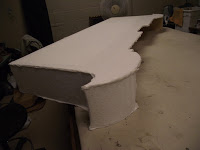
Next fiber batting was spot tacked on the entire cornice board.

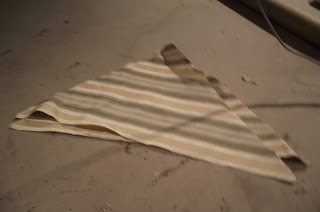
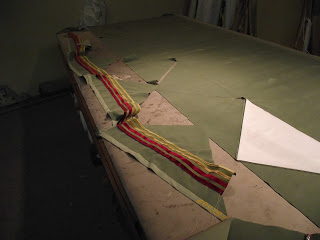
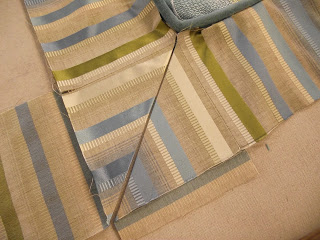
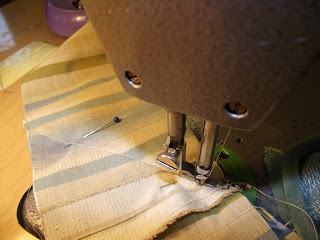
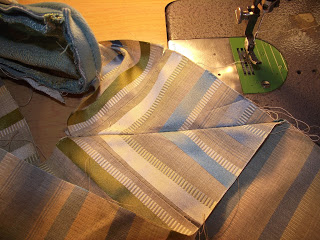
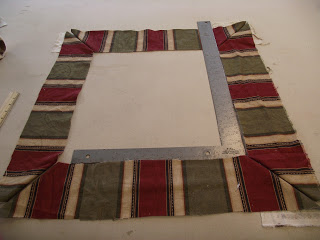
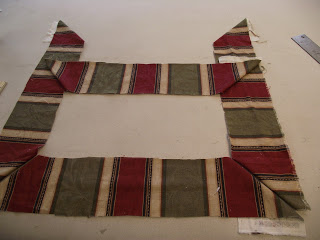
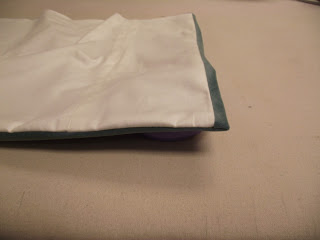
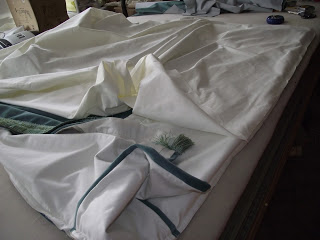
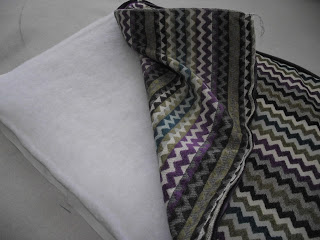
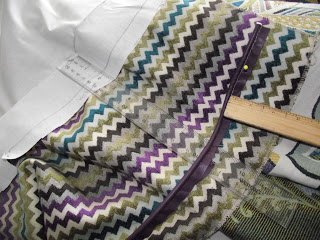
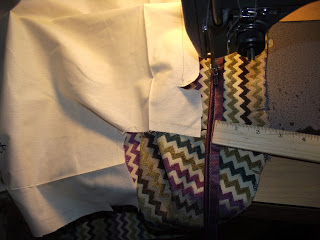
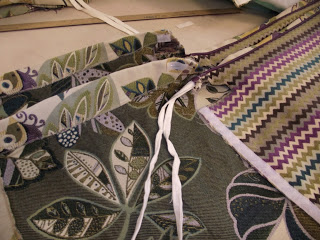
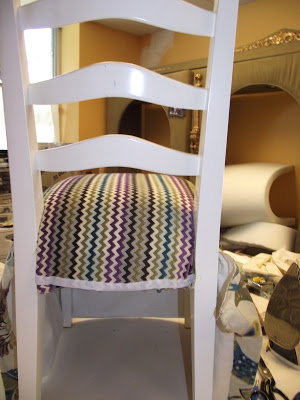
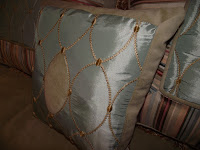
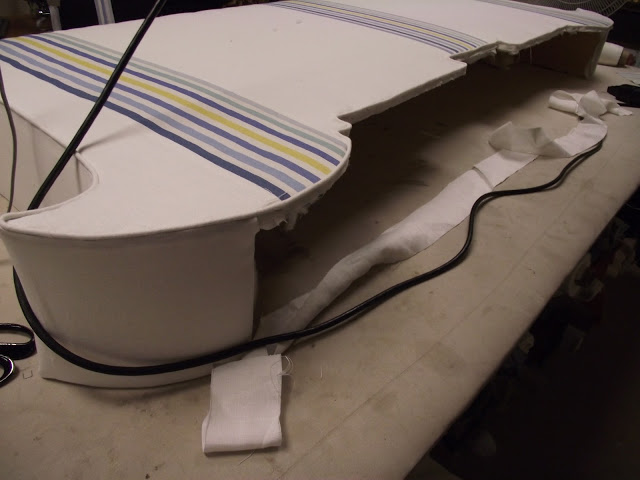
The Stripe pattern was cut apart and and stitched in place with the white fabric.

The cover was then stretched and stapled over

The cornice board.  *My earlier cornice blogs go into detail as to how to maneuver around corners and shapes.<br>

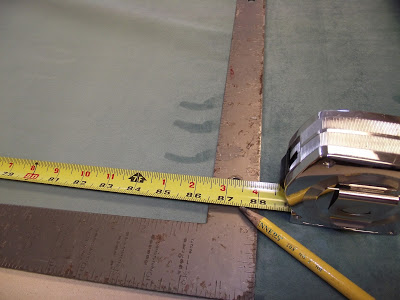
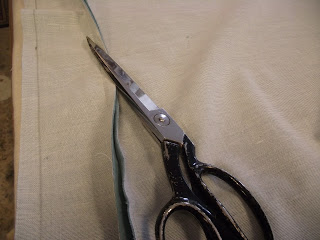
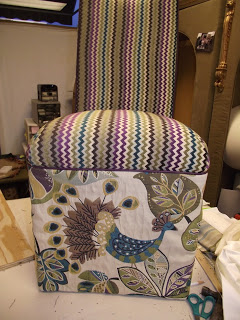
After the face fabric in stapled in place and trimmed, cut a piece of fabric a couple of inches wider than the depth of the cornice.

Lay it face down on the front of the cornice and staple the edge in place .

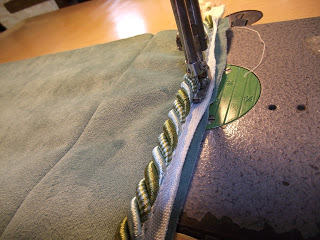
Then staple  cardboard stripping over the edge of the fabric just attached.  Be sure to align the top edge of the striping with the hard edge of the face of the cornice board.<br>

After the stripping is in place pull the fabric to the back and staple on the back.

Cut a 3" strip of fabric and repeat the process on the bottom edge of the front of the cornice board.

Line the inside with lining fabric.
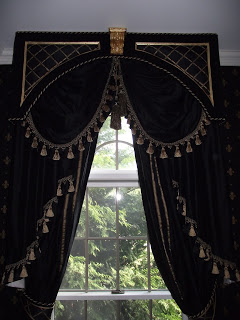
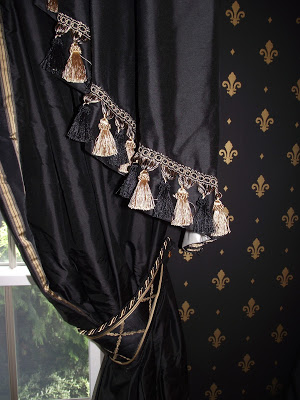
Done.

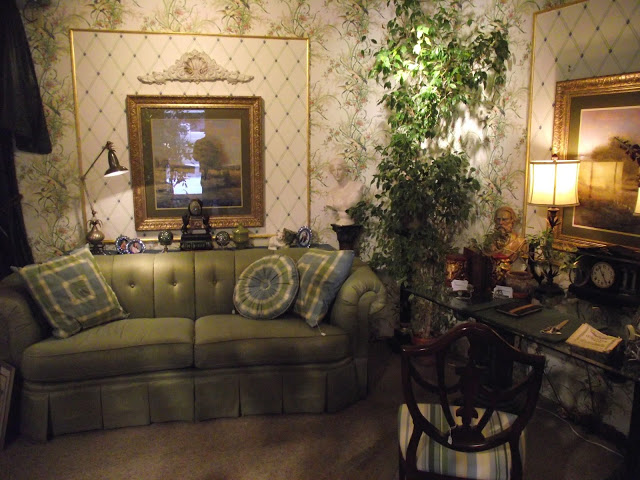
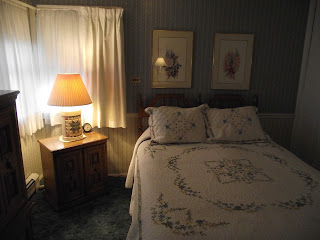
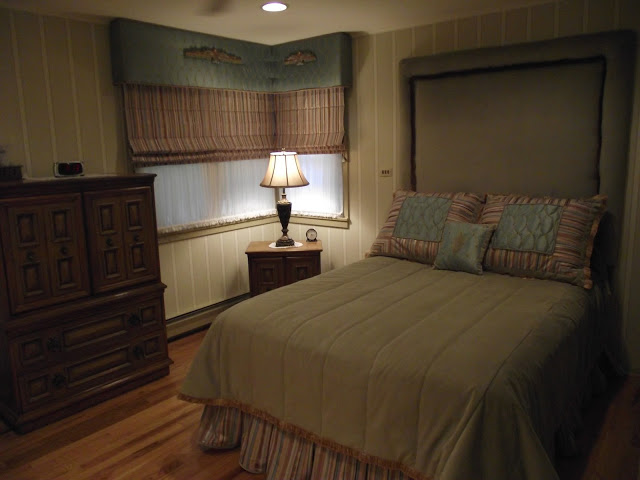
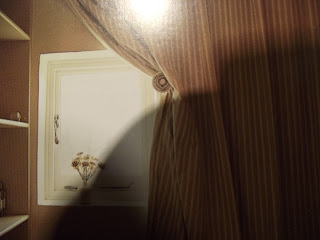
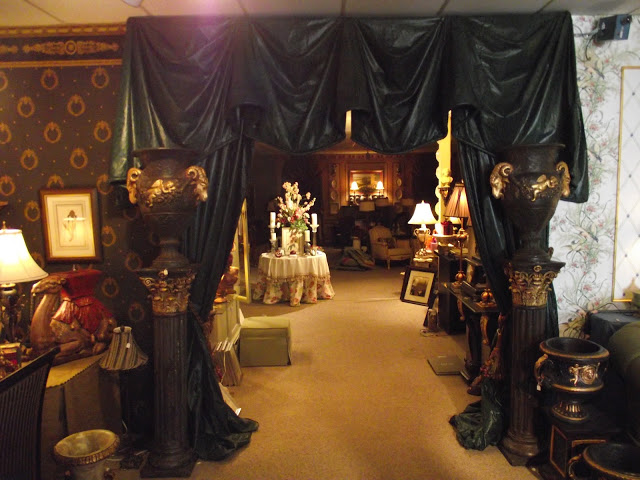
Unfortunately the lighting in the house was so bad where it was installed I couldn't get a picture of the finished, installed window treatment.  It looked exactly like the original sketch.

Bill Gantt

Decorating a Home Library in Black and Gold

My clients had a small room across the foyer from their dining room we had just finished.  While I was flattered that by this time I had enough of their confidence, they said just decorate it and make it look good.  I suggested they let me think about the room and get back to them with ideas.<br>

INTERIOR DECORATOR INTERIOR DESIGNER

To my way of thinking every room should have a purpose.  I came back to them with four suggestions.  A music room, a library, a dressy intimate dining area, or a room to serve all three purposes.  We settled on the fourth.  Essentially it is a library that can serve the other purposes.<br>

On the right is the rough sketch I provided for what I hoped the back wall of out library would look like.

The clients had seen a black and gold neoclassic room set in my studio. The husband had particularly liked it, so we decided to do that theme in the library.

The first thing that came to mind for seating in this small room was a pair of swan arm settees.  When I contacted the company I had gotten them from before I learned that they had discontinued them.  I then remembered I had used them for a bachelor client's living room.  He had since married and had told me his wife didn't like them.  He still had them in the navy and red stripe we had ordered them in.  I bought them back redid the gold leaf trim striped them and recovered them in the black and gold stripe.<br>

We selected Fabrics and wallpaper for the room.

I then sketched three original window treatment designs.  Two had round cornices the shape of the window tops and one had a square top with the shape of the window cut out of the bottom.<br>

The square top one was chosen by my clients.

We decided to upholster the cornice in black velvet with inserts of a black and gold trellis like pattern that the wife was especially fond of.  Black silk was selected for the swag and jabots

and tie back panels.     Black gold tassel fringe and rope trim was used as well.<br>

While I worked constructing cornices, drapes and recovering settees, my client worked with my sketch and a cabinet maker to get the back wall finished.>br>

A beautiful neoclassic pair of sconce lights were ordered from Decorative Crafts.  My client and I went to a bookstore on Third Street, Midtown Harrisburg and found good buys on several old books.

An internet search produced necessary neoclassic art prints.<br>

The large and heavy porcelain bowl with bronze ormolu makes a bold statement under the framed print in the center of the wall.   The shelves were arranged with books and various mementos and accessories new and old.  It is a room I and my clients are proud of.<br>

Tie backs echo the insert in the cornice boards

<br>

I hope you enjoyed sharing this experience with me.<br>

Bill Gantt

How To Mitre Stripes

Original stripe of Three colors of silk and velvet mitred

I love to work with stripes!   Mixed with other patterns and solids , they are a great way to create interest and detail into a room design.   I use them to make interesting trims or accents on drapes  pillows and table cloths.

Pattern after first fold

How to mitre a stripe

Cut a piece of lining a few inches larger than you want the finished product.

Fold the fabric diagonally-corner to corner.  Press it with an iron.

INTERIOR DECORATOR INTERIOR DESIGNER

Fold the piece diagonally again-opposite corners to corner-Press.

Pattern after second fold and lined up for cut

You will have a triangle shape about 1/4 the size of the original piece.  This is your pattern.

Place your triangle pattern on the striped fabric.  Make sure the

bottom of your pattern is aligned with the bottom stripe.   Also

It is a good idea to position the pattern so that the top point of

the triangle is over a large stripe.  This will make it easier to get

a neat square when you sew the 4 pieces together.

Cut your first triangle shape with the folded white lining pattern.

Two pieces sewn together

Then use the first striped triangle shape you cut as the pattern

for the next 3.   This helps assure that all four pieces will be

exactly alike.

Seam together two triangles, then seam together the other two.

Press the seams flat.

These pieces need to be turned face to face before being sewn

Place one set of sewn together triangles face up.  Put the other

set on top with the face down.   Be careful to perfectly align

the center seams.   Pin together.

Starting at the middle seam sew toward the outside point .

Then starting at the middle seam again sew to the other outside point.

Stripe trim being cut

Often I make a trim by cutting a stripe from a fabric.

It is much easier to mitre the entire pillow than to just try to sew the trim on and mitre the corners.

Many times the grain of even a solid fabric can give an interesting subtle effect when mitred.

Velvet triangles cut for two pillow faces

On these pillows the fabric is velvet which has a nap.  If done properly the differing directions of the nap when mitred will give a nice subdues effect.

To save on waste I have cut the triangles two directions.  With the velvet I must use all the triangles with the point up as cut for one pillow and the other, point down triangles for the second pillow.

Trim being applied to solid velvet

Measure an sew the trim stripe on each triangle at the same place.

Solid velvet and velvet stripe - red for covered  button

Finished pillow

As my pictures show you can even mitre a plaid.  I have mitred pillows using floral prints.   You can

even use the same technique on round pillows.   Just cut the lining a few inches larger than you want

the finished circle.  Fold the circle in half-press, fold it in half again-press.   Repeat the process

until you have the size triangles you want.  A round looks best with 6 or 8.

Mitred trim frames dog prints

Mitred dining room chair seat

"Explosion" pillow and small mitred pillow

Another type of mitre I have done is when a stripe is used to trim the outside edge of a pillow or table cloth.  If the stripe is used parallel to the edge of the item the methods described earlier work.

If however, the stripe is to be applied perpendicular to the edge of the fabric another issue arises

Fabric on the right is being aligned to be mitred

.

With a smaller multicolor stripe like shown here you will be able to mitre 3 corners at the same point in pattern and one mitre that will be at a different point.  With a stripe like this it is not so noticeable as with a bold 2 or 3color stripe.

For a project like this cut the large center piece of fabric and add a welt or trim on the edge.

Cut your stripes to the desired width.  To save fabric I usually join them all together end to end being extremely particular about the match so the seam is almost invisible

For this method, cut the strip of trim fabric the length of the center piece and add double the width of the trim fabric plus a few inches.  For example if the stripe trim fabric is 5" wide, add about 12" to your first cut.  With the trim fabric on the bottom facing up and the center fabric on top facing down, sew on top of the seam of the center piece trim seam.

Because this stripe is not balanced-one side is different than the other(see the cream colored grosgrain stripe next to the blue stripe) the next strip must be turned upside down to get a mitre.

Fabric trim is mitred and pressed 

Although I don't show it on the picture I recommend once you determine the edge that will be sewn to the center piece, you press over 1/2" along the top.  That is where you will be sewing.  Now put it next to the last corner and turn under one side to a 45 degree angle. If the edge of the trim stripe is perpendicular to the stripe showing on the upturned wrong side, it is 45 degrees.  Do the same with the piece you are adding. When they are perfectly aligned press a crease into both pieces.

Creased angles being sewn together

Now carefully fold the entire pillow face on the diagonal.  Noting the pattern, pin the two pieces of trim fabric face to face.  Be certain  that the angled creases you pressed in are one on top of the other.

Starting from the

outside edge

 sew the creases together with a medium stitch.  Be sure to lock the stitch on the outside edge.  nSew toward the center piece of the pillow or cloth.  When you reach the center piece trim keep as close to the corner as you can. Lock your stitch.

It is most likely that you may have to pick one or two out and redo them.  All the years I have been doing this I usually have one or so that I have to do twice until I'm satisfied.

underside of a successful mitre.

When the first corner is done to your satisfaction sew that strip up to the next corner.

Turn the fabric upside down(for this kind of stripe).  And find the point in pattern that will match the stripe at the top corner.  Turn the sewn piece so it is at a 45 degree angle(check to see if the face stripe is perpendicular to the stripe showing on the wrong side).  Pin it to your table.  Now do the same to the strip you are going to attach.  When the match is good press to mark and sew.

Last corner on the right. the part of the stripe to be eliminated in the middle

When you get to the last corner you no longer have the ability to shift the trim strip for a match.  With a mulit color smaller stripe, you find the pattern match on the corner.  Pulling as much fabric into that section as you need to match the first strip.  Press it into place and pin.  Now look at the excess fabric in the last trim strip and find a place where the pattern can be cut and joined will not be noticeable. For example on this one I paid attention to the location of the green and blue stripes.  The piece sticking up in the middle is where the fabric is coming out.

Once you find the place lay the fabric one direction and press in a crease then lay it the other direction and press in a crease.Be sure the fabric is always touching when your do the pressing.  Turn the fabric strip face to face.  With the center crease in the middle, line up and pin the other two creases together.  Lock your stitches and sew the two together.  Do not cut the excess off until you are certain everything lines up. Sew the upper edge of the last strip to the center piece and sew your last mitre in the corner.  All four corners are mitred and look great.

Bold stripe trim pieces laid out and checked with a framing square

If the finished size necessary for the piece is flexible, another approach that will get

all 4 corners mitred the same

, is to mitre the outside trim first and then attach the center piece when that is done.  With a bold or two color stripe this can often be the only way.  Unlike the stripe I showed you in the earlier example, stripes like these make eliminating part of the stripe on the last piece to get the mitre impossible.  Also with such a bold pattern you are much more likely to be annoyed with one corner having a different part of the pattern in the  mitre.

Trim strips adjusted to make a rectangular pillow

Because you must do a bold stripe this way you are only able to adjust the size of the pillow by the width of the stripe or by the repeat.

This stripe has a 9" repeat, so you can have a 27" by 27" square pillow or a 27"by 18" rectangle pillow.

  You are only limited by your creativity.

Good luck and please tell your friends about my blog.

Bill Gantt

How to make a "fitted' bed spread

Measurements and fabric estimate for fitted spread

When the bedroom is completed I will add a picture of the dressed bed here.  

First you must get accurate measurements of :

     The Top of the Mattress- width and length

         If the top is rounded like on a pillow top mattress, you may want to mark where you measure with a straight pin on each side and top and bottom.

      Next measure the length of the sides and bottom.   If you marked with a straight pin, measure from the pin to where you want the spread to end.  If there is to be no dust skirt, to the floor.  If there is to be a dust skirt plan at least 4" below the top of the box spring.  As a double check I also like to note the measurement from top to where the spread will end and the same way across.  The two measurements for each direction should add up to this one.  If you look at my notes you will see that I forgot to get a measurement for the width of the top of the mattress, but did get a total measurement.  By deducting the length of the two side pieces I was able to determine what width to make the top without returning to the clients house.

Make a clear drawing and put your measurements on it.  

This spread is velvet.  It is important when working with velvet to be sure the knap is going the direction you plan.  On a spread I always face the knap so that when you rub your hand down the bed top toward the bottom the knap is laid down.  Because I did not want seams on the side pieces and to match the knap  I cut them lengthwise off the fabric. After looking carefully at the velvet I determined to cut the bottom the same way to avoid seams there as well.

INTERIOR DECORATOR INTERIOR DESIGNER

Using a framing square I first made certain that the end coming off the bolt was square.  Next I measured up the roll to the finish length I wanted.

I added 1/2 seam allowance for the bottom and about 4" to the top.  Often times after the piece is made the top needs to be re-squared and you will need seam allowance for the top as well.

Since the top measurement is wider than the fabric width, it was necessary to cut another length of the fabric.  I prefer to be extra cautious when cutting the pieces to be added to the center piece.  To get an idea how wide they need to be deduct the width of the fabric from the planed finish width of the top piece.  You will need to add 1 1/2" seam allowance to both strips.  I usually get the measurement and add 3" to it.  Also it is good to cut the piece a few inches longer than the first piece to allow for shifting when you sew.   Pin the pieces face to face and sew together with a small stitch( this fabric has a 100,000 double rub rating and I expect this spread to last a good 25 or more years) .  I don't want the stitches to start to loosen before that time.  With velvet make sure the knap is in the right direction as well.  Once sewn together I fold it double, pin it seam on top of seam, divide the finish width in half add 1/2" seam allowance measure out from the center fold and mark the edge.  I then mark and cut off the excess.

Cut and stitch together lining in the same fashion to the same exact dimensions.  Lay the lining aside

The excess on each side has been marked and is ready to be cut off

.

bottom corners are marked for rounding

The mattress corners  are never square so round them as shown here.

Trim cording is added to top piece.

In this case I am finishing the top edge with a roped cord.  When sewing a lipped cord, always 

place the cord so the part where the lip is sewn on is next to your zipper foot.  The lip will be 1/2" wide.  Sew tight against the cord. 

Lay the top piece aside with it's lining.

Now it is time to make the two side pieces and the bottom piece.

From the piece cut to seam on to the top, cut your side pieces and if possible the bottom.  In this case I only had enough for sides and had to cut off the bolt for the bottom.  Cut the side pieces the finish width as shown on your diagram + 4". 

Cut the lining the same top to bottom and the length of the fabric less 4".  Pin the ends together and sew.  Lay the pieces flat.  You should have 1 1/2"

of fabric folding over fabric on each end.  Pin the bottom(if velvet be sure to check the direction of the knap and select the bottom so the knap will be going in the correct direction).  Sew the bottom with a 1/2" seam.  Turn right side out.     Press and run a 1/4" seam along the top of each piece.

Ends sewn ready for bottom to be sewn

Panel turned ready for top 1/4" seam

Lay side and bottom pieces face to face on the unlined center piece.  Pin in place and attach with a 1/2" seam.

Corner pieces ready to be added

Make two panels using the same technique as with the side and bottom panels.  These should be 1" shorter than the other panels and about 8" wide.

Center them on the corners, pin and attach with a 1/2'" seam on top of the bottom and side panels.

Final lining being prepared for sewing

Now, retrieve the large lining made early on.

Put the spread on the table face down.

Fold both side pieces, bottom piece and corner pieces on to the middle piece.  It is a good idea to pin the corner pieces to the side and bottom panel.  Pinning them helps keep you from accidentally stitching them into your lining seam.

Place the lining on top of all of this and pin it

all around the edges except at the top.  Attach

Spread after turning

lining with a 1/2' seam.  When sewing run through the machine with the lining down so you can sew over the previous seam.

Turn so the lining is out.  By doing it this way you have no exposed seams on the underside of your spread.  Turn any excess fabric and lining under so the top is even and straight.  Top stitch it closed 1/4" from the edge.

DONE!!

I hope you found this to be useful.

Bill Gantt

How to slipcover a wooden chair

 You may notice as you follow this blog that the fabrics may change in the photos.  That is because I made two different slip covers for the same set of chairs.  It seems every time I think I have the best way to cover a wooden chair down, I come up with a new variation.  The same happened with these chairs.  I am convinced that the second way is best.  Just remember that each new chair can have it's own peculiarities which may require you to adjust your approach.

When my client dropped of this little chair I immediately noticed that the seat had very little padding and was hard.  I decided to add padding to the slip cover.

In hind sight I should have repadded the seats of all 4 chairs before starting the slipcovers.

  It was a lot more work to include a place in the seat of the slipcover for removable padding.   On the first set of covers I attached them to the chair with several ties.

On the second set I only used two ties on the back and attached the rest with velcro.  The extra padding is simply put on top of the seat and the slipcover put on top of that.   It was much easier to do and I think the results were better.

I will show the second way here.

I am partial to making the back out of one piece and making the seat and skirt as a separate piece.  I can't find a good reason why these two sections need to be sewn together so I keep them separate.

Measure the back of the chair from highest point to the floor and the widest point horizontally.   On this type of slip cover, keeping the back separate from the seat requires the skirt part to wrap around the chair about six inches on each side.  Since these were cheap little chairs that will always be covered I used thumb tacks to hold the fabric in place.  When it is not possible to use thumb tacks pieces of masking tape should do the job.

Note: The picture shows the top of the "wrap around' for the skirt cut on a downward angle.

  It is better to cut that part on an upward angle.

INTERIOR DECORATOR INTERIOR DESIGNER

Using muslin or lining center the fabric on the back of the chair.  Since I am wrapping the bottom part to lap over or under the skirt, I also wrap the top around the thickness of the top.  Carefully smooth the fabric in place and attach it to the chair.  If the back has a lot of shape in it you will either need a few well placed darts or may want to make the side part separate and seam the back and side together.

Once the back fabric is smooth and in place, rub the side of your pencil lead on the edge to mark it.

When the chair has a wooden back I can't resist using the slipcover to make the chair more comfortable, so if you're only doing one chair save the lining  used to make the inside pattern.  Using the same method as on the outside back mark the lining for the inside back pattern.  Leave about 6" extra fabric on the bottom and mark it go around the vertical back pieces and hang behind the seat.  One of the last things you will do is add a piece of loop velcro to this to attach to the back of the seat piece.

After marking the edges on the pattern, remove it, lay it out flat and measure out 1/2" for seam allowance.  This is the line where you will cut the lining.

I use a fine tipped marker to mark the pattern pieces and where they connect.  I usually mark where the fabric pieces are to come together on the final fabric with a marker as well.  Just be careful to stay in the seam allowance.

While it may be tempting to avoid the next step, don't.  Using your largest stitch sew the lining pieces together and put them on the chair as you go.  It is a lot easier and cheaper to correct a problem on lining than on the finish fabric.

In this case you can see if have some rippling along the side.  Kn owing that I will be using ties on the front corners that will pull the back down smooth eliminates concern.  I also learn from my pattern that the back can be made from one piece of fabric, not the two I originally thought I needed.

With the back pattern completed to my satisfaction, I move on to dealing with the uncomfortable seat.  I cut a piece of 2" medium density foam a few inches smaller than the seat.  The edges if the foam are rounded to blend into the seat.  Eventually 2 thicknesses of polyester furniture batting are added as well.

To make the seat cover you

will

 have to use thumbtacks, but even on a good chair this is not a problem.  The seat must fit tight.   Once again lining is cut more than large enough to fit over the seat and the new foam, is pulled down until I am satisfied it will look good.  The edges are marked and it is taken of and cut.  Notice the marking for the rounded front corners.  If a more tailored look was wanted it could have been "boxed".  That is a top cut, welted and a 3 or 5" inch band attached and the band in turn attached under the seat.

As with all patterns it is folded double and cut to assure it is balanced.  Sew it together with a large stitch and put it into position.  Sometimes the first one doesn't work and you have to do a second until it is right.  It won't be the first time or the last that has happened  

That is why you make a pattern first.

With this piece as with the earlier ones a 1/2" allowance was made beyond the marked edge.  The edges you are going to sew

must

 have an accurate allowance so it fits the way you planned it.

Here you see the seat cover after the sewing has been done.  Thumbtacks hold it taunt and in  place.  Another line is marked on  the edge of the under side of the chair on the lining.  The pattern will be cut

on

 this line.  You might make a note to that effect on your pattern.   When the final fabric is cut. this edge will be overlocked and loop velcro sewed against the edge.

Chair seat with the pattern stretched in place.   Notice that the top corners do not fit smoothly.  Even though the bottom edges were marked, I had to tailor the seam further to the top so it would lay smoothly.

Once everything is fitted and marked, it is time to take your pattern apart and use it to cut out the slip- cover fabric.

                                                                         As I said earlier, I like to use the slipcover to make the chair more comfortable.  If you look closely at the picture you can see my pattern for the inside back.  So as not to have batting add thickness to my seam, the batting is cut 1/2" smaller than the pattern.  The batting is then attached with a seam

1"

in from the pattern edge.

Now the main fabric which was cut the exact size as the pattern, is placed on top of the pattern face up.  In this case I elected to add a welted trim which is sewn with a 1/2" seam allowance.  Now the two pieces are sewn together with the planned 1/2" seam allowance.  If you are doing more than one chair you will have cut extra inside back patterns to line your padded inside back piece.

Next the seat fabric is cut to match the pattern.  The two front/top seams are sewn and turned.  Remember no seam allowance was made to the bottom edges because loop velcro is now sewn to the  back side of the edges of the four sides where they will attach to the under sides of the chair.

On the back edge, just above the loop velcro just sewn, sew a strip of loop velcro to the face of the seat fabric.  The padded inside back panel will attach here to the seat piece.

Because I elected to add a welt trim to my chair, it is necessary to topstitch the trim to my seat piece now.

This is done by marking the pattern when held in place with thumb tacks.  Place the chair on a hard flat surface and measure up to the height where you want the skirt to start.  Using a yardstick mark the pattern, front and two sides: every few inches the height you determined the skirt should be attached.  When the three sides are marked take the pattern off , use a straightedge and join your marks together.

This measurement plus

one 1/2"

seam allowance will be the length you cut your skirt fabric.  Nothing is allowed for seam allowance on the bottom because you want the skirt yo be 1/2" above the floor.  When you line the skirt that 1/2" seam will make the skirt the right length to be 1/2" off the floor.

Lay the pattern above each corresponding edge of the seat fabric.  Measure and mark the seat fabric the same as the pattern.  This is where the top of my welt will be.

If there is no welt, you will measure down 1/2" from this mark and make a second mark.  This will be where the edge of the skirt will be placed.

Sewing 1/2" up from this mark will put the stitch exactly on the first mark.  The top of the skirt will start at that seam.

Welt is attached with a zipper foot with the top of the cord

where the skirt will be attached.

In this case after the welt is attached the skirt is placed face to face with the seat fabric.  The edge is kept just on top of the edge of the 1/2" selvedge edge of the welt cord and sewn on tight against the cord,

Skirt is attached to seat part

Here you see the  skirt after it was attached to the seat.  Notice that the peacock is centered.  Often a pleat is put on each front corner.  Because this skirt fabric is a thick upholstery fabric I elected not to do pleats. It would have added too much bulk as well as been difficult to sew.  Hook velcro was stapled to all four sides of the chair frame and the seat is held in place with it.

The outside back fabric was cut according to the pattern, hemmed and edges turned over and stitched.  A tie was added to two corners and the loop velcro that attaches to the lower back added.

Seat hook velcro where inside back attaches

Velcro tabs are added to hold the wrap around

part of the skirt in place

A purple covered button finishes off

the turn over back skirt.

I hope this was helpful.  Be sure to check out all my HOW TO blogs.  

Bill Gantt

Decorating a Master Bedroom

Clients I had helped about 13 years ago with their living room, which they are still enjoying; contacted me about helping with the Master Bedroom.

Before

The room had pinch pleated curtains, sill height, blue carpet and two papers on the wall.  Dividing a wall horizontally always makes the ceiling look lower and the room busier.  It also had a corner window which is always difficult to deal with.

The clients were open to change.

INTERIOR DECORATOR INTERIOR DESIGNER

After

In this "after" shot  the room looks more serene and open.  We selected a pale greenish tan paper with a subtle stripe design.  It lightens the room and ads height.   We eliminated the dated headboard and added a very high upholstered headboard.  The headboard and comforter are both covered in contract grade velvet and should last for years and years.

The First element to be selected in the design was the beautiful embroidered aqua fabric.

Before , dresser with very out dated mirrors

I couldn't resist Quilting the fabric for the center of

the shams

After,  Room is much lighter and open feeling. When the top of the dresser is better

accessorized  this area will be complete.

On the throw pillow I cut out one

aqua oval in the center and replaced

it with the velvet of th comforter.

Because the loose curtains were being replaced with more tailored cornices and roman shades.  It was necessary to make sheers that were attached at the bottom as well as the top.  Loose sheers would get caught up in the romans when they were put up.  On the other hand my clients like to take advantage of fresh air on temperate nights. Having the shades attached at the bottom in the traditional manner would make it impractical to remove them except for occasional cleaning.  I was able to resolve this problem by holding the sheers down with large cup hooks at the bottom and when the window is open the bottom rod will rest on cup hooks put 3/4 the way up the window.

After, Windows look much more tailored

Now the windows look much more tailored.  My clients have daytime privacy and can open the windows easily.  The bold stripe used in the gantt roman shades was also used on the dust ruffle and on the pillow shams.  Just enough to liven things up without taking too much attention.

Before ,

Trim painted the softer hue of the velvet

                                                                                                                            As with all my jobs there were compromises and the finished job is one I am proud of and my clients will enjoy at least as long as they have their living room.                                                                                                                                                                                                                                                                                                          

How to make a corner upholstered cornice board

As far as I am concerned, corner windows were a perverse invention.  They are also difficult to dress.  In this case I decided to make an upholstered cornice board and gantt roman shades do the job.

You probably can't  understand how many ways making a corner treatment messes with your perception.   Before I began work, I measured and drew the outline of the cornice board.  I made a template of what the top should be and then went to the client's house and literally held it up against the ceiling to be sure it was right.

Once I knew I had a good outline of the top I could cut out the pieces and glue and screw the pieces together.  I didn't want it to be too deep and take space out of the average size room.

The form is shown on the right.

INTERIOR DECORATOR INTERIOR DESIGNER

The structure is then covered with furniture batting and the fabric is attached as with any upholstered cornice board.

In this case a gold braid was added to the top to accentuate the metallic gold in the fabric.

The bottom was kept flat with no shaping.

The design of the plaster decorative elements allowed me to trim one down to the scale of the small window and keep the original size for the larger one.

The plaster elements were attached as a part of installation.  They had to be positioned over the center of the actual window which means they are not centered on each board.

The stripe of the roman shades help add the needed vertical effect under the very horizontal top treatments.

I hope this was useful. Please let me know what you think.

Bill Gantt

Window treatments- Topper or topless

For those of you who are unfamiiar with the term

topper

let me explain.  It is a skimpy little treatment of fabric stuck at the top of a window.  No matter how tall the window may be "toppers"

are usually no more than 12" long. They are disproportionate little dabs of fabric often sold as "add ons" by people who sell shading systems. The sales pitch is, "You need a little something else to finish off the window."   or "We need something to add a little color." There is no shame in not being able to afford to dress a window properly or completely.  The shame is in

wasting money

on something that is so skimpy it shouts to your guest, "They couldn't afford to do the whole window!"

If form follows function, What are the functions of a proper window treatment?

Topper

Make the window aesthetically  more pleasing by:

Softening the lines

Adjusting the proportions ie making it seem taller or wider

Accentuating the good points while playing down the bad

       for example, a round top window should always get a round top

       treatment

Control the amount of light entering the room

Possibly save on heating or cooling

Provide privacy if needed

Create an architectural effect

Help create a stylistic theme for the room

Applying these standards tells the tale on Toppers.

If you need a privacy treatment do it .  Don't forget there are many styles of custom shades that can be made in many fabrics.  A custom shade in the right fabric can give you privacy, save on heating and cooling and decorate the window properly.  If you don't need privacy wait until you can do it properly.  A bare window at least looks intentional.  A topper looks at best like you lost the rest of

your window treatment in the move.

My advice , if you're thinking of spending money for a topper is DON'T!  

             JUST GO TOPPLESS1

Bill Gantt

INTERIOR DECORATOR INTERIOR DESIGNER

Magic! Making doors disappear

We all have rooms that seem to have too many doors.   Doors interrupting the flow of walls,  creating sometimes jarring contrasts that make small rooms even smaller.   Sticking to my rule that sharp contrasts in a room are not good.   Wall colors should be warmer with natural or stained wood.

Painted trim should blend with the colors selected for the room.   Sometimes even following those rules,  doors can create a visual disturbance.

In many homes without the luxury of walk in closets,  bedrooms have a wall of doors covering closets.   In almost every case home owners wish these rooms were bigger.   Making those closet doors disappear will at least give the illusion the room is bigger.   In situations where it may not look good to put furniture so close to a door,  camouflaging the doors can allow more visual space for furnishings.

Wallpapered doors and moldings make these doors disappear 

Upholstered wall and doors.  Pictures on doors complete the illusion.

In some rooms too many doors may not be the problem.  A lack of architectural interest  or the style of the windows may be the problem.   In this case treating a door more like a window may help.    For example,  a room with small casual windows with sills four foot above the floor make it difficult to create a grand effect.     If the room is to be casual work with what you have.   However if you want something more elegant,  treat the windows  very simply.   Sheer set inside or a roman shade the same pattern and color of the walls.  In this case you are making the

windows 

disappear.  Instead of trying to force the windows to accept a treatment too fancy for them, give the door the attention.   The door after all has the proportions needed .   Too many people, unfortunately some who call themselves  decorators will dress these little pig windows  in great  ball  gown window treatments.                                                                                                                                                  

How much more can this little window stand?

INTERIOR DECORATOR INTERIOR DESIGNER

How much more can this little window take?

A bit much don't you think?

They will make a pathetic attempt to hide the short little "pig"  behind behind a sheer treatment.

Of course no amount of sheer can camouflage what is behind it.   Then to ad insult to injury, they add  a large formal treatment often with tie back panels to the floor.   The whole thing looks like a toddler playing dress up in mommies prom gown.    As Christopher Dresser said, referring to things like wicker

vases

or pottery made to look like

wicker,

"One element should not stoop to do poorly what another does well."   Wicker has qualities that make it desirable.   It is flexible, it allows air to circulate; but it certainly does not hold water.   Holding water is why we have

pottery

.

The same holds true with windows.   A little window is intended to be inconspicuous.   It is to simply let light and air into the room.   Forcing a small window to carry the load of a much larger looks unsettling and is

wrong!

Draped interior arch ads detail by framing entry to next area

Draped interior door adds architectural detail

To summarize, if you have a room with casual windows and want casual work with what you have.

If however,  have little windows but want a grand room; take attention away from the windows

and focus on something imposing,  a work of art,  a great piece of furniture or even a door.

If you have a room with too many doors blend them into the rest of the room as much as possible with color, pattern or"

make them disappear"

As always I hope you find this useful.   Please tell your friends .

     Let me know what you think.

Bill Gantt

3319 Derry St

Harrisburg,Pa

717-561-8166

Don't forget Holiday Decorating starts October 20!