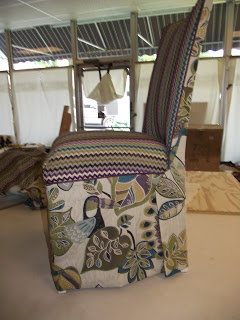
You may notice as you follow this blog that the fabrics may change in the photos. That is because I made two different slip covers for the same set of chairs. It seems every time I think I have the best way to cover a wooden chair down, I come up with a new variation. The same happened with these chairs. I am convinced that the second way is best. Just remember that each new chair can have it's own peculiarities which may require you to adjust your approach.
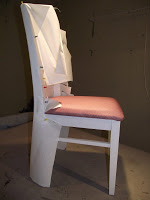
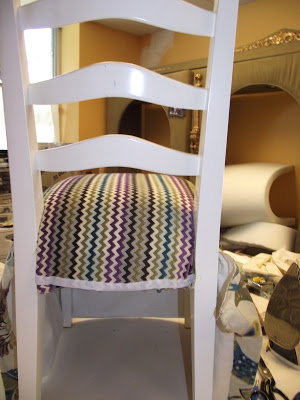
When my client dropped of this little chair I immediately noticed that the seat had very little padding and was hard. I decided to add padding to the slip cover.
In hind sight I should have repadded the seats of all 4 chairs before starting the slipcovers.
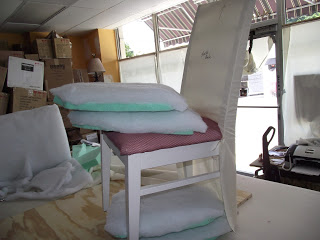
It was a lot more work to include a place in the seat of the slipcover for removable padding. On the first set of covers I attached them to the chair with several ties.
On the second set I only used two ties on the back and attached the rest with velcro. The extra padding is simply put on top of the seat and the slipcover put on top of that. It was much easier to do and I think the results were better.

I will show the second way here.
I am partial to making the back out of one piece and making the seat and skirt as a separate piece. I can't find a good reason why these two sections need to be sewn together so I keep them separate.
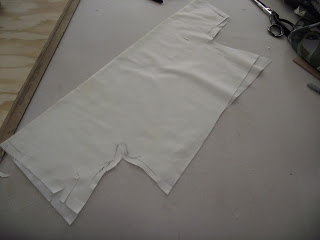
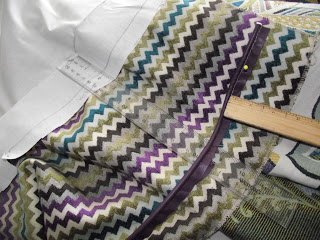
Measure the back of the chair from highest point to the floor and the widest point horizontally. On this type of slip cover, keeping the back separate from the seat requires the skirt part to wrap around the chair about six inches on each side. Since these were cheap little chairs that will always be covered I used thumb tacks to hold the fabric in place. When it is not possible to use thumb tacks pieces of masking tape should do the job.
Note: The picture shows the top of the "wrap around' for the skirt cut on a downward angle.
It is better to cut that part on an upward angle.
INTERIOR DECORATOR INTERIOR DESIGNER
Using muslin or lining center the fabric on the back of the chair. Since I am wrapping the bottom part to lap over or under the skirt, I also wrap the top around the thickness of the top. Carefully smooth the fabric in place and attach it to the chair. If the back has a lot of shape in it you will either need a few well placed darts or may want to make the side part separate and seam the back and side together.
Once the back fabric is smooth and in place, rub the side of your pencil lead on the edge to mark it.
When the chair has a wooden back I can't resist using the slipcover to make the chair more comfortable, so if you're only doing one chair save the lining used to make the inside pattern. Using the same method as on the outside back mark the lining for the inside back pattern. Leave about 6" extra fabric on the bottom and mark it go around the vertical back pieces and hang behind the seat. One of the last things you will do is add a piece of loop velcro to this to attach to the back of the seat piece.

After marking the edges on the pattern, remove it, lay it out flat and measure out 1/2" for seam allowance. This is the line where you will cut the lining.

I use a fine tipped marker to mark the pattern pieces and where they connect. I usually mark where the fabric pieces are to come together on the final fabric with a marker as well. Just be careful to stay in the seam allowance.
While it may be tempting to avoid the next step, don't. Using your largest stitch sew the lining pieces together and put them on the chair as you go. It is a lot easier and cheaper to correct a problem on lining than on the finish fabric.

In this case you can see if have some rippling along the side. Kn owing that I will be using ties on the front corners that will pull the back down smooth eliminates concern. I also learn from my pattern that the back can be made from one piece of fabric, not the two I originally thought I needed.
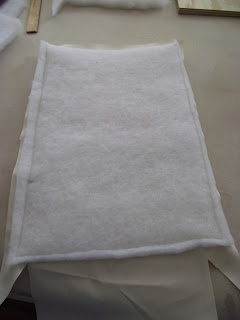
With the back pattern completed to my satisfaction, I move on to dealing with the uncomfortable seat. I cut a piece of 2" medium density foam a few inches smaller than the seat. The edges if the foam are rounded to blend into the seat. Eventually 2 thicknesses of polyester furniture batting are added as well.
To make the seat cover you
will
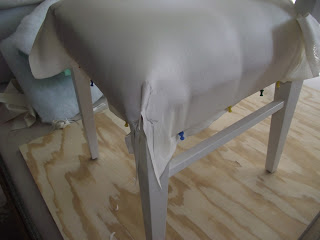
have to use thumbtacks, but even on a good chair this is not a problem. The seat must fit tight. Once again lining is cut more than large enough to fit over the seat and the new foam, is pulled down until I am satisfied it will look good. The edges are marked and it is taken of and cut. Notice the marking for the rounded front corners. If a more tailored look was wanted it could have been "boxed". That is a top cut, welted and a 3 or 5" inch band attached and the band in turn attached under the seat.
As with all patterns it is folded double and cut to assure it is balanced. Sew it together with a large stitch and put it into position. Sometimes the first one doesn't work and you have to do a second until it is right. It won't be the first time or the last that has happened
That is why you make a pattern first.
With this piece as with the earlier ones a 1/2" allowance was made beyond the marked edge. The edges you are going to sew
must
have an accurate allowance so it fits the way you planned it.

Here you see the seat cover after the sewing has been done. Thumbtacks hold it taunt and in place. Another line is marked on the edge of the under side of the chair on the lining. The pattern will be cut
on
this line. You might make a note to that effect on your pattern. When the final fabric is cut. this edge will be overlocked and loop velcro sewed against the edge.

Chair seat with the pattern stretched in place. Notice that the top corners do not fit smoothly. Even though the bottom edges were marked, I had to tailor the seam further to the top so it would lay smoothly.
Once everything is fitted and marked, it is time to take your pattern apart and use it to cut out the slip- cover fabric.
As I said earlier, I like to use the slipcover to make the chair more comfortable. If you look closely at the picture you can see my pattern for the inside back. So as not to have batting add thickness to my seam, the batting is cut 1/2" smaller than the pattern. The batting is then attached with a seam
1"
in from the pattern edge.
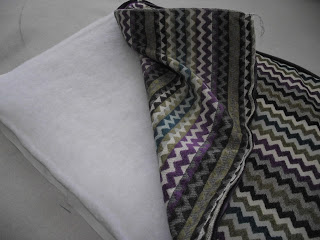
Now the main fabric which was cut the exact size as the pattern, is placed on top of the pattern face up. In this case I elected to add a welted trim which is sewn with a 1/2" seam allowance. Now the two pieces are sewn together with the planned 1/2" seam allowance. If you are doing more than one chair you will have cut extra inside back patterns to line your padded inside back piece.
Next the seat fabric is cut to match the pattern. The two front/top seams are sewn and turned. Remember no seam allowance was made to the bottom edges because loop velcro is now sewn to the back side of the edges of the four sides where they will attach to the under sides of the chair.
On the back edge, just above the loop velcro just sewn, sew a strip of loop velcro to the face of the seat fabric. The padded inside back panel will attach here to the seat piece.
Because I elected to add a welt trim to my chair, it is necessary to topstitch the trim to my seat piece now.
This is done by marking the pattern when held in place with thumb tacks. Place the chair on a hard flat surface and measure up to the height where you want the skirt to start. Using a yardstick mark the pattern, front and two sides: every few inches the height you determined the skirt should be attached. When the three sides are marked take the pattern off , use a straightedge and join your marks together.
This measurement plus
one 1/2"
seam allowance will be the length you cut your skirt fabric. Nothing is allowed for seam allowance on the bottom because you want the skirt yo be 1/2" above the floor. When you line the skirt that 1/2" seam will make the skirt the right length to be 1/2" off the floor.
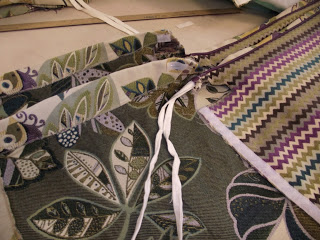
Lay the pattern above each corresponding edge of the seat fabric. Measure and mark the seat fabric the same as the pattern. This is where the top of my welt will be.
If there is no welt, you will measure down 1/2" from this mark and make a second mark. This will be where the edge of the skirt will be placed.
Sewing 1/2" up from this mark will put the stitch exactly on the first mark. The top of the skirt will start at that seam.
Welt is attached with a zipper foot with the top of the cord
where the skirt will be attached.
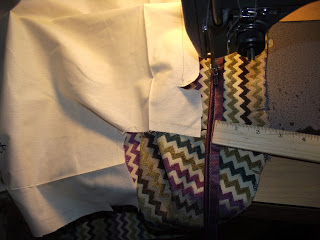
In this case after the welt is attached the skirt is placed face to face with the seat fabric. The edge is kept just on top of the edge of the 1/2" selvedge edge of the welt cord and sewn on tight against the cord,

Skirt is attached to seat part
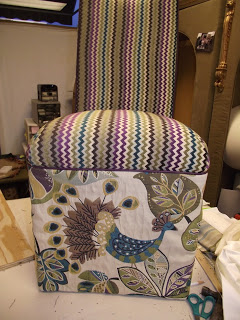
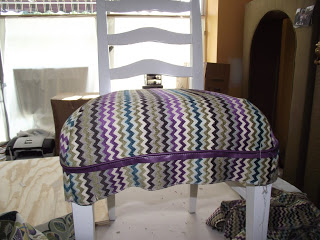
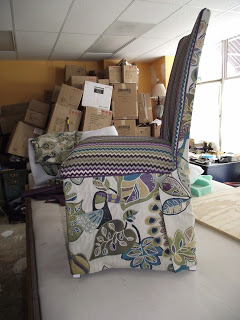
Here you see the skirt after it was attached to the seat. Notice that the peacock is centered. Often a pleat is put on each front corner. Because this skirt fabric is a thick upholstery fabric I elected not to do pleats. It would have added too much bulk as well as been difficult to sew. Hook velcro was stapled to all four sides of the chair frame and the seat is held in place with it.
The outside back fabric was cut according to the pattern, hemmed and edges turned over and stitched. A tie was added to two corners and the loop velcro that attaches to the lower back added.
Seat hook velcro where inside back attaches

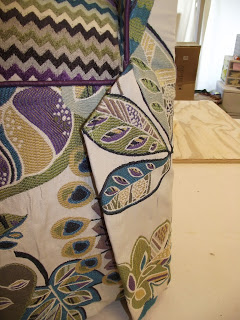
Velcro tabs are added to hold the wrap around
part of the skirt in place
A purple covered button finishes off
the turn over back skirt.
I hope this was helpful. Be sure to check out all my HOW TO blogs.
Bill Gantt