Over the years I have always made an animated show window for my shop. Since I do all the animation myself, it can be very time consuming. I have learned as long as I have imagination, fish line and some electric motors, I can animate. I'm sure people who are really good at it will consider my work very amateur. Those of you like me, with limited scientific skills; may find this useful. Those of you with technical skills, it should be good for a laugh.

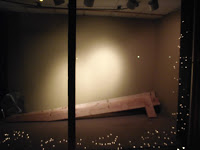
New addition to "Sunken Ship Christmas Window"
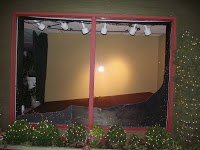
Beginnings of "Sunken Ship Show Window"
Two years ago when I revived this window, I realized it would be necessary to come back to differing versions of the same theme. I made the
major elements so they could be disassembled and stored. Three elements like this were made for the frame of the sloping floor.

This was the first animated Christmas window I did. The main part was the sloping floor with an open "treasure chest" with large fish swimming around it. To accomplish the swimming fish I replaced the ceiling tiles with ply-board painted squares. I mounted an electric motor above the ceiling with several pulley wheels and a large v belt. This has been used to create movement in a number of different themed windows, including the second incarnation of a "Monkey Sultan on a Flying Carpet" Christmas window.
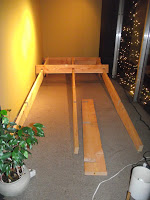
Floor Supports being assembled
Egg crate designed floor supports being
fitted together

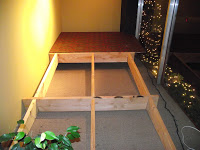
Sloped floor is complete
The horizontal floor supports are fit together making an egg crate pattern. Next 3/8 " ply board was cut to size and covered in a fabric patterned much like an oriental carpet. All pieces are marked for assembly.
1/4" ply board added

Floor as seen from the outside
The ply board is spot screwed into place.
Next 1/4" ply board is cut to give the illusion of a hole in the hull of a ship and is positioned to cover up the floor structure.
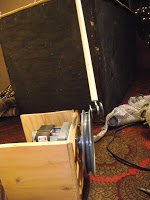
Motor for octopus

Small motor inside trunk
moves several fish
To make the octopus I used a silver sequenced fabric. A plastic Halloween pumpkin was used.
A block of wood about 4'x 4" x 4" was hollowed out in the center and attached to the inside bottom of the pumpkin. The octopus was attached to the pumpkin. The hole in the inside of the pumpkin sits on the dowel . The dowel is attached to the screw in the motor wheel with a screw eye. The screw eye rides on a plastic sleeve which has a large washer on either side.
Dowel attached to motor wheel
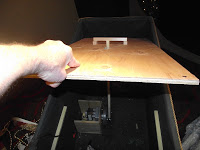
goes through a slot in a false top
of the trunk and the Octopus head
sits on top of it
A generous slot is cut in a false top for the trunk. The dowel goes through the slot and the octopus head sits on top of it. As the motor turns the wheel the octopus goes up and down and side to side.

Octopus sits in trunk ready to go

A water line is established near the ceiling. A still lit tree floats as beads and balls float away from it at the top of the water. Port holes add to the "state room" effect. Large paper- mache' fish are attached with fish line and staples to the revolving v belt at the ceiling. Other fish are wired in such a way as to make the look like they are picking at something as fish will do. New to this "Sunken Stateroom Window" is the "School of fish."