How to make Gantt Explosion Pillows and Woven Fabric Pillows


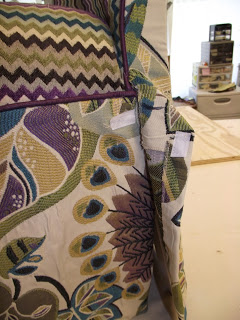
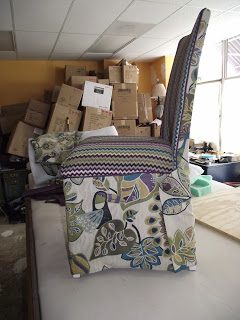
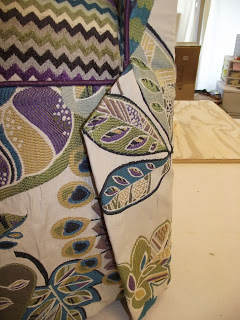
For me throw pillows are the finish to the job.   They offer me an exceptional opportunity to put my creativity and imagination to work.  Throw pillows are a way for me to gather all the fabrics used in the room into one place.  They put the stamp on my work that says, This is a custom design."    <br>

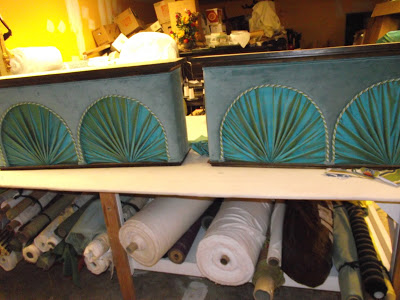
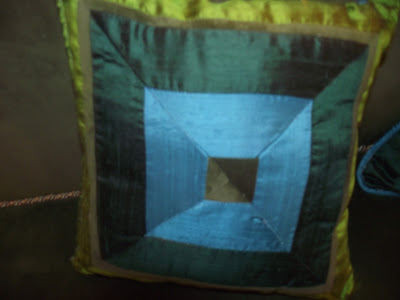
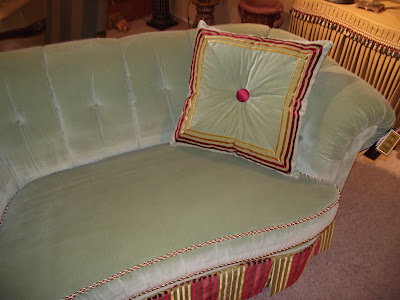
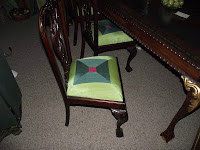
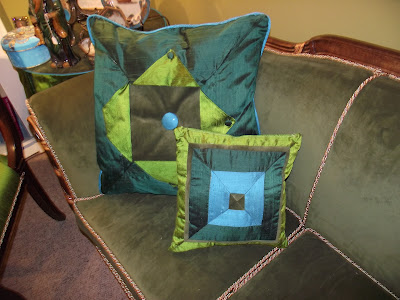
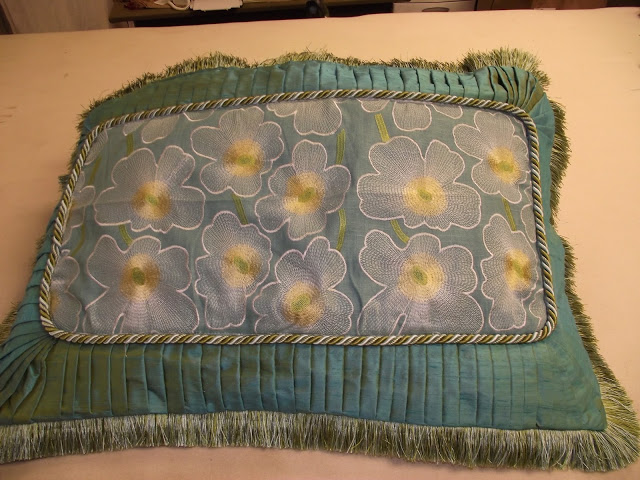
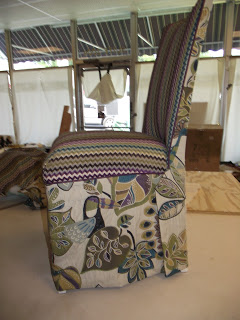
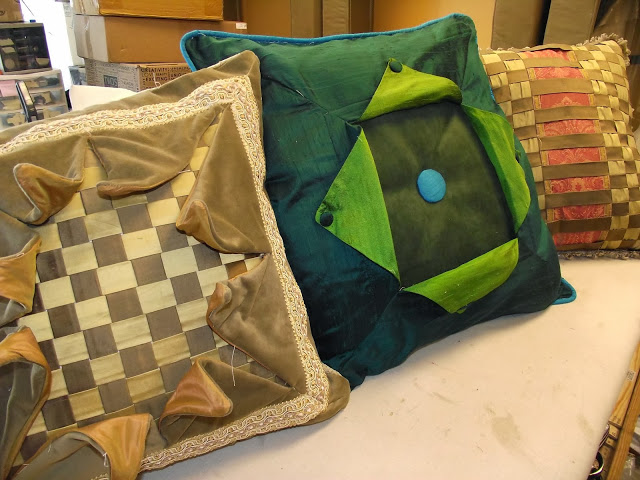
About three years ago I was preparing a room set for my showwindow.  It included three colors of silk and a velvet.  I cast about in my mind for a way to bring all these things into an interesting pillow design.  On my short drive to the studio I thought about some sort of mitering, and it came to me.  I would do a pillow only mitered part way to the center, contrast line the triangles and pull them back.  Cover the center with another fabric put a big button in the center and smaller buttons to hold the flaps back.  When my Peacock colored pillow was done it reminded me somewhat of an explosion in the center, hence "explosion pillow."    <br>

I have done them for one client and a decorator showhouse bedroom pillow sham.  I was not totally satisfied with the look though.  After the name, I wanted it to look even more realistic.  With that in mind I worked waiting for an opportunity to take it to the next level.   <br>

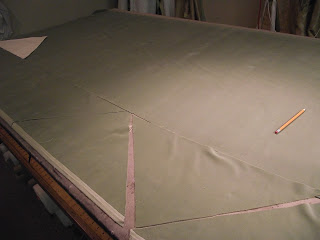
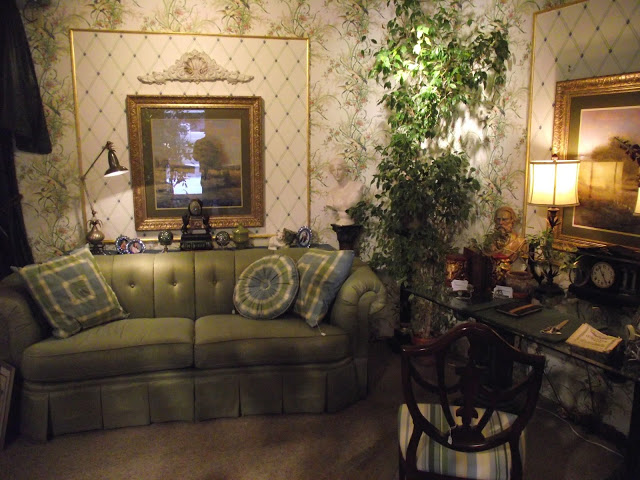
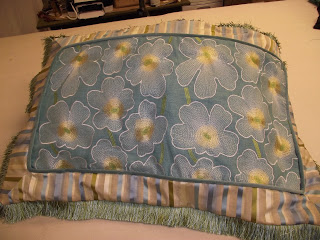
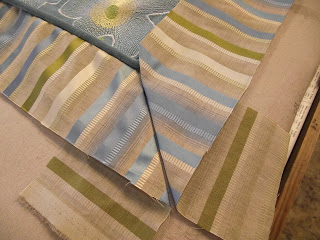
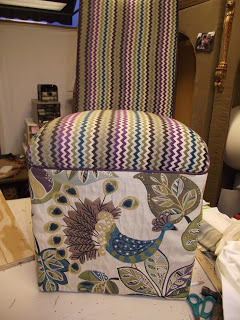
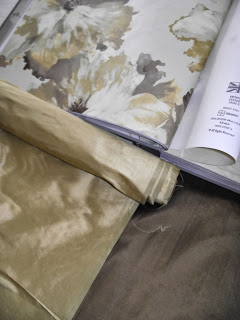
As I am preparing to move into my new studio, new room sets need to be prepared.  Having selected an English Floral paper to go with with a light sofa, I first decided to work on another idea I had been tossing around in my head.  I wanted to cut fabric into strips and make a woven checkerboard pattern.  To soften the checker board I planned to overlay it with a soft curvy pattern.   <br>

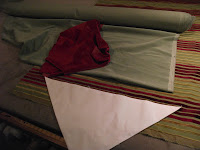
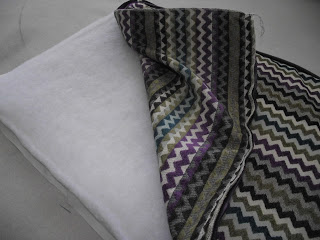
Two silks and a velvet that represented the colors of the paper were selected.    <br>

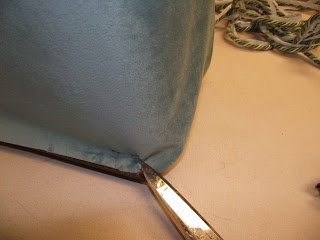
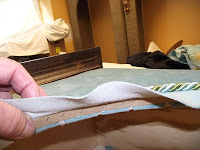
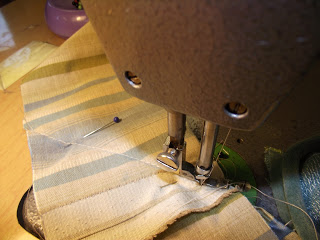
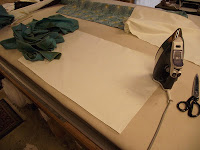
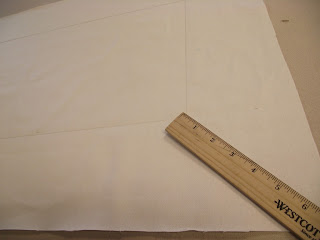
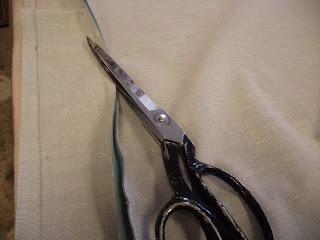
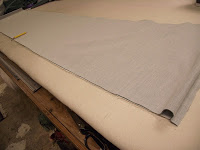
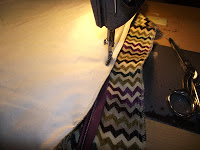
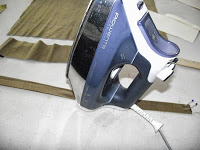
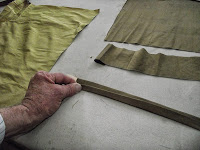
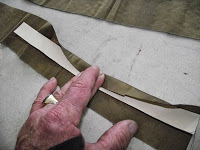
 Three inch strips were cut in order to make 1" finished strips.<b>

To make it easier to get crisp accurate strips I cut a double thickness of file folder 1" wide and used it to hold the fabric while pressing in the edges.  <b>                                                                                                
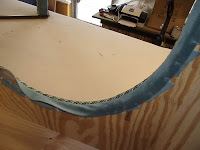
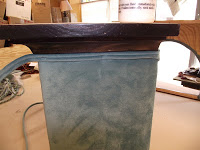
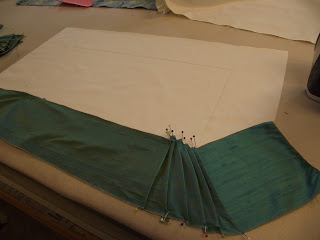
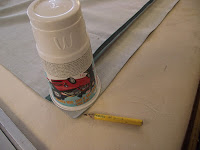
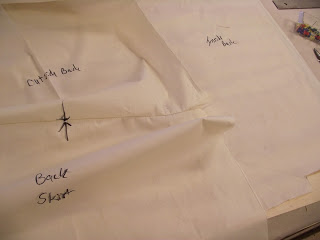
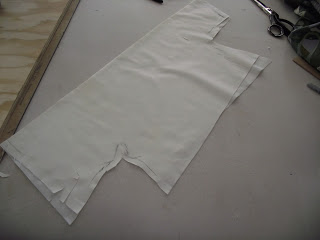
End is pinned and edges pressed
over cardboard form. <b> 
                                                                           

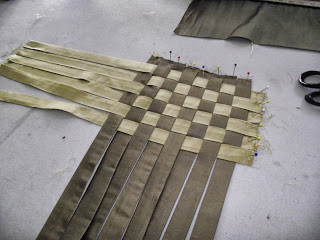
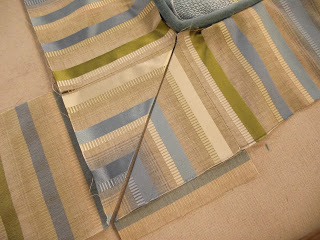
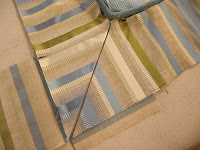
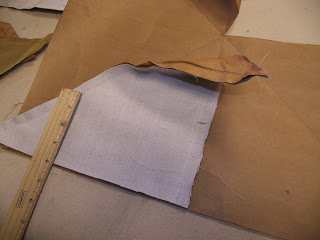
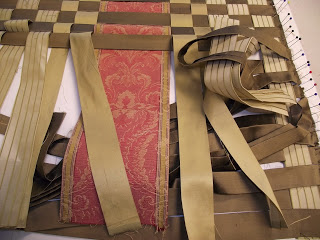
I don't show it here , but cut a piece of fabric a few inches larger than you want the finished piece.  Pin it to the table first.  Then for a checkerboard pattern pin the ends of all of one color strips 1" in from the edge of the fabric.  Next pin the end of the contrasting color strip and weave it through the others.  Keep the weave tight.  Pin on the other end and start the next one. <br>


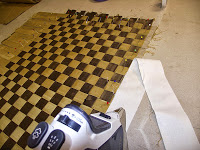
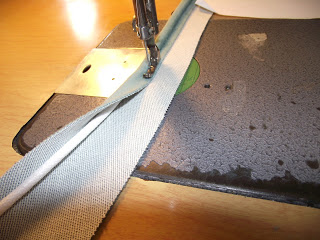
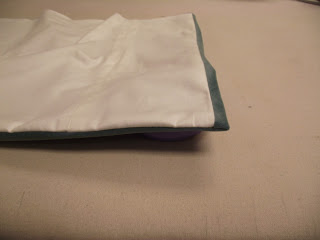
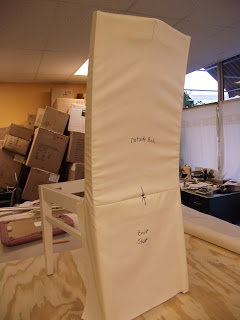
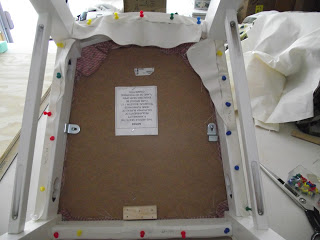
Fabric strip being bonded to hold
strips in ;place.
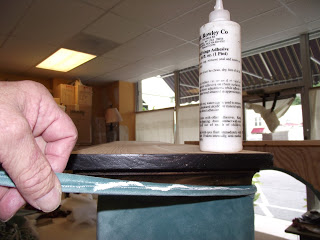
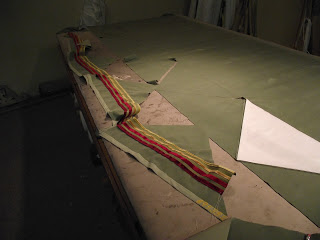
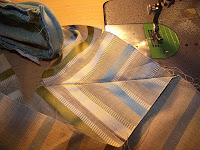
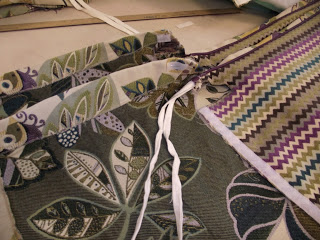
If you get annoyed by these how to blogs when it seems nothing ever goes wrong and when you try it everything goes wrong. <b> Well this was my first go around with this idea and I'll show you the things that went wrong and how I worked around them. <b>

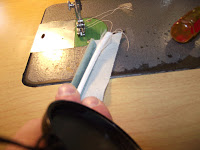
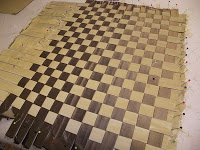
For example when I started the weaving I thought about putting the fabric square under my work but didn't.  When it is all pinned to the table I didn't want to start over so I used bonding tape and bonded the outside edges to strips of fabric as shown here.  Trust me the next time I put down a fabric square first.<b>
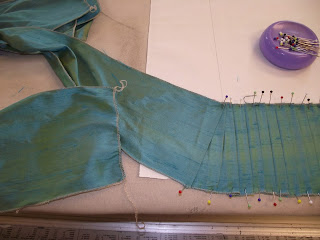
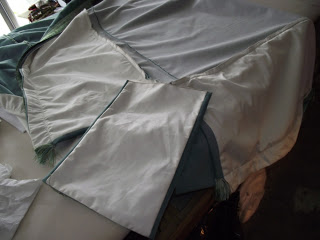
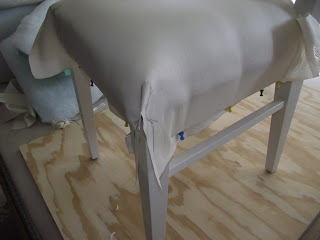
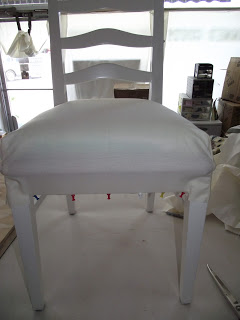
Strips with fabric bonded on edges
Don't do it this way! Put a fabric square down
before you start.

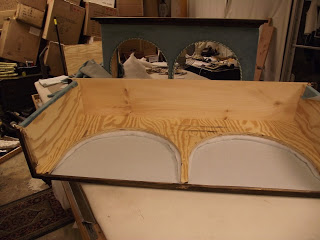
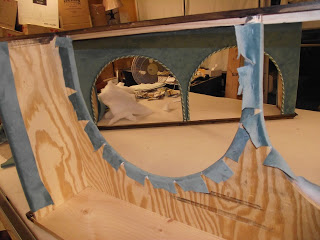
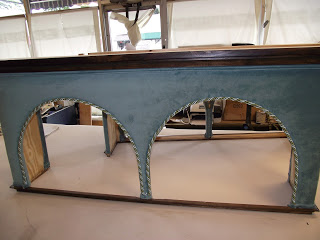
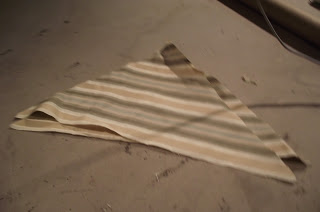
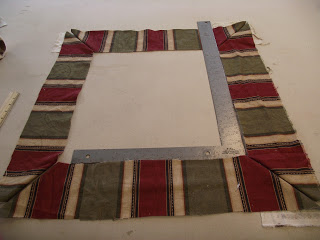
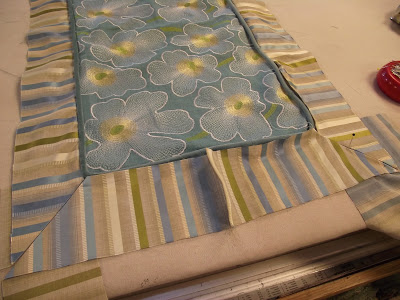
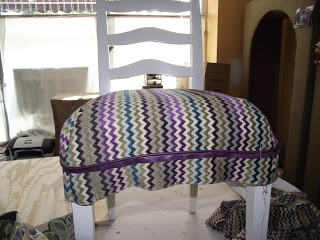
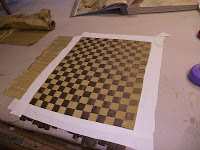
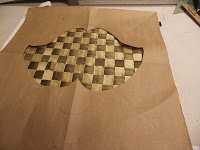
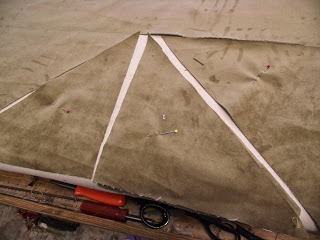
It was my original intention to overlay my checkerboard with a rounded Baroque type of shape.  The two would play well off each other.  I worked on a pattern.  When I thought I had it, I cut it out and laid it on  top of the checkerboard fabric.<b>


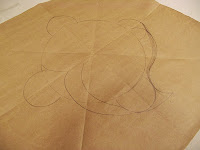
     This is what I came up with.  Obviously I didn't have it.  Tired of                                                       working with this, I remembered I had been wanting to play some
       more with the explosion pillow concept.  Make it a little more
      realistic looking. <b>


     So having a better idea how this would turn out I started working         on another pattern.<b>


How to make a Gantt Explosion Pillow
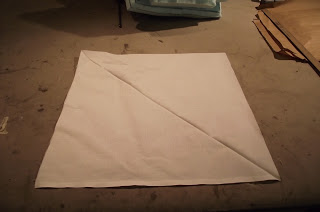
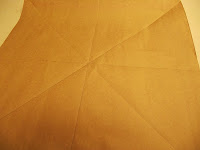
Paper pattern for pillow

I cut a paper square about 2" larger than I wanted the finished pillow and folded it in half, folded that in half, and folded it in half again.  I knew that 8 triangle shapes would look much more like an explosion than the 4 I used on the first design.<b>
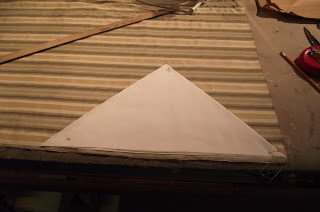
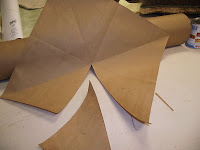
Pattern is cut from folded paper


Looking back, it would be a good idea to write a number on each triangle on the large pattern 1 through 8.  As each triangle is cut, number them .  Trust me this will prevent a lot of ripping apart and remaking of triangles.<b>

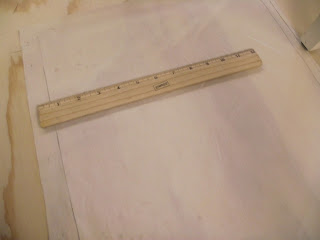
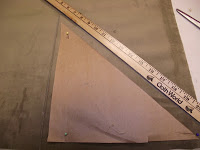
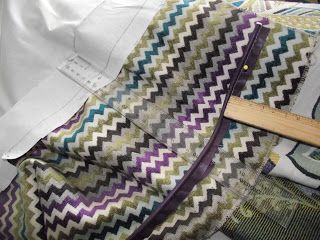
Use a straight edge and mark the
pattern on the fabric.

Since I was working with velvet I wanted to be careful to cut all pieces the same with the nap.  At the end I'm not sure I was totally successful doing that.  Had I marked the bottom of each triangle with a number 1 - 8, I would have easily known what was the bottom of the triangle and where it went.  Mark the bottom of each triangle you as you cut. <b<


Mark the bottom of each triangle by number as cut starting
with # 1


In order to save fabric I cut the triangles as shown.  I was making two pillows so I planned to use one nap direction for one and the next cut for the other pillow.  I marked them with a yellow headed pin and a red headed pin.  Mark the bottom of each triangle as you cut it with a number starting with #1.<b>


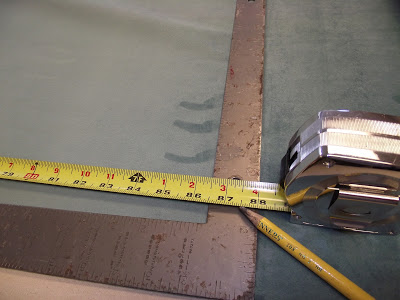
Measure 4" from the bottom on both sides of the triangle
mark and cut a 1/2" cut to mark.
Select a contrasting color of fabric to line the triangles.  I chose silk. The problem here was that both sides of the silk look the same.  I should also have marked the bottom of each triangle on its face with a number 1 through 8 as I cut it.<b>

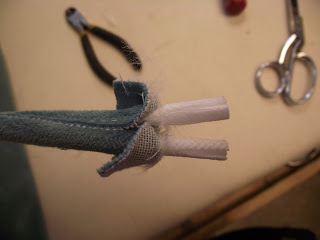
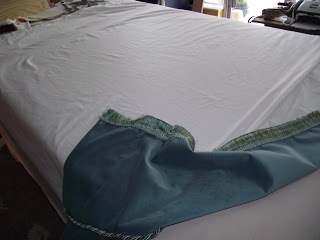
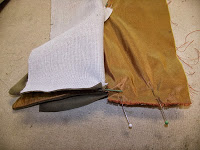
When the lining is cut and marked on the bottom with a number as cut, match the bottom numbers and attach the two face to face.  Measure 4 " from the bottom, mark and cut a 1/2" cut.  Starting 4" from the bottom attach the lining to the face fabric with a 1/2" seam.<b>

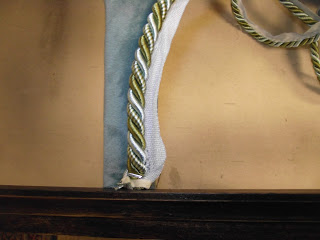
In order to make my "explosion" stay in place and be a little more realistic, I found a wire intended for stems on artificial flowers that was very bendable.<b>


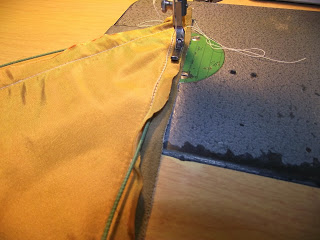
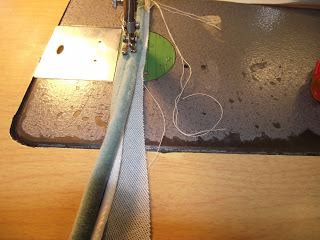
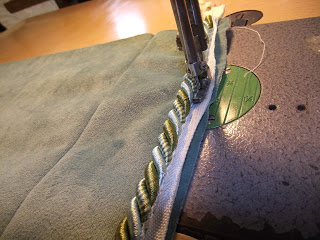
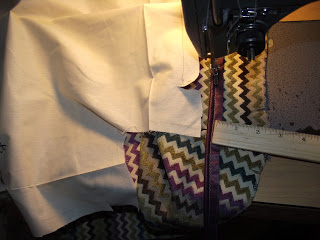
The wire was bent and stitched with a zipper foot into the seam of each triangle.<b>


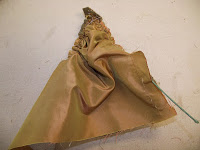
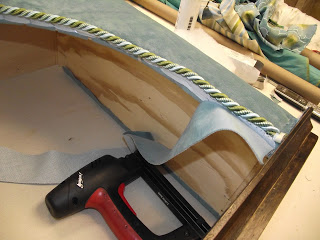
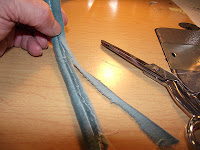
With the wires sewn into the salvage it is now time to "turn" the pieces so the salvage is inside.<b>
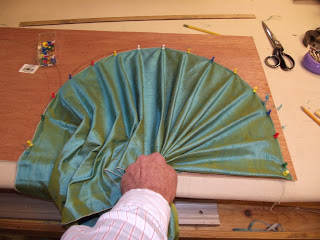
The pictures on the right show how that is done.  Gather the fabric on the wire and push tight from both sides to the center.  Pushing the center in gradually pull the fabric down the wire with the fabric turned salvage inside.<b>


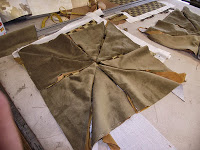
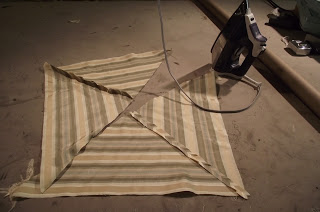
Now it is time to attach all the pieces.   If you lay them out on the original paper pattern in the numbered order they should look like the picture on the left.<b>


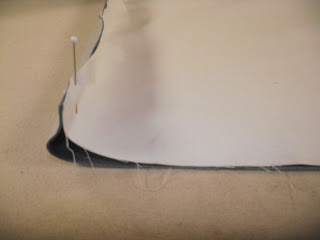
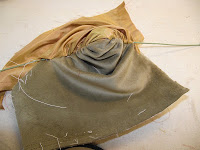
First turn the face fabric over the
upper part of the triangle.  Attach the two from each side first.  Pin the lining face to face and sew up to where the fabric is turned.
After the pairs that make up the 4 sides are attached use the same process to attach the linings of the four side pieces.<b>

Repeat the process with the face pieces.<b>


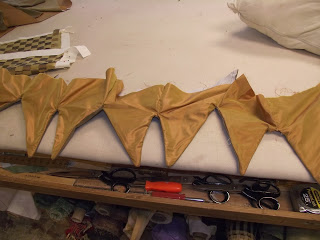
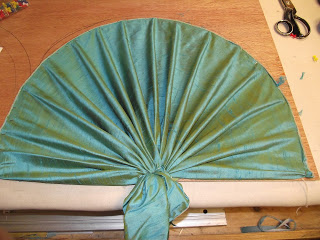
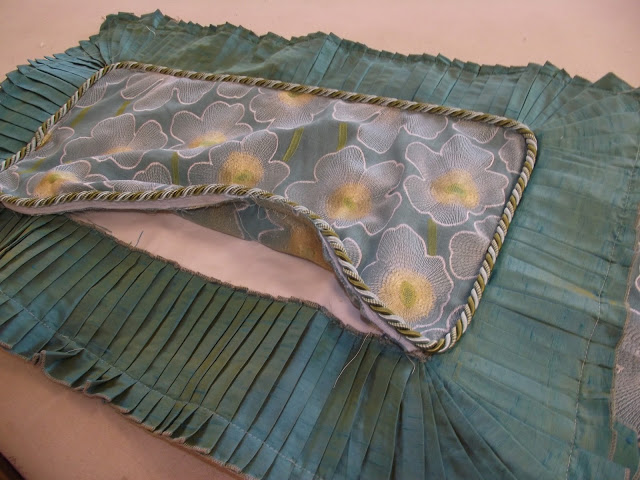
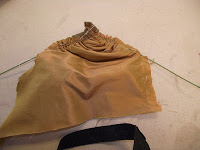
The picture on the right shows how it will look before you stitch the last linings and face pieces together.<b>

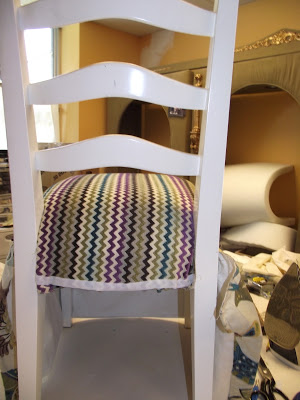
Now position this part into a flat square over the center fabric, in this case the checkerboard piece with both face up.  Sew together.  Turn these two pieces face down on top of the fabric cut for the pillow back sew together and turn.  Spot tack the triangles to the checkerboard fabric about 2" to the middle from where the wiring begins.<b>
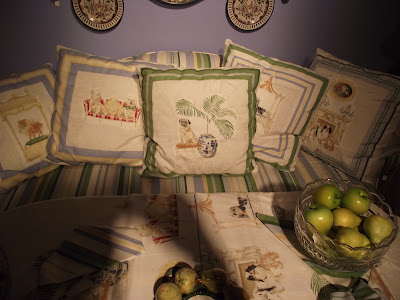
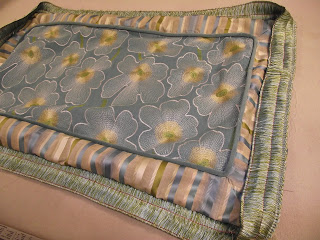
Shape the wired pieces to look explosive!  <b>


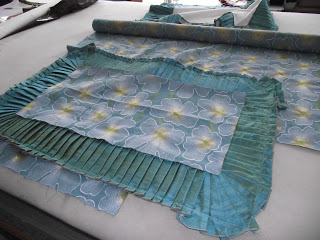
On the right is a photo of another fabric weave I did. Notice this time I modified the strip widths and worked with more than two fabrics.  Like everything you are only limited by your patience and creativity.<b>

Done<b>

I hope you enjoyed this process.  Check out my other blogs and please let me know what you think.

Bill Gantt

Decorating a Home Library in Black and Gold


My clients had a small room across the foyer from their dining room we had just finished.  While I was flattered that by this time I had enough of their confidence, they said just decorate it and make it look good.  I suggested they let me think about the room and get back to them with ideas.<br>


To my way of thinking every room should have a purpose.  I came back to them with four suggestions.  A music room, a library, a dressy intimate dining area, or a room to serve all three purposes.  We settled on the fourth.  Essentially it is a library that can serve the other purposes.<br>


On the right is the rough sketch I provided for what I hoped the back wall of out library would look like.

The clients had seen a black and gold neoclassic room set in my studio. The husband had particularly liked it, so we decided to do that theme in the library.

The first thing that came to mind for seating in this small room was a pair of swan arm settees.  When I contacted the company I had gotten them from before I learned that they had discontinued them.  I then remembered I had used them for a bachelor client's living room.  He had since married and had told me his wife didn't like them.  He still had them in the navy and red stripe we had ordered them in.  I bought them back redid the gold leaf trim striped them and recovered them in the black and gold stripe.<br>


We selected Fabrics and wallpaper for the room.
I then sketched three original window treatment designs.  Two had round cornices the shape of the window tops and one had a square top with the shape of the window cut out of the bottom.<br>

The square top one was chosen by my clients.

We decided to upholster the cornice in black velvet with inserts of a black and gold trellis like pattern that the wife was especially fond of.  Black silk was selected for the swag and jabots

and tie back panels.     Black gold tassel fringe and rope trim was used as well.<br>


While I worked constructing cornices, drapes and recovering settees, my client worked with my sketch and a cabinet maker to get the back wall finished.>br>


A beautiful neoclassic pair of sconce lights were ordered from Decorative Crafts.  My client and I went to a bookstore on Third Street, Midtown Harrisburg and found good buys on several old books.
An internet search produced necessary neoclassic art prints.<br>


The large and heavy porcelain bowl with bronze ormolu makes a bold statement under the framed print in the center of the wall.   The shelves were arranged with books and various mementos and accessories new and old.  It is a room I and my clients are proud of.<br>


Tie backs echo the insert in the cornice boards


<br>


I hope you enjoyed sharing this experience with me.<br>

Bill Gantt


Making an elaborate wood and fabric cornice board

1/2" scale drawing for Window Treatment

As with all my projects a 1/2" scale drawing was done of the proposed window treatment.


Inspiration was drawn from an interesting antique bed that was to be used in the room.  The panels in the headboard have fabric inserts.  I suggested we repeat the fabric insert idea in the upholstered cornice and echo the dark wood finish of the furniture.  The idea was well received and the project begun.


The main part of the cornice is constructed out of plyboard.

I have shown basic construction on other cornice blogs so I will not here.  The only difference between this basic construction and others is that the top is cut to extend beyond the front and ends about 2 1/2" to accept the small crown molding to be added.

A circle pattern was made on paper.  The paper was folded double, evened out , placed on the  front, traced with a marker and cut out with a sabre saw.

Small crown molding was added to the top, a sash bead molding and 1" square wooden strip to the bottom.  The square strip covered the plyboard edge on the bottom.
Small crown added to top and stained


1" bottom finish strip ans sash bead molding


 Nail holes were filled.  All wood that would show was stained and given a satin finish.


A layer of polyester furniture batting is spot stapled in place.


Relief cut made at corner


The velvet is pre cut to a few inches longer and wider than the surface to be covered.

I mark the center front top and bottom and staple the fabric tight from middle to end both directions.  When going around the corners with moldings it is necessary to cut "relief" cuts.

They are cut from the edge of the fabric up to the corner you are rounding.  They keep the molding from preventing the fabric from fitting snugly.

Turn the cornice face down.  Cut the outline of the  circled part out.  Keep your cut about 3" from the
edge.


Nex cut relief cuts about every 2 or 3 "apart.
Start in the top part of the rounded shape, pull each "tab" tight and staple.  As you do this watch how the front is looking.  You want the front to look smooth and even.

On the center strip cut off excess fabric.


The edge will either need a welt cord to finish it or a trim as shown here.  Note:  The ends of cording must be taped before cutting to prevent unraveling.  I also secured the end with a staple.

The white edge "lip" is stapled so that it is concealed in the thickness of the plyboard when the next step is completed.


Cut 2' bias strips of fabric.  Put the face of the bias fabric against the "lip" of the cord and staple it in place.


Now come back with 3/4" cardboard furniture stripping.  Staple the stripping so that it aligns  with the outside edge of the board.  The purpose of the striping is to give you a smooth edge.


Once the stripping is on come back, pull the bias fabric snug around to the back and staple.  You will need to cut relief cuts in it as well.

Now it is time to make double welt cord.  This will be used to cover staples and finish the edges.
making a double welt

Second cord laid next to covered one
First cover one cord. Using the zipper foot stitch close to the cord.  Be sure to keep the fabric tight on the cord. I like to keep the edge the width of the foot.

Second cord is being stitched over stitch of first cord
Next lay the second cord next to the covered one.

Keeping the fabric flat, roll the covered cord to the
right and over top of the uncovered cord.

Using the straight stitch foot stitch on top of the stitch from covering the first cord.
It will look like the picture to the right.

Carefully trim off excess fabric.


Fabric is stripped back before ends of cord are removed                                                                                                                                                                                                                                                                                                                                                                                                                                                                            


White fabric glue is put on the back of welt.
Before starting to attach the double welt I peel back the fabric and pull about an inch of cord and cut it off.  I then fold over the end and staple on the seam for a clean start.


With the end anchored with a staple white fabric glue is used to help attach the double welt.

It is good to staple at corners and every 12" or so to help hold the weld while and after the glue dries.  The double welt covers the staples .  I could have used gimp or trim.  On this design I wanted the emphasis on the open part so that was the obvious place to use the multi color trim.

If you look closely you can see where I put a cautionary staple.
When the project is complete it will hardly be noticeable.


Now that the double welt is in place top and bottom, it is time to work on the fabric insert.

A piece of luan  (1/4") ply board is cut to fit the inside of the cornice front.  It is the inside dimensions except that it is cut 1/2" shorter top to bottom. 

The outline of the circles are traced on the board.  Then another line is drawn parallel to the first 2" farther out.  This margin will assure that no edges show when the panel is put in place.

Check the length from center to the line. cut a piece of fabric the longest length and 3 times the fullness of the bottom width.
Measure the circumference of the half circle.  If for example it is 30" divide by a number you think will give you an answer of somewhere between 2 and 3.  That will be the number of folds you will have.  Thumbtack the center of the fabric to the center of the circle top and bottom.  Start at the center top and tack the fabric at the pre planned points.  At the bottom center you will pull the fabric to create the center pleat.  You will keep adjusting the amount of fabric in the fold until it stands up as shown.  Do the same til the end.  You will have to adjust the folds periodically until it looks good.  Then put some long staples to be sure it is attached.  Repeat the process on the other half.  When the bottom is done, use 1/4" staples and attach the fabric where the thumb tacks are.
There is no professional way to say this, but when all the fabric is stapled and secure, knall of the wad at the bottom with your scissors.

When both fans are finished I attached a strip of fabric that covered the bottom inch of the fans and the laun wrapped it around and attached to the back of the laun.  This way the bottom edge is covered and neat.

The panels are fit inside the cornice, the inside is lined in fabric lining and it is done.


How To Mitre Stripes

Original stripe of Three colors of silk and velvet mitred


I love to work with stripes!   Mixed with other patterns and solids , they are a great way to create interest and detail into a room design.   I use them to make interesting trims or accents on drapes  pillows and table cloths.
Pattern after first fold

How to mitre a stripe

Cut a piece of lining a few inches larger than you want the finished product.

Fold the fabric diagonally-corner to corner.  Press it with an iron.

Fold the piece diagonally again-opposite corners to corner-Press.

Pattern after second fold and lined up for cut
You will have a triangle shape about 1/4 the size of the original piece.  This is your pattern.

Place your triangle pattern on the striped fabric.  Make sure the
bottom of your pattern is aligned with the bottom stripe.   Also
It is a good idea to position the pattern so that the top point of
the triangle is over a large stripe.  This will make it easier to get
a neat square when you sew the 4 pieces together.

Cut your first triangle shape with the folded white lining pattern.
Two pieces sewn together


Then use the first striped triangle shape you cut as the pattern
for the next 3.   This helps assure that all four pieces will be
exactly alike.
Seam together two triangles, then seam together the other two.
Press the seams flat.


These pieces need to be turned face to face before being sewn


Place one set of sewn together triangles face up.  Put the other
set on top with the face down.   Be careful to perfectly align
the center seams.   Pin together.
Starting at the middle seam sew toward the outside point .

Then starting at the middle seam again sew to the other outside point.


Stripe trim being cut


Often I make a trim by cutting a stripe from a fabric.

It is much easier to mitre the entire pillow than to just try to sew the trim on and mitre the corners.

Many times the grain of even a solid fabric can give an interesting subtle effect when mitred.


Velvet triangles cut for two pillow faces

On these pillows the fabric is velvet which has a nap.  If done properly the differing directions of the nap when mitred will give a nice subdues effect.
To save on waste I have cut the triangles two directions.  With the velvet I must use all the triangles with the point up as cut for one pillow and the other, point down triangles for the second pillow.

Trim being applied to solid velvet


Measure an sew the trim stripe on each triangle at the same place.

Solid velvet and velvet stripe - red for covered  button


Finished pillow
As my pictures show you can even mitre a plaid.  I have mitred pillows using floral prints.   You can
even use the same technique on round pillows.   Just cut the lining a few inches larger than you want
the finished circle.  Fold the circle in half-press, fold it in half again-press.   Repeat the process
until you have the size triangles you want.  A round looks best with 6 or 8.


Mitred trim frames dog prints


Mitred dining room chair seat


"Explosion" pillow and small mitred pillow


Another type of mitre I have done is when a stripe is used to trim the outside edge of a pillow or table cloth.  If the stripe is used parallel to the edge of the item the methods described earlier work.


If however, the stripe is to be applied perpendicular to the edge of the fabric another issue arises
Fabric on the right is being aligned to be mitred
.
With a smaller multicolor stripe like shown here you will be able to mitre 3 corners at the same point in pattern and one mitre that will be at a different point.  With a stripe like this it is not so noticeable as with a bold 2 or 3color stripe.

For a project like this cut the large center piece of fabric and add a welt or trim on the edge.

Cut your stripes to the desired width.  To save fabric I usually join them all together end to end being extremely particular about the match so the seam is almost invisible

For this method, cut the strip of trim fabric the length of the center piece and add double the width of the trim fabric plus a few inches.  For example if the stripe trim fabric is 5" wide, add about 12" to your first cut.  With the trim fabric on the bottom facing up and the center fabric on top facing down, sew on top of the seam of the center piece trim seam.

Because this stripe is not balanced-one side is different than the other(see the cream colored grosgrain stripe next to the blue stripe) the next strip must be turned upside down to get a mitre.

Fabric trim is mitred and pressed 
Although I don't show it on the picture I recommend once you determine the edge that will be sewn to the center piece, you press over 1/2" along the top.  That is where you will be sewing.  Now put it next to the last corner and turn under one side to a 45 degree angle. If the edge of the trim stripe is perpendicular to the stripe showing on the upturned wrong side, it is 45 degrees.  Do the same with the piece you are adding. When they are perfectly aligned press a crease into both pieces.


Creased angles being sewn together
Now carefully fold the entire pillow face on the diagonal.  Noting the pattern, pin the two pieces of trim fabric face to face.  Be certain  that the angled creases you pressed in are one on top of the other.


Starting from the outside edge sew the creases together with a medium stitch.  Be sure to lock the stitch on the outside edge.  nSew toward the center piece of the pillow or cloth.  When you reach the center piece trim keep as close to the corner as you can. Lock your stitch.

It is most likely that you may have to pick one or two out and redo them.  All the years I have been doing this I usually have one or so that I have to do twice until I'm satisfied.
underside of a successful mitre.

When the first corner is done to your satisfaction sew that strip up to the next corner.

Turn the fabric upside down(for this kind of stripe).  And find the point in pattern that will match the stripe at the top corner.  Turn the sewn piece so it is at a 45 degree angle(check to see if the face stripe is perpendicular to the stripe showing on the wrong side).  Pin it to your table.  Now do the same to the strip you are going to attach.  When the match is good press to mark and sew.


Last corner on the right. the part of the stripe to be eliminated in the middle
When you get to the last corner you no longer have the ability to shift the trim strip for a match.  With a mulit color smaller stripe, you find the pattern match on the corner.  Pulling as much fabric into that section as you need to match the first strip.  Press it into place and pin.  Now look at the excess fabric in the last trim strip and find a place where the pattern can be cut and joined will not be noticeable. For example on this one I paid attention to the location of the green and blue stripes.  The piece sticking up in the middle is where the fabric is coming out.

Once you find the place lay the fabric one direction and press in a crease then lay it the other direction and press in a crease.Be sure the fabric is always touching when your do the pressing.  Turn the fabric strip face to face.  With the center crease in the middle, line up and pin the other two creases together.  Lock your stitches and sew the two together.  Do not cut the excess off until you are certain everything lines up. Sew the upper edge of the last strip to the center piece and sew your last mitre in the corner.  All four corners are mitred and look great.


Bold stripe trim pieces laid out and checked with a framing square
If the finished size necessary for the piece is flexible, another approach that will get all 4 corners mitred the same, is to mitre the outside trim first and then attach the center piece when that is done.  With a bold or two color stripe this can often be the only way.  Unlike the stripe I showed you in the earlier example, stripes like these make eliminating part of the stripe on the last piece to get the mitre impossible.  Also with such a bold pattern you are much more likely to be annoyed with one corner having a different part of the pattern in the  mitre.


Trim strips adjusted to make a rectangular pillow
Because you must do a bold stripe this way you are only able to adjust the size of the pillow by the width of the stripe or by the repeat.


This stripe has a 9" repeat, so you can have a 27" by 27" square pillow or a 27"by 18" rectangle pillow.


  You are only limited by your creativity.


Good luck and please tell your friends about my blog.


Bill Gantt


How to make fancy reversible pillow shams


Other side of sham


No well dressed traditional bedroom should be without beautiful pillow shams.

I always make mine reversible and as fancy as my client will allow.  They really are the most important decorative item on the bed.

This embroidered linen floral is what the room scheme is built around, but the shams are the only place I used it.  I know that is all the exposure it will need in the room.


Because my plans called for silk to be pleated around the outer 4" of the sham it was necessary to have the lining to pin and sew it to.
lining cut the finish size of the sham


8" long corner pieces cut.
A 4" margin is measured and marked on  the lining.  When the lines intersect it becomes obvious that the corner fabric will have to be longer than  the rest.  Pleating requires 3 times the length the finished piece is to be.  Accordingly several 6" pieces of silk were cut equivalent to three times  the length of the sides and ends of the pillow.  All lengths were sewn together.

4 pieces of silk were cut 8"  wide and about 12" long. One for each corner.


Starting in the corner with the 8" piece the silk is pinned on both sides and the pleating begins.  To fan the fabric out around the corner it is necessary to use hardly any fabric in the outside pleat and very much more on the inside pleats. I planned for my pleats to be about 3/4" wide.  Once the corner piece is pinned you can simply slip about 4" of the 5" wide silk under the corner piece, pin and continue to pleat.  Always fold the fabric in the same direction as you pleat.  I don't often have the patience to measure things like this but go by sight.  If you are more comfortable measuring do so.  

first side pleated , tieing into the corner
To measure for a 3/4" pleat, pinch your first pleat so that it's fold has 3/4" inches of fabric on both sides.  Pin it flat to the table.  Place your ruler's 1 1/2" mark on the outline of the fold under the pleated fabric.   Fold your fabric to the 3/4" mark, hold in place pull out the ruler and pin top and bottom.  Repeat the process until reaching the next corner.   Cut the fabric about 4" longer than the last pleat.   Fold the first pleat of your corner fabric and pin it over the 4" of 5" pleating fabric.

Also pin the fabric even with the guide line drawn on the lining.  Let the excess go beyond
the lining. Repin all the pleats to the lining.  Sew the top edge 1/4" in from the edge of the silk.  Flip the lining and silk over and sew the outer edge of the lining to the pleated silk.  Sew it also 1/4" in from the edge.


Measure and cut the main-center piece of fabric.
It should lay about 5/8" over the pleat top on all sides.  Make a 1/4" welt cord or use a lip cord trim.  
Sew the welt or trim piece to the edge of the fabric with a 1/2" seam.


Position the trimmed center piece of fabric on top of the pleated fabric.  Pin in  place and with your zipper foot stitch it as close as possible to the edge trim.  Be careful that the lip of the cord stays folded under.

If you want more now it's time to start the other side.

Other side of the reversible sham.

Initially my plan was for the other side of the pillow sham to be covered in the main floral fabric only.  But I had a little of the drape and dust skirt fabric left and couldn't stand the thought of one side being so fancy and the other side plain.

This time there is no lining needed because there is no pleating.  I cut the center the same size as used on  the other side, covered a 1/4" cord in velvet left from the bed cover and sewed it to the main fabric.  The stripe was cut with a total of 1" seam allowances.   The amount of stripe left only allowed me to cut the pieces with the stripes running toward the center of the pillow.  There is a reason you don't see stripes done this way often.  The reason is that for it to look right the corners must be mitred.

All strips were sewn together end to end.  Care was taken to be careful to get a perfect pattern match for an almost invisible seam.

To do this you do one side at a time.  Sew the first strip allowing about an inch more than the width of the strip on each end.  Place it on the sewing machine with the center piece on top and the stripe strip on the bottom, so you can stitch over top of the trim seam on the center piece.


Here the second strip is being aligned to the first one sewn
If you look closely at this particular stripe, each stripe has a grosgrain type on one side only.

Because of the grosgrain stripe it is necessary to turn the next strip of fabric upside down to get the mitre.  In the picture you can see that the grosgrain stripe next to the blue stripe is on the left of the blue and on the right of it on  the other strip. 
Turning the strip would not be necessary if each stripe was balanced(the same on both sides).

While I am not showing it in this picture, aligning the corner mitre would be easier if the
top of the strip were turned down 1/2" (your seam allowance).   The easiest way to check the angle of the corner fold is to be sure the edge of the strip is perpendicular to the stripe seen on the underside of the fabric.


Stitch the two pieces together on crease made by ironing.  
Corners pressed for seam mark
ready to be folded and pinned for sewing
Once you are sure the corners are properly matched, press a crease on the fabric.  Carefully pin the crease of each fabric face to face being sure the creases and pattern line up.  Sew with a medium stitch from the outside corner toward the center.  As you get to the center piece trim, sew as close a possible to the corner of the trim and LOCK your stitch by sewing in reverse a few stitches.  Most likely you will have to redo corners a few times until they are acceptable.   All the years I've been doing this I usually have to rework some until I am satisfied.  Don't get frustrated.  Pick out the stitch and consider the first time as creating reference points that will help you get it right the second time.

Under side of mitre after sewn

All this works well until you get to the 4th corner.   How do you make it miter correctly?  With some bold or simple 2 color stripes you may actually have to cut the strips first, lay them out in  a rectangle or square depending on the pillow you want to finish with.

Center is checked for square before corner is pressed, pinned and sewn


As you can see once you have the strips laid out you can adjust for size by adjusting all four corners.  This of course means if all corners are going to be the same the size and repeat of the stripe will dictate the sizes possible.
Repeat of 9" allows for a 27"
 square or a 18" x 27" rectangle


As you can see this stripe has a 9" repeat so the pattern allows for a 27" x 27" square pillow.  If I want a rectangle it would have to be 27" by 18".
That is the big disadvantage of bordering a pillow with a large stripe running perpendicular to the edge of the center piece of the pillow.


Final stripe pieces is readied to finish pillow.

With a small multi color stripe not having the 4th corner match the other 3 is not as important as with a large bold stripe.  It is important, however that the corner be mitred.  With this kind of stripe it is possible to remove some of the stripe in the middle of the piece.  As you can see in the picture the corner is first matched for the final mitre.  Then it is determined what part of the stripe can be removed to shorten the piece to achieve the final mitre.  The piece standing up was pressed each direction to create a marking crease.  A tight stitch was used to sew crease to crease.  It was then cut and seam pressed open.  The final mitre was done.
Brush fringe is attached to one side of the pillow.


Brush fringe was attached to one side of the pillow.

The final step is to sew both sides together.

Both pieces were pinned face to face.  The pleated silk edge is not even, but it was stitched 1/4" from the edge of the lining.  Since it was easy to watch edge with the brush fringe sewn on, that part is put down and the side with the silk is watched.   Start on a long side that you determine will be the bottom.  Start about 6" from the corner and sew toward the shorter side.   Continue around the edge until you reach the long side you started on.  Only sew in 6" again. Lock the stitch well.   The space not sewn is where you will sew velcro for an invisible closure which allows the sham to be reversible.   Always sew the hook side(more plastic side) on the edge the brush fringe is sewn to.  Sew the loop side on the opposite side.   The fringe trim is less apt to get caught on the hook velcro if it is sewn this way.

done

I hope this was helpful and understandable.

Bill Gantt

How to make a "fitted' bed spread

Measurements and fabric estimate for fitted spread

When the bedroom is completed I will add a picture of the dressed bed here.  
First you must get accurate measurements of :
     The Top of the Mattress- width and length
         If the top is rounded like on a pillow top mattress, you may want to mark where you measure with a straight pin on each side and top and bottom.
      Next measure the length of the sides and bottom.   If you marked with a straight pin, measure from the pin to where you want the spread to end.  If there is to be no dust skirt, to the floor.  If there is to be a dust skirt plan at least 4" below the top of the box spring.  As a double check I also like to note the measurement from top to where the spread will end and the same way across.  The two measurements for each direction should add up to this one.  If you look at my notes you will see that I forgot to get a measurement for the width of the top of the mattress, but did get a total measurement.  By deducting the length of the two side pieces I was able to determine what width to make the top without returning to the clients house.

Make a clear drawing and put your measurements on it.  

This spread is velvet.  It is important when working with velvet to be sure the knap is going the direction you plan.  On a spread I always face the knap so that when you rub your hand down the bed top toward the bottom the knap is laid down.  Because I did not want seams on the side pieces and to match the knap  I cut them lengthwise off the fabric. After looking carefully at the velvet I determined to cut the bottom the same way to avoid seams there as well.


Using a framing square I first made certain that the end coming off the bolt was square.  Next I measured up the roll to the finish length I wanted.
I added 1/2 seam allowance for the bottom and about 4" to the top.  Often times after the piece is made the top needs to be re-squared and you will need seam allowance for the top as well.

Since the top measurement is wider than the fabric width, it was necessary to cut another length of the fabric.  I prefer to be extra cautious when cutting the pieces to be added to the center piece.  To get an idea how wide they need to be deduct the width of the fabric from the planed finish width of the top piece.  You will need to add 1 1/2" seam allowance to both strips.  I usually get the measurement and add 3" to it.  Also it is good to cut the piece a few inches longer than the first piece to allow for shifting when you sew.   Pin the pieces face to face and sew together with a small stitch( this fabric has a 100,000 double rub rating and I expect this spread to last a good 25 or more years) .  I don't want the stitches to start to loosen before that time.  With velvet make sure the knap is in the right direction as well.  Once sewn together I fold it double, pin it seam on top of seam, divide the finish width in half add 1/2" seam allowance measure out from the center fold and mark the edge.  I then mark and cut off the excess.

Cut and stitch together lining in the same fashion to the same exact dimensions.  Lay the lining aside
The excess on each side has been marked and is ready to be cut off
.
bottom corners are marked for rounding


The mattress corners  are never square so round them as shown here.

Trim cording is added to top piece.
In this case I am finishing the top edge with a roped cord.  When sewing a lipped cord, always 
place the cord so the part where the lip is sewn on is next to your zipper foot.  The lip will be 1/2" wide.  Sew tight against the cord. 


Lay the top piece aside with it's lining.


Now it is time to make the two side pieces and the bottom piece.

From the piece cut to seam on to the top, cut your side pieces and if possible the bottom.  In this case I only had enough for sides and had to cut off the bolt for the bottom.  Cut the side pieces the finish width as shown on your diagram + 4". 
Cut the lining the same top to bottom and the length of the fabric less 4".  Pin the ends together and sew.  Lay the pieces flat.  You should have 1 1/2"
of fabric folding over fabric on each end.  Pin the bottom(if velvet be sure to check the direction of the knap and select the bottom so the knap will be going in the correct direction).  Sew the bottom with a 1/2" seam.  Turn right side out.     Press and run a 1/4" seam along the top of each piece.

Ends sewn ready for bottom to be sewn
Panel turned ready for top 1/4" seam


Lay side and bottom pieces face to face on the unlined center piece.  Pin in place and attach with a 1/2" seam.


Corner pieces ready to be added

Make two panels using the same technique as with the side and bottom panels.  These should be 1" shorter than the other panels and about 8" wide.


Center them on the corners, pin and attach with a 1/2'" seam on top of the bottom and side panels.


Final lining being prepared for sewing


Now, retrieve the large lining made early on.

Put the spread on the table face down.

Fold both side pieces, bottom piece and corner pieces on to the middle piece.  It is a good idea to pin the corner pieces to the side and bottom panel.  Pinning them helps keep you from accidentally stitching them into your lining seam.

Place the lining on top of all of this and pin it
all around the edges except at the top.  Attach
Spread after turning
lining with a 1/2' seam.  When sewing run through the machine with the lining down so you can sew over the previous seam.

Turn so the lining is out.  By doing it this way you have no exposed seams on the underside of your spread.  Turn any excess fabric and lining under so the top is even and straight.  Top stitch it closed 1/4" from the edge.


DONE!!

I hope you found this to be useful.

Bill Gantt

How to slipcover a wooden chair


 You may notice as you follow this blog that the fabrics may change in the photos.  That is because I made two different slip covers for the same set of chairs.  It seems every time I think I have the best way to cover a wooden chair down, I come up with a new variation.  The same happened with these chairs.  I am convinced that the second way is best.  Just remember that each new chair can have it's own peculiarities which may require you to adjust your approach.

When my client dropped of this little chair I immediately noticed that the seat had very little padding and was hard.  I decided to add padding to the slip cover. In hind sight I should have repadded the seats of all 4 chairs before starting the slipcovers.  It was a lot more work to include a place in the seat of the slipcover for removable padding.   On the first set of covers I attached them to the chair with several ties.
   
On the second set I only used two ties on the back and attached the rest with velcro.  The extra padding is simply put on top of the seat and the slipcover put on top of that.   It was much easier to do and I think the results were better.

I will show the second way here.

I am partial to making the back out of one piece and making the seat and skirt as a separate piece.  I can't find a good reason why these two sections need to be sewn together so I keep them separate.

Measure the back of the chair from highest point to the floor and the widest point horizontally.   On this type of slip cover, keeping the back separate from the seat requires the skirt part to wrap around the chair about six inches on each side.  Since these were cheap little chairs that will always be covered I used thumb tacks to hold the fabric in place.  When it is not possible to use thumb tacks pieces of masking tape should do the job.
Note: The picture shows the top of the "wrap around' for the skirt cut on a downward angle.  It is better to cut that part on an upward angle.

Using muslin or lining center the fabric on the back of the chair.  Since I am wrapping the bottom part to lap over or under the skirt, I also wrap the top around the thickness of the top.  Carefully smooth the fabric in place and attach it to the chair.  If the back has a lot of shape in it you will either need a few well placed darts or may want to make the side part separate and seam the back and side together.

Once the back fabric is smooth and in place, rub the side of your pencil lead on the edge to mark it.

When the chair has a wooden back I can't resist using the slipcover to make the chair more comfortable, so if you're only doing one chair save the lining  used to make the inside pattern.  Using the same method as on the outside back mark the lining for the inside back pattern.  Leave about 6" extra fabric on the bottom and mark it go around the vertical back pieces and hang behind the seat.  One of the last things you will do is add a piece of loop velcro to this to attach to the back of the seat piece.


After marking the edges on the pattern, remove it, lay it out flat and measure out 1/2" for seam allowance.  This is the line where you will cut the lining.


I use a fine tipped marker to mark the pattern pieces and where they connect.  I usually mark where the fabric pieces are to come together on the final fabric with a marker as well.  Just be careful to stay in the seam allowance.

While it may be tempting to avoid the next step, don't.  Using your largest stitch sew the lining pieces together and put them on the chair as you go.  It is a lot easier and cheaper to correct a problem on lining than on the finish fabric.


In this case you can see if have some rippling along the side.  Kn owing that I will be using ties on the front corners that will pull the back down smooth eliminates concern.  I also learn from my pattern that the back can be made from one piece of fabric, not the two I originally thought I needed.


With the back pattern completed to my satisfaction, I move on to dealing with the uncomfortable seat.  I cut a piece of 2" medium density foam a few inches smaller than the seat.  The edges if the foam are rounded to blend into the seat.  Eventually 2 thicknesses of polyester furniture batting are added as well.


To make the seat cover you will have to use thumbtacks, but even on a good chair this is not a problem.  The seat must fit tight.   Once again lining is cut more than large enough to fit over the seat and the new foam, is pulled down until I am satisfied it will look good.  The edges are marked and it is taken of and cut.  Notice the marking for the rounded front corners.  If a more tailored look was wanted it could have been "boxed".  That is a top cut, welted and a 3 or 5" inch band attached and the band in turn attached under the seat.


As with all patterns it is folded double and cut to assure it is balanced.  Sew it together with a large stitch and put it into position.  Sometimes the first one doesn't work and you have to do a second until it is right.  It won't be the first time or the last that has happened  That is why you make a pattern first.

With this piece as with the earlier ones a 1/2" allowance was made beyond the marked edge.  The edges you are going to sew must have an accurate allowance so it fits the way you planned it.

Here you see the seat cover after the sewing has been done.  Thumbtacks hold it taunt and in  place.  Another line is marked on  the edge of the under side of the chair on the lining.  The pattern will be cut on this line.  You might make a note to that effect on your pattern.   When the final fabric is cut. this edge will be overlocked and loop velcro sewed against the edge.


Chair seat with the pattern stretched in place.   Notice that the top corners do not fit smoothly.  Even though the bottom edges were marked, I had to tailor the seam further to the top so it would lay smoothly.


Once everything is fitted and marked, it is time to take your pattern apart and use it to cut out the slip- cover fabric.


                                                                         As I said earlier, I like to use the slipcover to make the chair more comfortable.  If you look closely at the picture you can see my pattern for the inside back.  So as not to have batting add thickness to my seam, the batting is cut 1/2" smaller than the pattern.  The batting is then attached with a seam 1"in from the pattern edge.

Now the main fabric which was cut the exact size as the pattern, is placed on top of the pattern face up.  In this case I elected to add a welted trim which is sewn with a 1/2" seam allowance.  Now the two pieces are sewn together with the planned 1/2" seam allowance.  If you are doing more than one chair you will have cut extra inside back patterns to line your padded inside back piece.


Next the seat fabric is cut to match the pattern.  The two front/top seams are sewn and turned.  Remember no seam allowance was made to the bottom edges because loop velcro is now sewn to the  back side of the edges of the four sides where they will attach to the under sides of the chair.

On the back edge, just above the loop velcro just sewn, sew a strip of loop velcro to the face of the seat fabric.  The padded inside back panel will attach here to the seat piece.


Because I elected to add a welt trim to my chair, it is necessary to topstitch the trim to my seat piece now.


This is done by marking the pattern when held in place with thumb tacks.  Place the chair on a hard flat surface and measure up to the height where you want the skirt to start.  Using a yardstick mark the pattern, front and two sides: every few inches the height you determined the skirt should be attached.  When the three sides are marked take the pattern off , use a straightedge and join your marks together.

This measurement plus one 1/2"seam allowance will be the length you cut your skirt fabric.  Nothing is allowed for seam allowance on the bottom because you want the skirt yo be 1/2" above the floor.  When you line the skirt that 1/2" seam will make the skirt the right length to be 1/2" off the floor.

Lay the pattern above each corresponding edge of the seat fabric.  Measure and mark the seat fabric the same as the pattern.  This is where the top of my welt will be.

If there is no welt, you will measure down 1/2" from this mark and make a second mark.  This will be where the edge of the skirt will be placed.
Sewing 1/2" up from this mark will put the stitch exactly on the first mark.  The top of the skirt will start at that seam.


Welt is attached with a zipper foot with the top of the cord
where the skirt will be attached.
In this case after the welt is attached the skirt is placed face to face with the seat fabric.  The edge is kept just on top of the edge of the 1/2" selvedge edge of the welt cord and sewn on tight against the cord,

Skirt is attached to seat part


Here you see the  skirt after it was attached to the seat.  Notice that the peacock is centered.  Often a pleat is put on each front corner.  Because this skirt fabric is a thick upholstery fabric I elected not to do pleats. It would have added too much bulk as well as been difficult to sew.  Hook velcro was stapled to all four sides of the chair frame and the seat is held in place with it.


The outside back fabric was cut according to the pattern, hemmed and edges turned over and stitched.  A tie was added to two corners and the loop velcro that attaches to the lower back added.
Seat hook velcro where inside back attaches


Velcro tabs are added to hold the wrap around
part of the skirt in place


A purple covered button finishes off
the turn over back skirt.


I hope this was helpful.  Be sure to check out all my HOW TO blogs.  Bill Gantt