Decorating a Home Library in Black and Gold


My clients had a small room across the foyer from their dining room we had just finished.  While I was flattered that by this time I had enough of their confidence, they said just decorate it and make it look good.  I suggested they let me think about the room and get back to them with ideas.<br>


To my way of thinking every room should have a purpose.  I came back to them with four suggestions.  A music room, a library, a dressy intimate dining area, or a room to serve all three purposes.  We settled on the fourth.  Essentially it is a library that can serve the other purposes.<br>


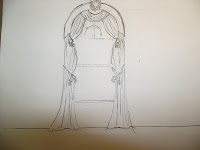
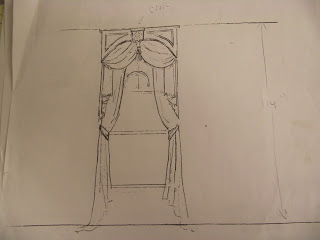
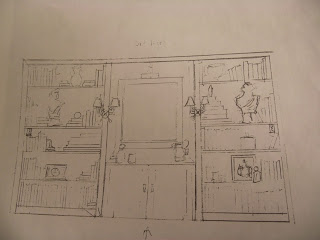
On the right is the rough sketch I provided for what I hoped the back wall of out library would look like.

The clients had seen a black and gold neoclassic room set in my studio. The husband had particularly liked it, so we decided to do that theme in the library.

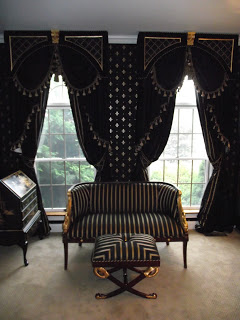
The first thing that came to mind for seating in this small room was a pair of swan arm settees.  When I contacted the company I had gotten them from before I learned that they had discontinued them.  I then remembered I had used them for a bachelor client's living room.  He had since married and had told me his wife didn't like them.  He still had them in the navy and red stripe we had ordered them in.  I bought them back redid the gold leaf trim striped them and recovered them in the black and gold stripe.<br>


We selected Fabrics and wallpaper for the room.
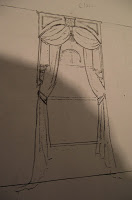
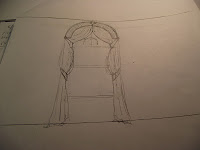
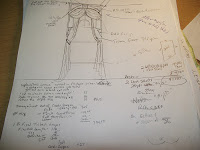
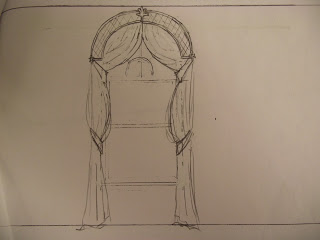
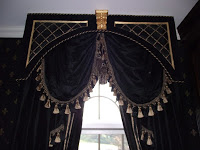
I then sketched three original window treatment designs.  Two had round cornices the shape of the window tops and one had a square top with the shape of the window cut out of the bottom.<br>

The square top one was chosen by my clients.

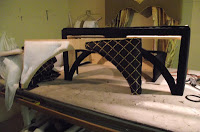
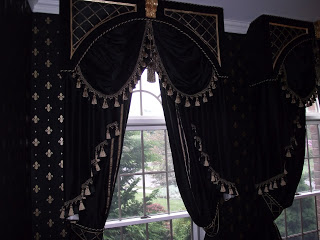
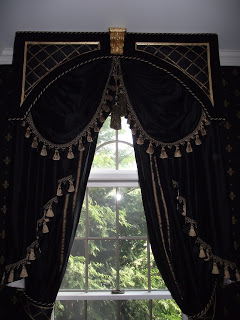
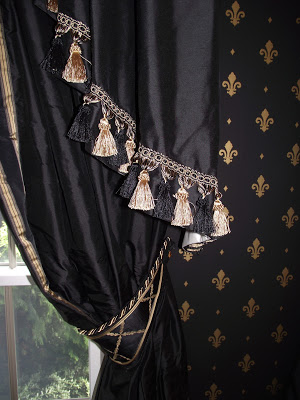
We decided to upholster the cornice in black velvet with inserts of a black and gold trellis like pattern that the wife was especially fond of.  Black silk was selected for the swag and jabots

and tie back panels.     Black gold tassel fringe and rope trim was used as well.<br>


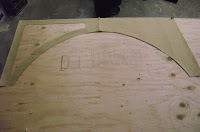
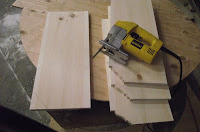
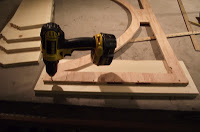
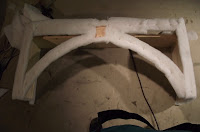
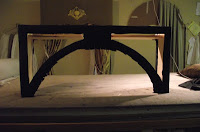
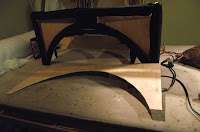
While I worked constructing cornices, drapes and recovering settees, my client worked with my sketch and a cabinet maker to get the back wall finished.>br>


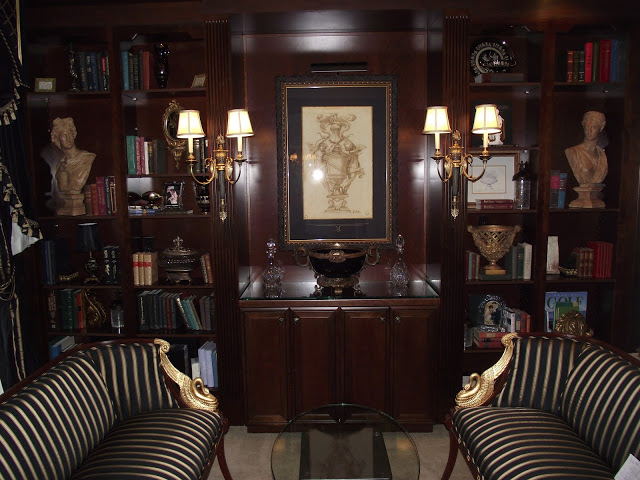
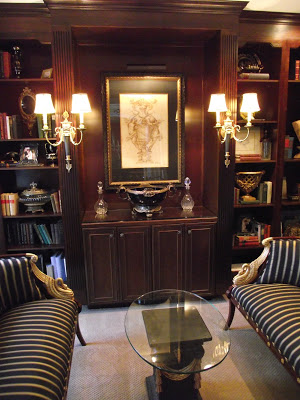
A beautiful neoclassic pair of sconce lights were ordered from Decorative Crafts.  My client and I went to a bookstore on Third Street, Midtown Harrisburg and found good buys on several old books.
An internet search produced necessary neoclassic art prints.<br>


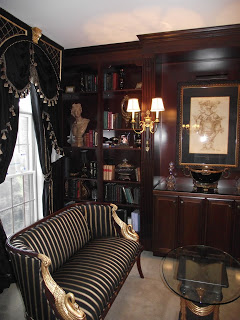
The large and heavy porcelain bowl with bronze ormolu makes a bold statement under the framed print in the center of the wall.   The shelves were arranged with books and various mementos and accessories new and old.  It is a room I and my clients are proud of.<br>


Tie backs echo the insert in the cornice boards


<br>


I hope you enjoyed sharing this experience with me.<br>

Bill Gantt


How to Make an Elegant Cornice and Drape for a Home Library

As with almost every project, my client was presented with 3 original 1/2 scale sketches.    Since this was a round  top window, two of the cornice designs were round top.  The one that was not round topped was designed so that the bottom had the same line as the actual window top.  We settled on the flat topped one.  Having done three round tops in the dining room, this was a nice change.

Round top option  1
Flat top  option 3
Round top  option 2


Once the final design was decided, the fabrics and trims were selected, noted on the sketch and the quotes done.

The quote was accepted and I started to work.

Marked up sketch  ready to start

Often when I do the sketches I'm not certain how to actually make what I've drawn.  The cornice was the biggest part of the challenge.  I decided to use 3/8" plyboard  for the main part of the cornice.  If the plyboad had been too thick, it would have been too heavy both physically and visually.

I used plastic molding to trim the cut outs.  With the use of a hair dryer, I was able to bend them to fit the shape.  Cutting the proper angle to fit the bottom corner was the hardest thing to get.   Luckily I didn,t have much trouble.


Paper pattern of cornice
Sides of cornice cut to fit over existing crown molding


Heating plastic moldinmgs into place


Main part of cornice is padded
Main part of cornice is covered in black velvet


Plastic moldings are gold leafed
1/4"ply board is cut to be attached inside


After the main part of the cornice was constructed, it was padded
and covered in black velvet.

Insert being prepared to go inside

To make the padded part behind the cut outs I cut a piece of 1/4"
plyboard with the same bottom shape and marked where the cut
outs were on the board.

Only the area of the cut outs was padded so that the two parts
would fit together tightly.


Finished cornice board
Next I cut the plastic moldings to the sizes and aqngles I needed.  They were primed and painted  an orangish color and gold leaf was applied.  After they were lacquered they were carefully fit into the cut outs and secured with finish nails.  The bracket element at the top was purchased, gold leafed and attached.


The Swag and Jabot were made of black silk and trimmed with  black and gold tassel fringe.  The tie
back drapes were made of the same silk.  Using a stripe from the neoclassic setee fabric, I added a
black and gold stripe trim.  The actual tieback merits close attention.  I made them to echo the design
of the cornice board.


Take a closer look at the tie backs


Stop by the studio and as always please tell your friends about my blog.


Bill Gantt
Starting October 20 , my blog will be dedicated to Holiday decorating.    How to make ribbon roses and wrap gift boxes like these.     How to decorate a Christmas tree.    How to make a 1/2 upside down tree .    How to make beautiful decorations from roadside weeds .    On and on.