
We decorators tell you that you should decorate your rooms for Christmas in colors that coordinate with your room.
Because after making up many gift boxes for the shop, I get I would get lazy about wrapping my gifts for home.
I got in the habit of putting home gifts in the wrapped boxes from the shop.
After Christmas I bring them back to the shop. No waste.
While my traditional Purple and Red boxes are beautiful {see blog on wrapping with two colors of ribbon] but my living room is decorated in tan with black and gold accents.
After several years of looking uneasily at the purple boxes, I decided to come up with a style that would look good in my room. It would also give my clients an alternative to the traditional purple. At Christmas you always want your house to look its best. If you keep gifts under your tree, I suggest that you wrap them all to look good with your room. You might do what I do, which is to wrap the boxes so the lid can be taken off without destroying the wrapping. That way you can reuse them year after year. Some people wrap the boxes as decorations for under the tree and use them year after year.
Let me show you how to do this one.
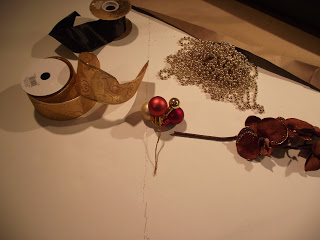
You will need the following supplies:
- Black satin ribbon -of course colors can be changed
- Metallic gold ribbon
- A coordinating decorative flower or other focal item{or you can buy the ready made picks at hobby shops}
- Wired florist balls
- Gold Christmas beads
- Ice pick or something to punch holes through the ribbon and box.
- Florist wire
- Kraft paper {I use the back side of my green wrapping paper.]

On the right the "pick" for the bow is made. Both ribbons
and beads are cut to length..
1. Wrap the box lid as I showed you in 'Gift wrapping with velvet roses"
2.Wire together the items to make the "pick" for the center of the bow.
3. Measure from the bottom edge of the lid to the center-add 8" and cut 2 pieces of black ribbon and 2 pieces of metallic gold ribbon. Also cut 2 lengths of tree beads
4. Because I cannot seem to find metallic gold

Folding metallic ribbon so both edges show and the ribbon
is 1/2 its original width
ribbon narrower than the 2 1/2" black, I fold the
gold ribbon to 1/2 the original width so that both
edges show.

Stapled ribbon gold face against inside of box and black
centered on top of gold face against inside of box
5. Staple the folded gold ribbon face against the
inside of the box. Then center the black ribbon
on top of the gold, with the face of the ribbon against the inside of the box.
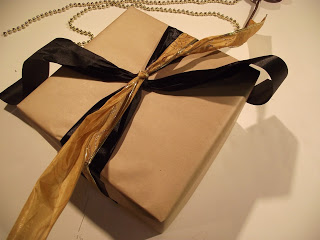
6. Pull the ribbons around and over to the center
of the box. Tie the black one first and then tie the
gold one on top of the black.

7. Using the ice pick. Punch two holes about 1" apart and about 1/2 \" from the bottom edge of
the lid.

Florist wire threaded through holes punched
8. Cut about a 6" piece of florist wire and thread it through the two holes you punched.

Beads attached with florist wire
9. Catch the last ball of both strings of beads in
the loop created by the florist wire. Pull the wire
tight through the holes and twist tight. You can
use pliers to put the last few twists on it. Just don't get carried away and break the wire.

Cutting beads even with the bottom
10. Bring the beads across the top of the box and down the other side. Put them through the florist wire loop. Pull the beads tight with one hand, making sure the wire is above the beads that end up even with the edge of the lid. Twist the
florist wire loop tight as before. Now that the beads are secure, cut off the excess. Now go
the inside of lid and cut off the excess florist wire.

Top of the box after beads are attached on both sides

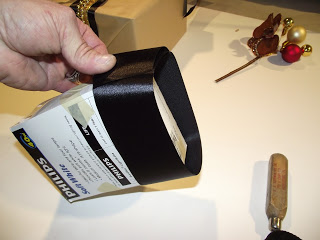
11. Now hold the end of the black ribbon with your index finger and wrap the ribbon for the bow around
the box 7 times and cut.
I use a 4 pack light bulb box. It makes the
right size bow and is flexible enough to make
it easy to slid the bow off.
(leave the bulbs in the box)
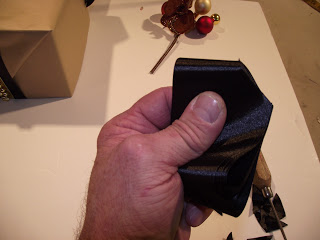
12. Carefully slide the wrapped ribbon off the box.

13. Fold the looped ribbon you pulled off the box
in half. Cut a notch as shown from both sides
leaving about 1 inch in the center. You can put a staple through this center to hold it together if you want.

14. Cut about 48" of the metallic gold ribbon and make about 4 6" loops.
Squeeze them together in the center to look like a bow.

Bow made with 48" of ribbon

15. Put the black bow with the metallic gold bow on top of it and last on top, the "pick" you made.
With the ends of the black box ribbon tie tight all
three elements tightly to the top of the box,

15. Starting on one side of the black bow pull one loop from the inside out and twist it to the left so the loop is perpendicular to the box top. Pull the next loop from the inside and twist it to the right. Continue always alternating the direction you twist the loop. When one half is done, do the same to the other half of loops. A beautiful bow will form.
16. Arrange the little gold ribbon so it looks good.
Arrange the elements in your "pick.
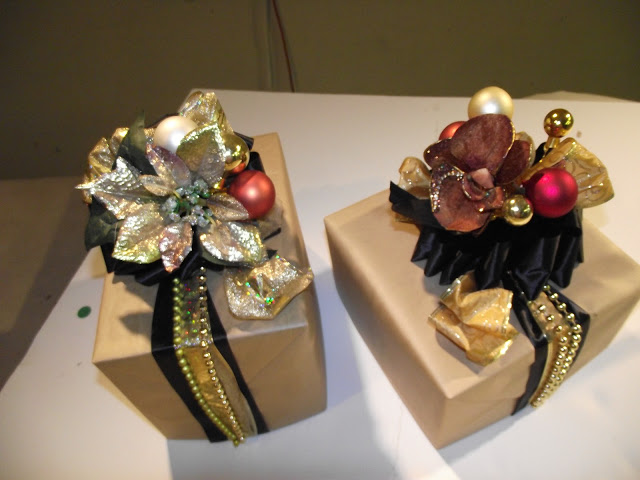
DONE!!!!
Aren't they absolutely beautiful! You could almost give the "boxes" as gifts. In fact I've had men tell me that their wives told them "Get me something from Gantts. I want the box."
I hope you enjoyed this. Be sure to check out all my other blogs. As I get ready for Christmas, I'll probably be posting at least twice a week. So check back often at ganttsdecorating.com
Mark your calendar for our holiday open house. This year instead of 15% off everything in the studio will be 1/2 off!!!!! I'm preparing to down size my studio.
As always we will be serving French Champagne and Hors d'oeuvres.
DECEMBER 1 & 2
Please comment let me know what you think.