Over the past 25 years I have had the experience of needing a stripe fabric that did not seem to exist. Making my own stripe may be a little time consuming, but for me having just the right pattern and color makes it worth the effort.
Another thing I like about making my own stripe is that my client is getting something that is truly "one of a kind." He or she will not see it any where else.
Making your own stripe.
DONE!
On this particular project I needed a stripe for a table cloth. Unable to find one, I decided to make a stripe. I selected the colors from the same faux satin book. I then made the pattern . I wanted the light color to be primary with the blue and burgundy secondary. The bright red was to be minimal to give the pattern some life.
Knowing how I was going to pleat the cloth, I made the red stripe wide. My plan was to put almost all of the red inside my pleats, After making the pattern I was able to determine how much of each color I needed.
The fabric was cut into strips and with my pattern next to the sewing machine, sewn together.
Sometimes you can find a stripe that would work except for one color in the pattern. You can cut that stripe out and seam the fabric back together.
Making your own stripe also allows you to make stripes of different textures.
As always you are only restricted by your creativity.
If you enjoy the blog please tell a friend.
 Bill Gantt
Another thing I like about making my own stripe is that my client is getting something that is truly "one of a kind." He or she will not see it any where else.
Making your own stripe.
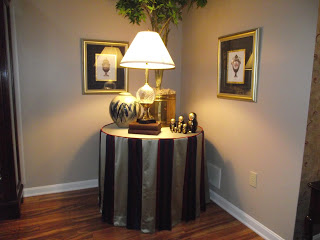 |
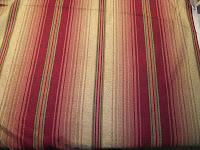
| Original stripe on table cloth. note: pictures need to be moved to within 8" of corner so they appear to be over table |
- Find the colors and textures you want in solid color fabrics.
- Do the color assortment. Determine how much of what colors you want to show. Normally one color will be dominate.
- Design your stripe. Determine the widths and positioning of the stripes. While random stripes are made, you are better off to make a balanced stripe-one that has a horizontal repeat.
- Draw your stripe pattern. Remember to allow 1/2" seam allowance on each side. This means that a strip cut 6" ends up being a 5" stripe. This is especially important to remember on small stripes. For example a 1" stripe would be cut 2". Because of seam allowances 1" is really the smallest stripe you should plan.
- Cut the strips the widths you plan on your pattern
- Sew the stripes together. Since it is easy to get confused it's a good idea to keep your pattern where you can refer to it. To save time I don't pin the strips together, I hold both pieces face to face with the same tension top and bottom and sew them 1/2" from the edges
- Use a very small stitch. You don't want your stripe coming appear when you cut it.
- Press open your seams.
DONE!
On this particular project I needed a stripe for a table cloth. Unable to find one, I decided to make a stripe. I selected the colors from the same faux satin book. I then made the pattern . I wanted the light color to be primary with the blue and burgundy secondary. The bright red was to be minimal to give the pattern some life.
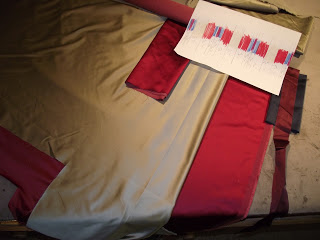 |
| Fabrics to be used to make stripe |
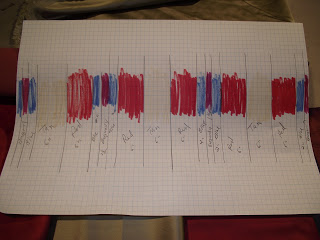 |
| Pattern plan for stripe |
Knowing how I was going to pleat the cloth, I made the red stripe wide. My plan was to put almost all of the red inside my pleats, After making the pattern I was able to determine how much of each color I needed.
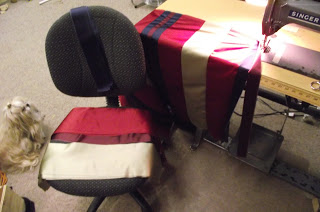 |
| Strips being sewn together. note no pins |
The fabric was cut into strips and with my pattern next to the sewing machine, sewn together.
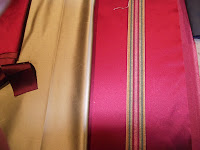 |
| Center stripe removed from stripe at the left added to red fabric |
 |
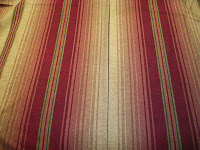
| Stripe pattern as printed
|
Sometimes you can find a "fancy" stripe that is part of a stripe that won't work. That part can be cut out and become a part of your new stripe.
 |
| Center stripe removed |
 |
| Stripe pattern as printed |
Sometimes you can find a stripe that would work except for one color in the pattern. You can cut that stripe out and seam the fabric back together.
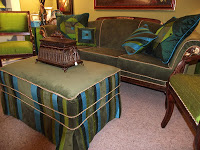 |
| Ottoman covered with original stripe |
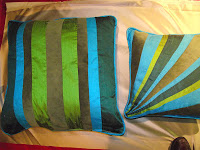 |
| Pillows covered in textured mix of velvet and silk |
Making your own stripe also allows you to make stripes of different textures.
As always you are only restricted by your creativity.
If you enjoy the blog please tell a friend.