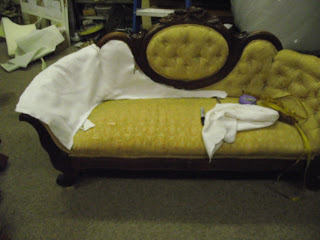
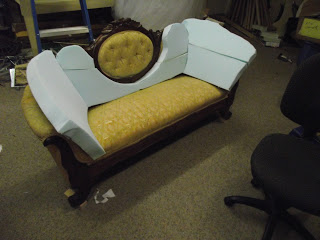
Because I want to be as clear as possible, this process may seem complicated. If you follow the instructions carefully, I think you'll not have any problems.
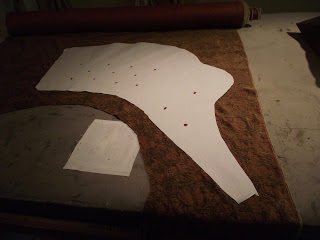
1. Make an exact pattern of the chair seat. Don't forget to fold it double to be sure both sides are the same.
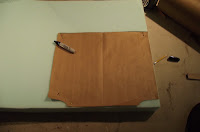 2. Pin the pattern to 3" medium density foam. Use a magic marker to mark the pattern onto the foam.
3. Using an electric carving knife, cut the foam into the outlined shape.
4. Since this will be a knife edge pad, mark the foam with a line
1" in from the edge on both top and bottom. Then put a line on the
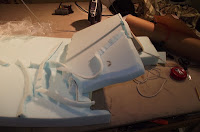 side 1" in from the top and bottom edge.
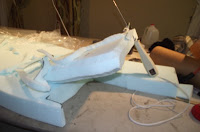
5. Watching both lines cut the 45 degree angle around both
the top and bottom.
6. Measure the foam across the top and half way down each side.
Do this from side to side and front to back. This gives you the
measurement for your next pattern.
7. Using your first pattern as a guide, add the additional width. For example
if your new measurement is 3" more, add 1 1/2" on each side of the first pattern.
. Do the same front to back. Since you want the cover to
be tight it is not necessary to add for seam allowances.

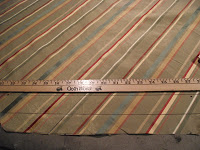
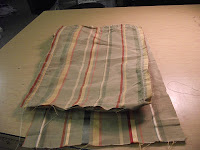
8. Cut a square of fabric a few inches larger than your new
pattern. In this case I am using the fabric from the "How to
mitre a Stripe" blog. Center the fabric and pin it down.
Using a pencil or fine tipped marker, mark the pattern on the
fabric. This is more exacting than trying to cut the fabric while
the pattern is in place.
 9. Welting the edge is not essential but it gives you a more
professional looking pad. Use a welt cord of no more than
1/4" in diameter. To find how wide to cut the welt cord
fabric, wrap the cord tight with a piece of fabric. Mark both
sides tight against the cord. Lay the fabric flat-add 1" and
that is your width. You want the fabric to go around the cord
and have 1/2" seam allowance . For example if the circum-
ference of the cord is 5/8", you will cut your welt fabric 1 5/8"
wide. In the past I would sometimes cut the fabric a little
wider thinking the extra width would give me a little wiggle
 room. DON'T DO IT. It will throw off your other measurements.
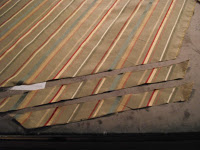
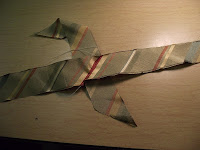
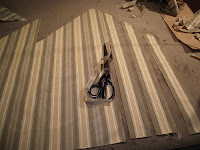
10. Cut the cord fabric on the bias or diagonal across the fabric.
Use a yard stick to mark your first diagonal line. Measure and
mark 1 5/8" or whatever your cord measurement is and draw
another line. Mark off and cut several diagonal strips. If you
 lay the strips face to face at a 45 degree angle and match the
pattern; The joined strip should lay out flat. {see Picture)
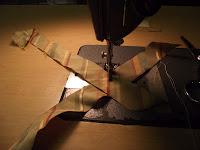
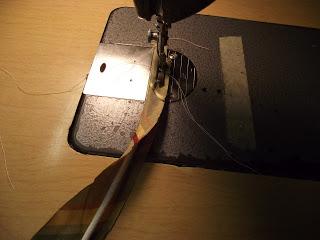
Don't forget to use a very small stitch. If the two pieces don't
lay out straight you did something wrong. Cut them apart and
turn one of them end to end. Match the pattern and on a 45degree
angle sew the new end to the old end. It's tricky but be patient
you'll figure it out.

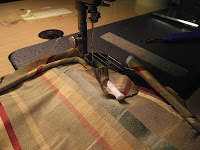
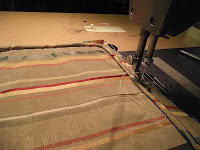
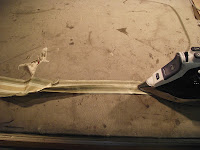
11. Using the zipper foot on the right side of the needle, wrap
the cord. Put both edges together and sew tight next to the cord.
12. Once the cord is covered, put it on the top edge of pad cover. Align the edge of the cord
with the edge of your pad cover. Sewing tight against the cord, attach it to the pad cover.
Never start on a corner!
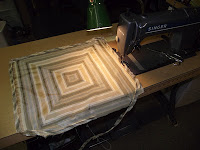
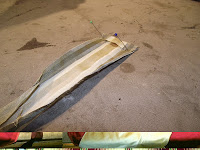
Sew all the way around the cover until you get to where you started.

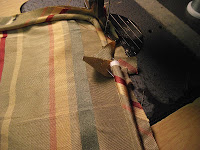
When you get to the starting point, cut the cord 1" beyond where
you started. {see picture}
 Open the seam about 1" from where you cut it.
{see picture}
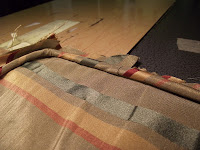
Now cut off the extra 1" of cord where you opened the seam.
Fold the 1" under 1/2". Put the start point cord end next to
the piece you just cut. Wrap the 1/2" lip around the start point
and sew through both.
{see Picture}
13 Make the ties to hold your chair pad in place. Depending on the chair, they should around 12" long. It is much better to have ties that are a little long than to realize when you are done that they are too short. Cut fabric strips 2" wide. You must cut the
strips with the grain of the fabric(top to bottom). Otherwise
 they will stretch.

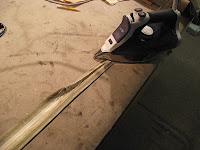 Fold 1/2" in to the middle and press.
Fold 1/2"on the other side
 to the middle and press. Fold one half over the other half press and sew. At the ends fold about 1/2" up refold and sew.
 14. Pin the ties where you want them on the pad cover so that the tie lays on the face of the cover.
The tie should lay over the cord just enough that the end is caught in the stitch. If you want you can
sew the ties in place now.
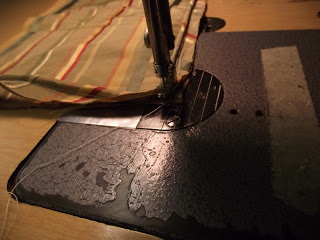
 15. Lay the cover side with the cord and ties face down on the other side of the cover. Remember the fabrics go face to face.
Pin strategically. Start sewing at a back corner. Sew on top
of the stitch of the cording around to the other back corner.
Sewing on top of the cord stitching assures that no stitching will
show when the cover is turned right side out. Be sure to use a small stitch and back stitch at both back corners. They will get a lot of stress when you put the foam in.
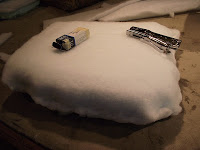 16. Using polyester furniture batting , cut to the shape of your
cushion and using a bag stapler, staple the edges all around.
This will disguise any miscuts on the foam and give a rich smooth
finish to your chair pad.
17. Turn your cover right side out. Put the foam in and
sew the back closed by hand.
DONE!
I hope you find this useful. Please tell your friends about my web site and blog.
Let me know what you think so far.
When you can, stop into the studio and see me. 3319 Derry St.
Harrisburg, Pa. 717-561-8166

Bill Gantt
1. Make an exact pattern of the chair seat. Don't forget to fold it double to be sure both sides are the same.
2. Pin the pattern to 3" medium density foam. Use a magic marker to mark the pattern onto the foam.3. Using an electric carving knife, cut the foam into the outlined shape.
4. Since this will be a knife edge pad, mark the foam with a line
1" in from the edge on both top and bottom. Then put a line on the
side 1" in from the top and bottom edge.5. Watching both lines cut the 45 degree angle around both
the top and bottom.
6. Measure the foam across the top and half way down each side.
Do this from side to side and front to back. This gives you the
measurement for your next pattern.
7. Using your first pattern as a guide, add the additional width. For example
if your new measurement is 3" more, add 1 1/2" on each side of the first pattern.
. Do the same front to back. Since you want the cover to
be tight it is not necessary to add for seam allowances.
8. Cut a square of fabric a few inches larger than your new
pattern. In this case I am using the fabric from the "How to
mitre a Stripe" blog. Center the fabric and pin it down.
Using a pencil or fine tipped marker, mark the pattern on the
fabric. This is more exacting than trying to cut the fabric while
the pattern is in place.
9. Welting the edge is not essential but it gives you a moreprofessional looking pad. Use a welt cord of no more than
1/4" in diameter. To find how wide to cut the welt cord
fabric, wrap the cord tight with a piece of fabric. Mark both
sides tight against the cord. Lay the fabric flat-add 1" and
that is your width. You want the fabric to go around the cord
and have 1/2" seam allowance . For example if the circum-
ference of the cord is 5/8", you will cut your welt fabric 1 5/8"
wide. In the past I would sometimes cut the fabric a little
wider thinking the extra width would give me a little wiggle
room. DON'T DO IT. It will throw off your other measurements.10. Cut the cord fabric on the bias or diagonal across the fabric.
Use a yard stick to mark your first diagonal line. Measure and
mark 1 5/8" or whatever your cord measurement is and draw
another line. Mark off and cut several diagonal strips. If you
lay the strips face to face at a 45 degree angle and match thepattern; The joined strip should lay out flat. {see Picture)
Don't forget to use a very small stitch. If the two pieces don't
lay out straight you did something wrong. Cut them apart and
turn one of them end to end. Match the pattern and on a 45degree
angle sew the new end to the old end. It's tricky but be patient
you'll figure it out.
11. Using the zipper foot on the right side of the needle, wrap
the cord. Put both edges together and sew tight next to the cord.
12. Once the cord is covered, put it on the top edge of pad cover. Align the edge of the cord
with the edge of your pad cover. Sewing tight against the cord, attach it to the pad cover.
Never start on a corner!
 |
When you come to a corner put a relief cut in the selvage up to the cord |
Sew all the way around the cover until you get to where you started.
When you get to the starting point, cut the cord 1" beyond where
you started. {see picture}
Open the seam about 1" from where you cut it.{see picture}
Now cut off the extra 1" of cord where you opened the seam.
Fold the 1" under 1/2". Put the start point cord end next to
the piece you just cut. Wrap the 1/2" lip around the start point
and sew through both.
{see Picture}
strips with the grain of the fabric(top to bottom). Otherwise
they will stretch. Fold 1/2" in to the middle and press.Fold 1/2"on the other side
to the middle and press. Fold one half over the other half press and sew. At the ends fold about 1/2" up refold and sew.14. Pin the ties where you want them on the pad cover so that the tie lays on the face of the cover.The tie should lay over the cord just enough that the end is caught in the stitch. If you want you can
sew the ties in place now.
15. Lay the cover side with the cord and ties face down on the other side of the cover. Remember the fabrics go face to face.Pin strategically. Start sewing at a back corner. Sew on top
of the stitch of the cording around to the other back corner.
Sewing on top of the cord stitching assures that no stitching will
show when the cover is turned right side out. Be sure to use a small stitch and back stitch at both back corners. They will get a lot of stress when you put the foam in.
16. Using polyester furniture batting , cut to the shape of yourcushion and using a bag stapler, staple the edges all around.
This will disguise any miscuts on the foam and give a rich smooth
finish to your chair pad.
17. Turn your cover right side out. Put the foam in and
sew the back closed by hand.
DONE!
I hope you find this useful. Please tell your friends about my web site and blog.
Let me know what you think so far.
When you can, stop into the studio and see me. 3319 Derry St.
Harrisburg, Pa. 717-561-8166
Bill Gantt