These shades have proven to be very effective at saving on heat gain in the summer and heat loss in the winter. They are an all or nothing privacy treatment and I often add sheer gathered about 6x full tight on a rod top and bottom when daytime privacy is required. The sheer of course needs the bottom rod so that it will not get caught up in the shade when it is pulled up.
Depending on the fabric selection and style of the room a roman shade can be the only window treatment required or be part of a more elaborate plan. The Gantt roman looks great in stripes or solids or solids with trims. Some patterns do not lend themselves to the horizontal pleading of this shade. In that case I use the horizontal stitches without the pleat.
Roman shades look best when mounted inside the thickness of the window. If this is not possible or height is needed they can be mounted outside the window or against the ceiling.
Estimate the amount of fabric you need by:
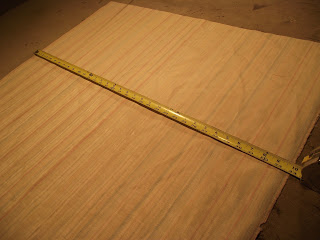
Measure the dimensions of the window. Be exact.
If you have a repeating pattern and you are doing more than one shade, divide the length of the window by the pattern repeat. For example if the window measures 80" long and the repeat is 25"
80 divided by 25" = 3.2 round up to 4(repeats needed)
4 x 25= 100" In order to have your pattern at the same place on each shade you need 100" for each one. If you are doing 2 shades multiply by 2=200" divide by 36" = 5.56 yds
For a Gantt roman I make the pleats about 9" apart and allow 1/2" for each pleat. In this case the Finish Length of my shade is 80". 80"(finish length) divided by 9"(space between pleats)=8.89
Round down to 8. 8 x1/2" 4"
80"+ 4"(pleats) +2"(seam allowances) =86"
Since this is less than the 100" needed for the repeat, you will need 100". If it had amounted to more than the 100", you would have to add the length of one more repeat to each shade's total fabric requirement.
Width is determined by adding 4" to the finish width, and dividing by the width the fabric comes in.
For example: If the Finished Width is 36" add 4"=40" Cut Width
assuming the fabric comes in 54" widths 54"divided by 40(Cut Width)=1.35
You will need one width of fabric 100" long for each shade.
If the Cut width is 58"!! Bite the bullet, you need 2 pieces 100" and plan on making some pillows.
If the Cut Width (Finish Width +4") exceeds the width your fabric comes in, cut two pieces your "cut length." Match the pattern if necessary. Seam together.
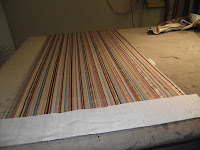
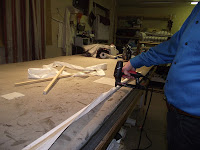
Cut the "face" fabric to the "Cut Width" (Finish Width + 4")
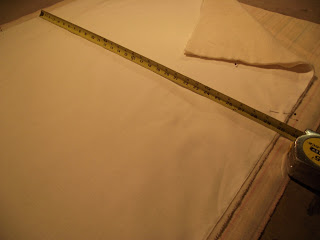
Remove the "face" fabric and cut the lining and flannel to the "Cut Length"
Now, cut the heavy flannel and lining the Finish Width! (not Cut Width-Finish Width!)
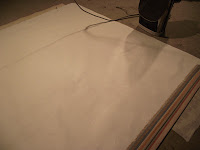
Put the "Face" fabric back on the table. Put it face down. Center the heavy flannel and lining on top. The heavy flannel will be between the "face" fabric and the lining.
 Fold over 2" border of "face" fabric and iron .
Open and press 1" of border, using the crease made by ironing as a guide.
Fold over the finished 1" border and pin.
Repeat the process on the other side. Check the width as you go to be sure the width is correct.
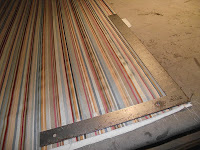
Usually the sewing of the edges will cause them to pull up some, so turn the shade face up and using a framing square; mark the bottom and cut it square.
Cut a 5" wide strip of lining 6" longer than the Finish width of the shade. Cut it so that the grain runs the length of the strip. Center the strip, pin and attach to the bottom of the shade as shown. Use a 1/2" seam.
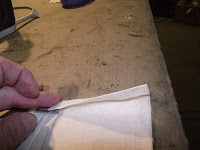 Lay the shade face down. Fold and press over 1" on each edge of the newly attached strip. Now place a 1" wide strip of fusible web on the strip next to the 1" edge just pressed. Fold over again so that the edge of the lining strip is even with the finished edge of the shade. With the fusible web between the fold, press the new fold. Being careful not to scorch the fabric press the fold until the web glues the new fold.
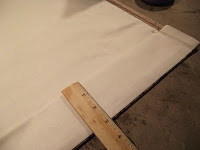
Fold and press the strip over, forming a finished bottom edge. Fold and press the top 1 1/2" edge under, leaving a 3" pocket on the bottom edge.
Pin and sew at the edge of the new pocket.
Drop down 1" from the last seam and stitch again.
This forms a pocket to hold a piece of curtain rod which will stabilize and ad weight to the bottom of the shade.
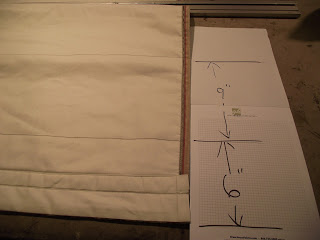
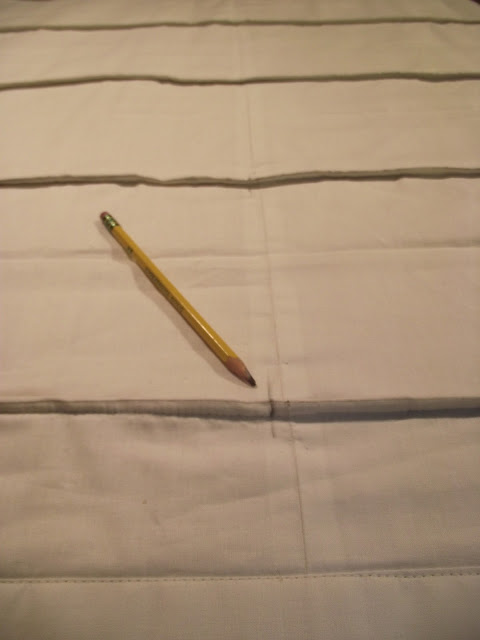
With the shade still face down, measure up from the bottom edge 6" and mark with a pencil line across the width of the shade. The bottom pleat must always measure more than 1/2 the width of the other pleat widths. This assures an inch or more lip that will hang below where the rest of the pleats will stack.
Mark the rest of the pleats your predetermined lengths. Usually around 9". Press and pin as you go to keep the layers aligned.

At this point the safe thing to do is pin and put a stitch on top of each mark to prevent the face fabric from moving.
Sometimes I will skip this step depending on how slippery the face fabric might be.
Starting at the bottom fold the shade face to face with the edge of the first mark on the bottom. Press and pin in place.
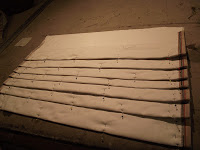 |
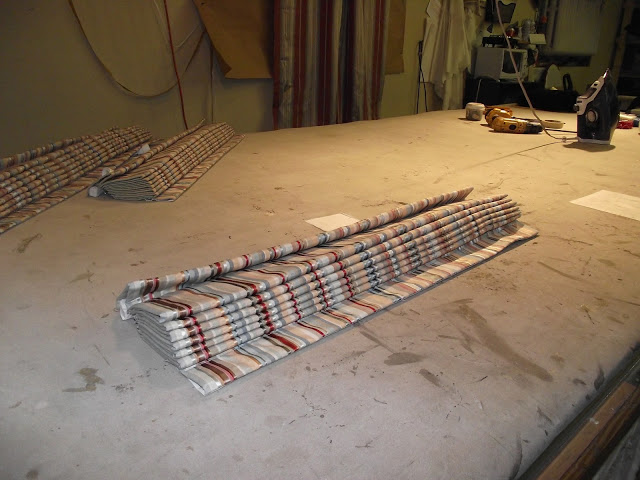
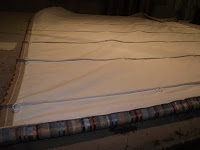
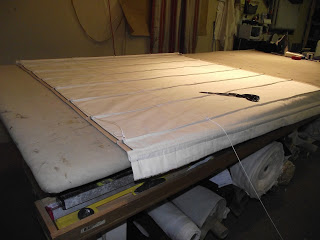
| Pleats pressed and pinned into place ready to be sewn. |
When this process is completed your shade will look like the one picture.
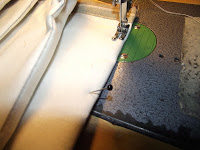
Use the pressure foot of your sewing machine as a guide.to sew a quarter inch seam. Remember we allowed 1/2" for each pleat which of course is 2x 1/4"
I hold the edge of the shade as I sew and stretch the fabric taunt, to help avoid it drawing up and making the shade narrower than it should be at the stitches.
Lay the shade face down again and determine where the vertical rows balloon shade
rings will be sewn. The rows should not be more than 9" apart.
The rings on the edge should be sewn just inside the edge of the face fabric and the balance should be spaced evenly across the shade.
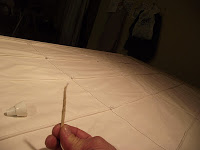
Mark the placement across the bottom pleat and across the uppermost pleat. Lay a straight edge between and mark the pleats between.
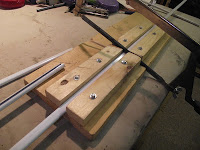
Cut a 1"x 1" strip the Finish width of the shade. If it is an "inside mount" cut it 1/4" less than the finish width. Cover the strip with lining.
Now lay the shade out flat. Measure from the bottom up and allowing 1 1/4" to attach to the top strip, cut the shade to the planned finish length + 1 1/4". Finish the edge. If you don't have an overlock, use a ziz zaz stitch.
 Staple the shade to the top strip.
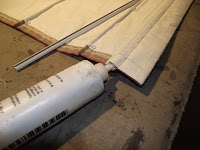
Cut a piece of curtain rod 1" shorter
than the finish width of the shade.
Slide the rod into the bottom pocket. Put some "tacky glue" on each end. This will hold the rod in place.
In the event it ever needs to be removed it can be broken loose.
Directly above each vertical row of balloon shade rings drill a small pilot hole for screw eye screws. Drill your pilot holes on the opposite side of the 1" of fabric used to mount the shade to the strip
String the shade with a woven nylon cord. While it is traditional to have the pull cord on the right, if it would be hard to get to on the right; string the shade to the left. When the shade is laid out face down, if you want the cord on the left, you start stringing it on the left side as shown. Start with the bottom ring and pull the cord through all the rings to the top. then thread it through that screw eye and the others down the full width of the shade. Then pull it down about half the length of the shade. Cut the cord at the bottom and tie a double knot around the bottom ring.
Go to the next row of rings. Start at the bottom, through all the rings to the top, through that screw eye and through the rest of the screw eyes on the top the end and half way down again. Repeat the process until all rows of rings are strung.
 When the shade is entirely threaded, pull the strings even and cut the ends on an angle as shown.
Wrap them in masking tape to keep in position.
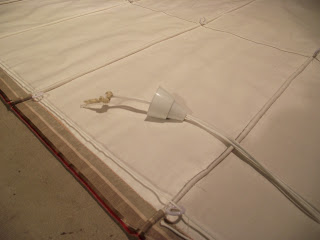
Cutting the ends of the cords on an angle and wrapping them in masking tape makes it easier to pull them through the weighted cord pull. If you have a shade that is 6' or more wide, it may have too many cords to fit through the hole in the pull. In that case, work the lead piece out of the plastic cover and drill the hole out bigger. Then reassemble, pull the cords through knot and trim off the excess. I use a metal cleat to wrap the cord around when the shade is at the proper height.

Prior to installation I pull the shade completely up, attach the cleat to the mounting strip and wrap the cord around it to hold it in a compact manageable unit. Using a steam iron steam each fold do not press-steam.
This will train the shade without making creases. Hope you enjoy your Gantt Stitched Roman Shade.
Bill Gantt